
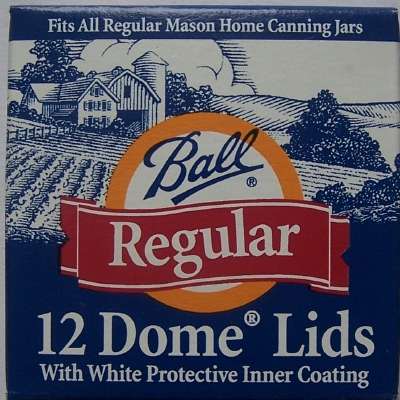
Looking for Quince Jam: How to Make Quince Jam or Preserves, Easily! With Step-by-step Directions, Photos, Ingredients, Recipe and Costs in 2025? Scroll down this page and follow the links. And if you bring home some fruit or vegetables and want to can, freeze, make jam, salsa or pickles, see this page for simple, reliable, illustrated canning, freezing or preserving directions. There are plenty of other related resources, click on the resources dropdown above. If you are having a hard time finding canning lids, I've used these, and they're a great price & ship in 2 days.
If you have questions or feedback, please let me know! There are affiliate links on this page. Read our disclosure policy to learn more.
Quince Jam: How to Make Quince Jam or Preserves, Easily! With Step-by-step Directions, Photos, Ingredients, Recipe and Costs
Yield: 7 to 9 pint jars
Click here for a PDF print version
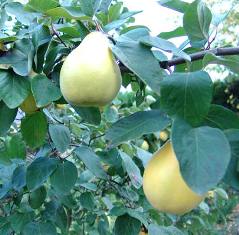 Quince
jam is easy to make. And that's a good thing, considering how hard it is
to find quinces or quince preserves in the grocery stores! Quinces are an old
time fruit, related to apples and pears, and like them has a fruit which is
bright golden yellow when mature, pear-shaped, 3 to 5 inches long and 4.5
inches wide (7-12 cm long and 6-9 cm wide).
Quince
jam is easy to make. And that's a good thing, considering how hard it is
to find quinces or quince preserves in the grocery stores! Quinces are an old
time fruit, related to apples and pears, and like them has a fruit which is
bright golden yellow when mature, pear-shaped, 3 to 5 inches long and 4.5
inches wide (7-12 cm long and 6-9 cm wide).
Most varieties of quince are too hard, astringent and sour to eat raw unless ripened on the tree and softened by frost and subsequent decay. But they are used to make jam, jelly and quince pudding, or they may be peeled, then roasted, baked or stewed. The flesh of the fruit turns red after a long cooking time. The very strong perfume means they can be added in small quantities to apple pies and jam to enhance the flavor. Adding a diced quince to apple sauce will enhance the taste of the applesauce with the chunks of relatively firm, tart quince.
So, see below to make quince preserves!
Other quince trivia
In Iran and other parts of the Middle East, the dried pits of
the fruit are used to treat sore throat and to relieve cough.
The pits are soaked in water; the viscous product is then drunk
like cough medicine. It is commonly used for children, as it is
alcohol free and 100% natural. A variety of quince which is
grown in the Middle East, does not require cooking and is often
eaten raw.[citation needed]
In Europe, quinces are
commonly grown in central and southern areas where the summers
are sufficiently hot for the fruit to fully ripen. They are not
grown in large amounts; typically one or two quince trees are
grown in a mixed orchard with several apples and other fruit
trees.
Ingredients
Yield: about 4 pints
- 7 cups of peeled, quartered, cored quince slices (about 3 lbs of prepared quinces)
- 3 cups of sugar or other sweetener: sugar, no-sugar, Stevia (but you will have to experiment with amount, each brand of Stevia is a different concentration), or Splenda, or a mix of sugar and Stevia (or Splenda) or fruit juice - see step 5
- Cinnamon (optional!) I like 1/2 teaspoon per batch
- Quinces are naturally high in pectin, so you should not need to add any pectin. If for some reason you find your batches are not tick enough, you can add 1/2 packet of dry pectin to each batch; mix it with the sugar in step 5.
Equipment
- Ball/Kerr jars - 4 ounce, 8 ounce or pint size (Publix, Kroger, other grocery stores and some "big box" stores carry them - now about $12 per dozen quart jars (up 50% in 2 years!) including the lids and rings)
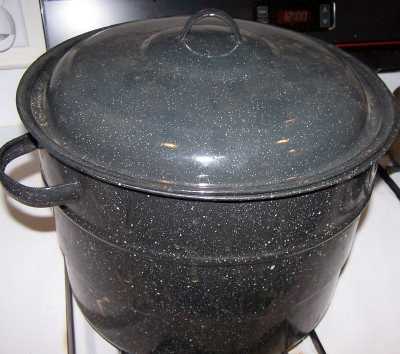
- 1 water bath canner (a huge pot with a lifting rack to sanitize the jars of apple jelly after filling (about $30 to $35 at mall kitchen stores and local "big box" stores, but it's usually cheaper online from our affiliates) You CAN use a large pot instead, but the canners are deeper, and have a rack top make lifting the jars out easier. If you plan on canning every year, they're worth the investment.
- Vegetable / fruit peeler ($1.99 at the grocery store)
- Jar grabber (to pick up the hot jars)
- Jar funnel ($4 at mall kitchen stores and local "big box" stores, but it's usually cheaper online from our affiliates)
- At least 1 large pot
- Jelly strainer (see step 6) or cheesecloth
- Large spoons and ladles,
Directions - Step by Step
Step 1 - Get the jars cleaning and canner heating up
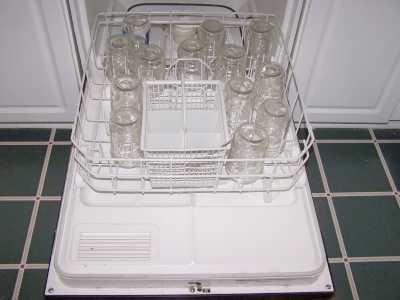 Now's a good time to get the jars ready, so you won't be rushed later. The dishwasher is fine for the jars; especially if it has a "sanitize" cycle, the water bath processing will sanitize them as well as the contents! If you don't have a dishwasher with a sanitize cycle, you can wash the containers in hot, soapy water and rinse, then sanitize the jars by boiling them 10 minutes, and keep the jars in hot water until they are used.
NOTE: If a canning recipe calls for 10 minutes or more of process time in the canner, then the jars do not need to be "sanitized" before filling them. But really, sanitizing them first is just good hygeine and common sense! See this page for more detail about cleaning and sanitizing jars and lids.
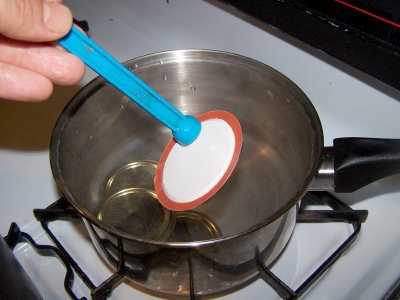
Put the lids into a pan of hot, but not quite boiling water (that's what the manufacturer's recommend) for 10 minutes, and use the magnetic "lid lifter wand" to pull them out. Leave the jars in the dishwasher on "heated dry" until you are ready to use them. Keeping them hot will prevent the jars from breaking when you fill them with the hot jam.
Now is also a good time to get your canner filled (about 2/3
full) of water and heating up.
 You will need it going at a full boil when you put the sealed jars
in later!
You will need it going at a full boil when you put the sealed jars
in later!
Step 2 - How many quince and where to get them
As mentioned at the beginning, quince are not a common fruit these days, but they can be found! You can pick your own: I have found orchards in Arizona, New Jersey, Oregon, Washington and Ontario that have quince. In the Fall, you can often find them at farmer's markets and specialty stores, like Whole Foods. It takes about 5 or 6 pounds of fresh quince to make this batch of preserves.
I'm sure you can figure out how to wash the quince in plain cold water and remove any stickers or labels on them.
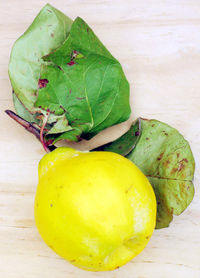
 Step 3 -Wash and peel the
quince!
Step 3 -Wash and peel the
quince!
Using a vegetable peeler or a paring knife, peel the quince.
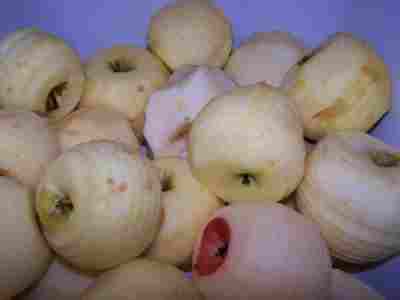
Step 4 -Chop the quince!
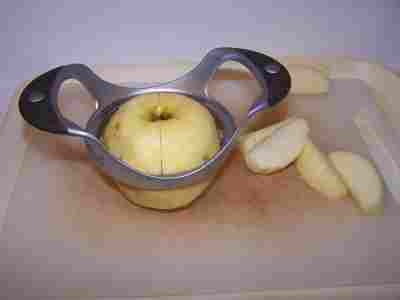 Chopping them is much faster if you use one of those
apple corer/segmenters - you just push it down on an apple and it cuts it
into segments.
Chopping them is much faster if you use one of those
apple corer/segmenters - you just push it down on an apple and it cuts it
into segments. 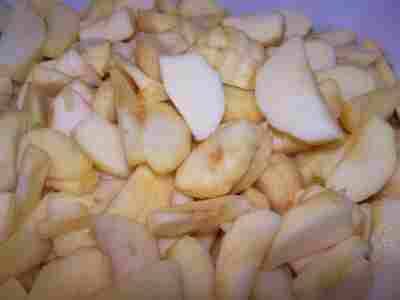
Using a paring knife, be sure to remove any seeds, gritty parts, and any mushy or dark areas.
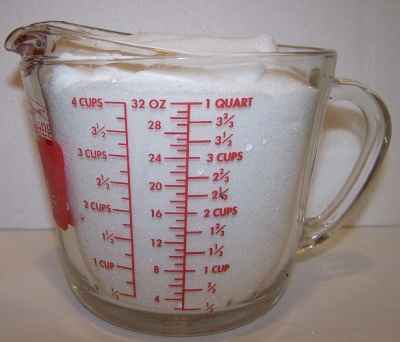
Step 5 - Measure out the sweetener and heat with water
 Depending
upon which type of jam you're making (sugar, no-
Depending
upon which type of jam you're making (sugar, no-
sugar, Stevia (but you will have to experiment with amount, each brand of Stevia is a different concentration), or Splenda, or a mix of sugar and Stevia (or Splenda) or fruit juice) you will need to use a
different amount of sugar and type of pectin. The precise
measurements are found in directions inside each and every box
of pectin sold (every brand, Ball, Kerr, Mrs. Wages, etc. has
directions inside). I haven't seen a jelly recipe that uses only
Stevia (in a prepared form like Truvia, it measures same as sugar; if you use another form, you will need do your own conversion) - or Splenda, if you prefer, , and I haven't yet tried it; I suspect it would taste
bland.
| Type of jam |
Type of pectin to buy |
Sweetener |
| regular | no-sugar or regular | 3 cups of sugar |
| low sugar | no-sugar | 1.5 cups of sugar |
| lower sugar | no-sugar | 1 cups sugar and 1 cups Splenda (or about 1/3 that if you use Stevia, which is my preference) |
| no sugar | no-sugar | 3 cups Splenda (or about 1/3 that if you use Stevia, which is my preference) |
| natural | no-sugar | 3 cups fruit juice (grape, peach, apple or mixed)- and add less water! |
Mix the sweetener and 2 quarts of water in a pot and start it heating up. (If you use fruit juice as the sweetener, then add only 1 quart plus 1 cup of water). Boil for 5 minutes, until the sweetener is dissolved.
Step 6 - Cook the Quince
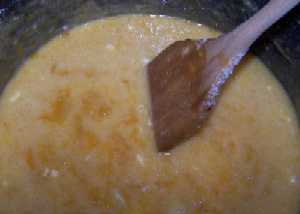 Pretty
simple! Add the quinces and cook until the flesh is transparent
and the syrup (the liquid) is almost to the jelling / gelling
point. You can tell because it will start to thicken and look
like a syrup! But as it thickens be careful to stir constantly
to prevent sticking to the sides of the pot and burning!.
Pretty
simple! Add the quinces and cook until the flesh is transparent
and the syrup (the liquid) is almost to the jelling / gelling
point. You can tell because it will start to thicken and look
like a syrup! But as it thickens be careful to stir constantly
to prevent sticking to the sides of the pot and burning!.
Step 7 - Testing for "jell" (thickness)
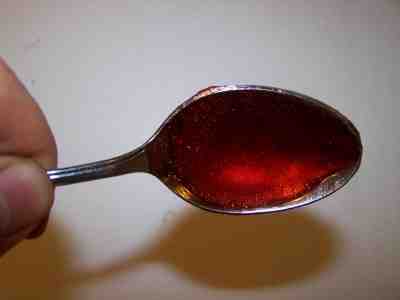 I keep a metal tablespoon sitting in a
glass of ice water, then take a half spoonful of the mix and let it cool
to room temperature on the spoon. If it thickens up to the
consistency I like, then I know the jam is ready. If not, I mix in a
little more pectin (about 1/4 to 1/2 of another package) and bring it to a
boil again for 1 minute.
I keep a metal tablespoon sitting in a
glass of ice water, then take a half spoonful of the mix and let it cool
to room temperature on the spoon. If it thickens up to the
consistency I like, then I know the jam is ready. If not, I mix in a
little more pectin (about 1/4 to 1/2 of another package) and bring it to a
boil again for 1 minute.
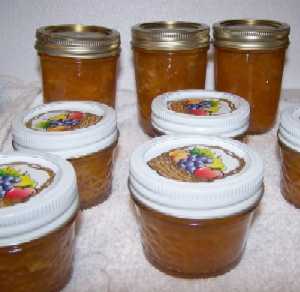
Step 8 - Turn off the heat, fill the jars and put the lid and rings on
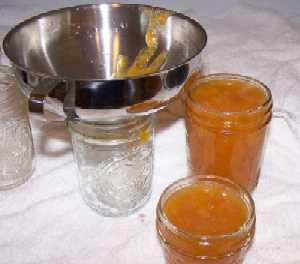 Skim
any foam off the surface with a ladle, then fill the jars to within 1/4-inch of the top, wipe any spilled jam off the
top, seat the lid and tighten the ring around them. Then put the filled jars into the canner!
Skim
any foam off the surface with a ladle, then fill the jars to within 1/4-inch of the top, wipe any spilled jam off the
top, seat the lid and tighten the ring around them. Then put the filled jars into the canner!
 This is where the jar tongs
and lid lifter come in really
handy!
This is where the jar tongs
and lid lifter come in really
handy!
Step 9 - Process (heat) the jars in the boiling water bath
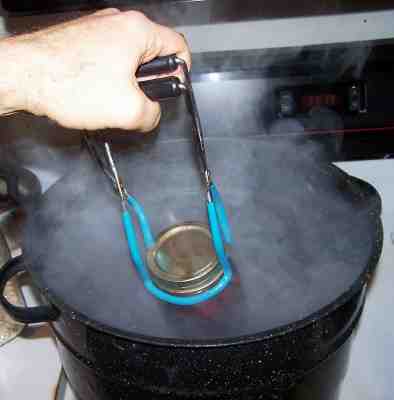 Keep
the jars covered with at least 2 inches of water. Keep the water boiling. In
general, boil them for 15 minutes. I say "in general"
because you have to process (boil) them longer 5 minutes at higher altitudes than sea
level, or if you use larger jars,
Keep
the jars covered with at least 2 inches of water. Keep the water boiling. In
general, boil them for 15 minutes. I say "in general"
because you have to process (boil) them longer 5 minutes at higher altitudes than sea
level, or if you use larger jars,
 or
if you did not sanitize the jars and lids right before using them.
or
if you did not sanitize the jars and lids right before using them.
Note: Some people don't even boil the jars; they just ladle it hot into hot jars, put the lids and rings on and invert them, (this is called "open kettle" processing). Open kettle process is universally condemned by all of the authorities (USDA, FDA, Universities - Clemson, UGa, Minnesota, WI, Michigan, etc,.) as being inherently dangerous and conducive to botulism. It does not create a sterile environment; it does create the ideal environment for botulism to grow.
Putting the jars in the boiling water bath REALLY helps to reduce spoilage! To me, it makes little sense to put all the working into making the jam and then not to process the jars to be sure they don't spoil or risk your family's health.!
Step 10 - Remove and cool the jars - Done!
 Lift the jars out of the water and let them cool without touching or
bumping them in a draft-free place (usually takes overnight) You can then remove the rings if you like, but if you leave them on, at least loosen them quite a bit, so they don't rust in place due to trapped moisture. Once the jars are cool, you can check that they are sealed verifying that the lid has been sucked down. Just press in the center, gently, with your finger. If it pops up and down (often making a popping sound), it is not sealed. If you put the jar in the refrigerator right away, you can still use it. Some people replace the lid and reprocess the jar, then that's a bit iffy. If you heat the contents back up, re-jar them (with a new lid) and the full time in the canner, it's usually ok.
Lift the jars out of the water and let them cool without touching or
bumping them in a draft-free place (usually takes overnight) You can then remove the rings if you like, but if you leave them on, at least loosen them quite a bit, so they don't rust in place due to trapped moisture. Once the jars are cool, you can check that they are sealed verifying that the lid has been sucked down. Just press in the center, gently, with your finger. If it pops up and down (often making a popping sound), it is not sealed. If you put the jar in the refrigerator right away, you can still use it. Some people replace the lid and reprocess the jar, then that's a bit iffy. If you heat the contents back up, re-jar them (with a new lid) and the full time in the canner, it's usually ok.
Once cooled, they're ready to store. I find they last up to 12 months. But after about 6 to 8 months, they get darker in color and start to get runny. They still are safe to eat, but the flavor and texture aren't as good. So eat them in the first 6 months after you prepare them!
Other Equipment:
From left to right:
- Jar lifting tongs
helpful to pick up hot jars
- Lid lifter
- to remove lids from the pot
of hot water - Lids
- disposable - you may only
use them once - Ring
- holds the lids on the jar until after
the jars cool - then you remove them, save them and reuse them - Canning Jar funnel
- to fill the jars
|
See here for related tools, equipment, supplies on Amazon
See here for related tools, equipment, supplies on Amazon
|
Home Canning KitsSee the seller's website for features, pricing and user reviews! This is the same type of standard canner that my grandmother
used to make everything from apple jelly to jams and jellies to tomato and
spaghetti sauce. This complete kit includes everything you need: the canner, jar rack, Jar grabber tongs,
lid lifting wand, a plastic funnel,
labels, bubble freer, and the bible of canning, the Ball Blue Book. You will never need anything else except more jars and lids! |
| Find this item (B09WDKLMPW) on Amazon See here for related tools, equipment, supplies on Amazon |
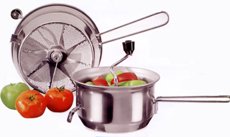
Deluxe Food Strainer & Sauce MakerD220-DLXRetail:
$89.95Our
price: $69.00
|
See here for related tools, equipment, supplies on Amazon |
Mirro Stainless Steel Foley Food Mill
|
|
|
Lids, Rings, Jars, mixes, pectin, etc.Need lids, rings and replacement jars? Or pectin to make jam, spaghetti sauce or salsa mix or pickle mixes? Get them all here, and usually at lower prices than your local store! |
Can't find the equipment? We ship to all 50 states!
Step - br>
This document was adapted from the "Complete Guide to Home Canning,"
Agriculture Information Bulletin No. 539, USDA, revised 2006.
Reviewed May 2009.
Tips
Comments and Feedback
Illustrated Canning, Freezing, Jam Instructions and Recipes
[ Easy Home Canning Directions] [FAQs - Answers to common questions and problems] [Recommended books about home canning, jam making, drying and preserving!] [Free canning publications to download and print]


Looking for canning equipment and supplies?
Water bath canner with a jar rack
Pressure canners for gas, electric and induction stoves: Presto 23Qt or T-fal 22Qt
Canning scoop (this one is PERFECT)
Ball Blue book (most recent version)
Jars: 8oz canning jars for jams
Find Other types of farms:
Farm markets and roadside stands
Road trips and camping resources
Local Honey, apiaries, beekeepers
Consumer fraud and scams information
Home canning supplies at the best prices on the internet!
Maple Syrup Farms, sugarworks, maple syrup festivals
Environmental information and resources
Farms For Your Event for birthday parties, weddings, receptions, business meetings, retreats, etc.
Festivals - local fruit and vegetable festivals
Get the
most recent version of
the Ball Blue Book
