If you like frozen peas in the winter, just imagine how good it would taste if you had picked a bag yourself and then quickly froze it at home! It is
also one of the simplest ways to put up a vegetable for the winter. Here's how to do it, complete instructions in easy steps and completely illustrated. The
peas will taste MUCH better than anything you've ever had from a store.
Directions for Freezing peas
Ingredients and Equipment
fresh peas - any quantity. I figure one handful per serving.
Vacuum food sealer or "ziploc" type freezer bags (the freezer bag version is heavier and protects better against freezer burn.
1 Large pot of boiling water
2 large bowls, one filled with cold water and ice.
1 sharp knife
Instructions
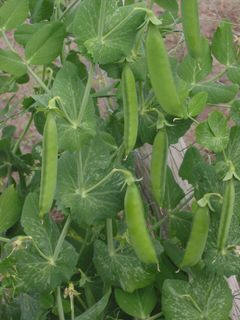
Step 1 - Get yer peas!
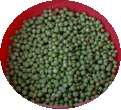
This is the most important step! You need peas that are FRESH and crisp. Limp, old peas
will make nasty tasting frozen peas. Guests will probably throw them at you.. Select filled but tender, firm, crisp peas. Remove and discard
any soft, diseased, spotted and rusty pods.
Peas are of the best quality when they are fully expanded but immature, before they become hard and
starchy. Peas should be picked immediately before cooking because their quality, especially sweetness (like that of sweet corn), deteriorates
rapidly. FYI, the pods on the lower portion of the plant mature earliest. If there is a delay between harvesting and freezing, put it in the
refrigerator or put ice on it. And don't use peas that are old, overripe, starchy or have leathery, wrinkled pods.
How many peas and where to get
them
You can grow your own, pick your own, or buy them at the grocery store. About 14 pounds of peas makes 7 quart jars; or 9 pounds is needed per 9 pints.
A bushel, which produces anywhere from 13 to 20 quarts, weighs 30 pounds. That works out to an average of 2 pounds of peas per finished quart jar.
Start with fresh peas - as fresh as you can get.
Step 2 - Wash the peas!
I'm sure you can figure out how to rinse the pea pods in plain cold water. Since the peas are secure in the pods, this step isn't
really necessary, unless the pods are very muddy or dirty or they are edible-podded peas (snow peas, snap peas, sugar snaps, managetout).
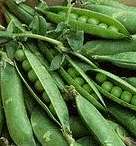
Step 3 -Hull the peas
I find it easiest to just grab the stem end, and press my thumbnail into the seam,
squeezing the pod gently. It usually opens right up, and I can use a finger to push the peas out.
Obviously, this step is unnecessary for edible-podded peas like snap peas. Just snap off the tips and pull the "strings" off. Don't fret if you don't find
any strings modern varieties are fairly stringless.
Step 4 - Get the pots ready
Get the pot of boiling water ready (about 2/3 filled) and a LARGE
bowl with ice and cold water.
Step 5 - Blanch the peas.
All fruits and vegetables contain enzymes and bacteria
that, over time, break down the destroy nutrients and change the color, flavor, and texture of food during frozen storage. peas requires a brief heat
treatment, called blanching, in boiling water or steam, to destroy the enzymes before freezing. Blanching times for peas is 1 and a half minutes
(90 seconds) - the duration is just long enough to stop the action of the enzymes and kill the bacteria.
Begin counting the blanching time as soon as you place the peas in the boiling water. Cover the kettle and boil at a high temperature for
the required length of time. You may use the same blanching water several times (up to 5). Be sure to add more hot water from the tap from time to time to
keep the water level at the required height.
Step 6 - Cool the peas
Cool peas immediately in ice water. Drain the peas thoroughly (this
shouldn't take more than a minute).
After vegetables are blanched, cool them quickly to prevent overcooking. Plunge the peas into a large quantity of ice-cold water (I keep adding more
ice to it). A good rule of thumb: Cool for the same amount of time as the blanch step. For instance, if you blanch sweet peas for 90 seconds, then cool in
ice water for at least 90 seconds.
Drain thoroughly.
Step 7 - Bag the peas
I love the FoodSavers (see
this page for more information) with their vacuum sealing! I am not paid by them, but these things really work. If you don't have one,
ziploc bags work, too, but it is hard to get as much air out of the bags. remove the air to prevent drying and freezer burn. TIP: If you
don't own a vacuum food sealer to freeze foods, place food in a Ziploc bags, zip the top shut but leave enough space to insert the tip of a soda straw.
When straw is in place, remove air by sucking the air out. To remove straw, press straw closed where inserted and finish pressing the bag closed as
you remove straw.
Step 8 - Done!
Pop them into the freezer, on the quick freeze shelf, if you have one!
Freezing keeps greens safe to eat almost indefinitely, but the recommended maximum storage time of 12 months is best for taste and quality. The
quality of the frozen greens is maintained best in a very cold freezer (deep freezer), and one that keeps them frozen completely with no thaw
cycles. Excluding any air from inside the bags which leads to freezer burn, by using vacuum-sealed bags, is also important to maintaining quality
Tips:
Harvest early in the morning, especially if the weather is hot, to get peak flavor.
Harvest the peas at its peak maturity (firm, straight, not lumpy)
Process promptly after harvesting, or keep cooled in the fridge or with ice until then.
Frequently Asked Questions
I've frozen peas but they seem so bland, starchy or rubbery after being cooked. Any idea why?
Generally, that means the peas were either old to being with, or they were overcooked. It only takes 90 seconds to blanch the peas, then plunge them
immediately into ice water.
How long can they be frozen?
It depends upon how cold is your freezer and how you packed them. Colder (deep freezes) are better than frost free compartments, which actually cycle above
freezing (that's how they melt the ice). Vacuum packing results in longer storage capability, too. Thicker bags also help prevent freezer burn.
In general, up to 9 months in a ziploc bag in an ordinary freezer, and 14 months in a deep freeze in a vacuum packed bag. After that, they peas won't make
you sick; they just won't taste as good.
This one is the least expensive of the Food Saver models that has all the advamced features, like automatic bag detection and sealing, which makes it
faster and easier to seal. And yes, you can seal and freeze foods with liquids (just freeze the unsealed bag in the freezer overnight, THEN seal it!)
This is the same type of standard canner that my grandmother used to make everything from applesauce to jams and jellies to tomato and spaghetti sauce. This complete kit includes everything you need and lasts for years: the canner, jar rack, jar grabber tongs, lid lifting wand, a plastic funnel, labels, bubble freer. It's much cheaper than buying the items separately. You'll never need anything else except jars & lids (and the jars are reusable)! There is also a simple kit with just the canner and rack, and a pressure canner, if you want to do vegetables (other than tomatoes). To see
more canners, of different styles, makes and prices, click here!
Don't forget the Ball Blue Book!

 I find it easiest to just grab the stem end, and press my thumbnail into the seam,
squeezing the pod gently. It usually opens right up, and I can use a finger to push the peas out.
I find it easiest to just grab the stem end, and press my thumbnail into the seam,
squeezing the pod gently. It usually opens right up, and I can use a finger to push the peas out.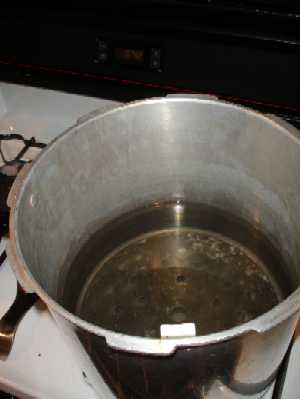 Get the pot of boiling water ready (about 2/3 filled) and a LARGE
bowl with ice and cold water.
Get the pot of boiling water ready (about 2/3 filled) and a LARGE
bowl with ice and cold water.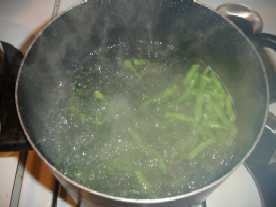 All fruits and vegetables contain enzymes and bacteria
that, over time, break down the destroy nutrients and change the color, flavor, and texture of food during frozen storage. peas requires a brief heat
treatment, called blanching, in boiling water or steam, to destroy the enzymes before freezing. Blanching times for peas is 1 and a half minutes
(90 seconds) - the duration is just long enough to stop the action of the enzymes and kill the bacteria.
All fruits and vegetables contain enzymes and bacteria
that, over time, break down the destroy nutrients and change the color, flavor, and texture of food during frozen storage. peas requires a brief heat
treatment, called blanching, in boiling water or steam, to destroy the enzymes before freezing. Blanching times for peas is 1 and a half minutes
(90 seconds) - the duration is just long enough to stop the action of the enzymes and kill the bacteria.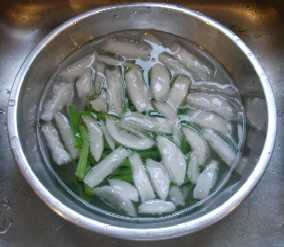 Cool peas immediately in ice water. Drain the peas thoroughly (this
shouldn't take more than a minute).
Cool peas immediately in ice water. Drain the peas thoroughly (this
shouldn't take more than a minute). I love the FoodSavers (
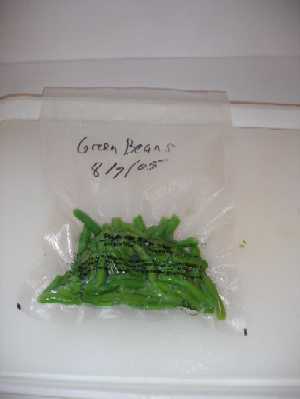 Pop them into the freezer, on the quick freeze shelf, if you have one!