
Looking for How to Make Mixed Fruit Cocktail - Easily! With Step-by-step Directions, Photos, Ingredients, Recipe and Costs in 2025? Scroll down this page and follow the links. And if you bring home some fruit or vegetables and want to can, freeze, make jam, salsa or pickles, see this page for simple, reliable, illustrated canning, freezing or preserving directions. There are plenty of other related resources, click on the resources dropdown above. If you are having a hard time finding canning lids, I've used these, and they're a great price & ship in 2 days.
If you have questions or feedback, please let me know! There are affiliate links on this page. Read our disclosure policy to learn more.
How to Make Mixed Fruit Cocktail - Easily! With Step-by-step Directions, Photos, Ingredients, Recipe and Costs
Yield: 6 pint jars
Click here for a PDF print version
Making and canning your own delicious mixed Fruit Cocktail is easy and safe with this USDA-tested recipe! This recipe uses peaches, pears, green grapes, cherries, but the Ball Blue Book points out that you could also freely substitute nectarines, pineapple, apricots, grapefruit, plums, etc.
Some of the photos are just of peaches, but that's just because my camera malfunctioned when I made this recipe.
Ingredients
- 3 lbs peaches or nectarines (yes, you can use pineapple, apricots, grapefruit, plums instead)
- 3 lbs pears
- 1-1/2 lbs seedless green grapes (preferably slightly under-ripe)
- 10-oz jar of maraschino cherries
- 3 cups sugar (or 3 cups honey - but sugar is easier to use) See step 2 for other options.
- 4 cups water
Equipment
- large pot of boiling water
- large bowl of ice water
- a sharp knife
- saucepan
- Spoons, ladles,
- Water bath canner
- Jar tongs
Directions - Step by Step
Step 1 - Selecting the peaches, pears, cherries and grapes
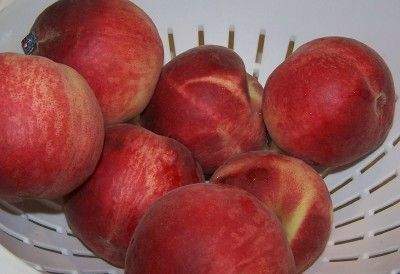 The most important step! You need
fruit that is sweet, but still firm, not overripe or even dead ripe - and to
make the work easier, cling-free (also called freestone). This means
that the peach separates easily from the pit!
Same with nectarines, and this doesn't apply to cherries or plums. Don't
miss the peach picking tips
page!
The most important step! You need
fruit that is sweet, but still firm, not overripe or even dead ripe - and to
make the work easier, cling-free (also called freestone). This means
that the peach separates easily from the pit!
Same with nectarines, and this doesn't apply to cherries or plums. Don't
miss the peach picking tips
page!
Choose ripe, mature fruit of ideal quality for eating fresh or cooking. They should not be mushy, but they also should not be rock hard: just as ripe as you would eat them fresh.
Step 2 - Prepare the sugar (or other sweetener) solution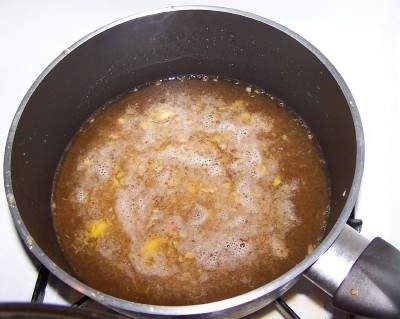
Fruit must be packed in a solution of water and sugar or fruit juice. It's up to you which to use. Sugar is added to improve flavor, help stabilize color, and retain the shape of the fruit. It is not added as a preservative. Sugar solution is much less expensive (unless you have a supply of cheap grape juice), so I usually use a light solution to keep sugar (and the added calories) to a minimum.
Yes, honey could be used in place of sugar, but I will warn that it is very sticky and can be messy to work with.
Sugar Syrup
| Syrup | Sugar | Water | Yield |
| Light | 2 cups | 6 cups | 7 cups |
|---|---|---|---|
| Medium | 3 cups | 6 cups | 6 1/2 cups |
| Heavy | 4 cups | 6 cups | 7 cups |
To prepare syrup, while heating water, add sugar slowly, stirring constantly to dissolve. Bring to a gentle boil and keep it simmering. After preparing the liquid syrup, keep it hot (but not boiling).
Step 3 - Wash the jars and lids
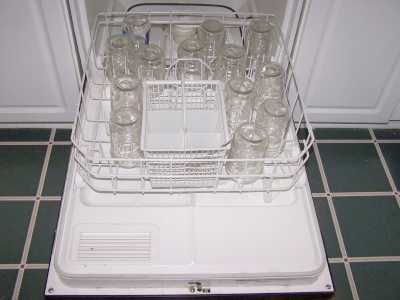 This is a good time to get the jars ready! The dishwasher is fine for the jars; especially if it has a "sanitize" cycle. Otherwise put the jars in boiling water for 10 minutes. I just put the lids in a small pot of almost boiling water for 5 minutes, and use the magnetic "lid lifter
wand" (available from target, other big box stores, and often grocery stores; and available online - see this page) to pull them out.
This is a good time to get the jars ready! The dishwasher is fine for the jars; especially if it has a "sanitize" cycle. Otherwise put the jars in boiling water for 10 minutes. I just put the lids in a small pot of almost boiling water for 5 minutes, and use the magnetic "lid lifter
wand" (available from target, other big box stores, and often grocery stores; and available online - see this page) to pull them out.
Step 4 -Wash the fruit!
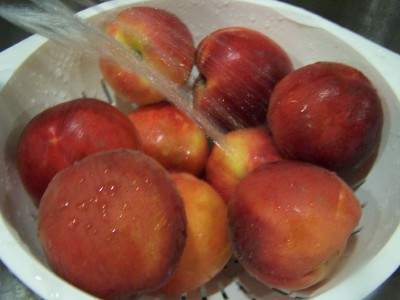 I'm
sure you can figure out how to wash the fruit in plain cold or
lukewarm water
I'm
sure you can figure out how to wash the fruit in plain cold or
lukewarm water
Step 5 - Peeling the Peaches, Nectarines, Plums, Apricots
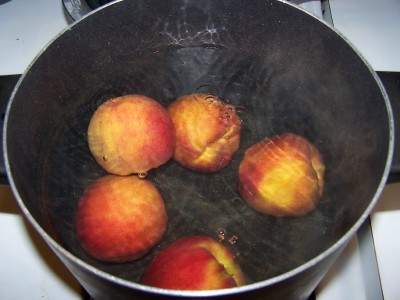
Nope, we're not going to peel them by hand; that's way too much work. Instead, here's a great trick that works with many fruits and vegetables with skins (like tomatoes): just dip the fruit in boiling water for 20 to 45 seconds.
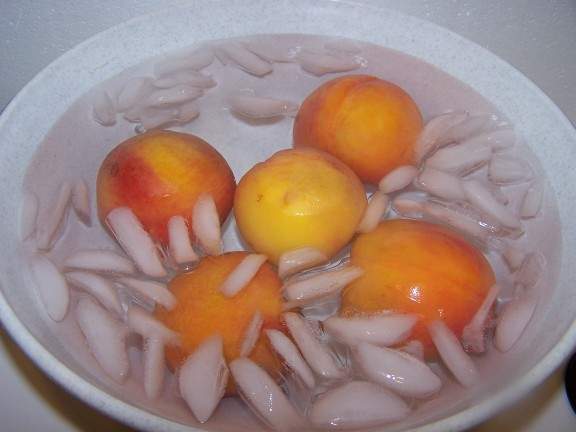 Remove from the
boiling water using a slotted spoon and put into
a large bowl or pot of cold water and ice for several minutes
Remove from the
boiling water using a slotted spoon and put into
a large bowl or pot of cold water and ice for several minutes
 The skins will easily slide off
now!
The skins will easily slide off
now!
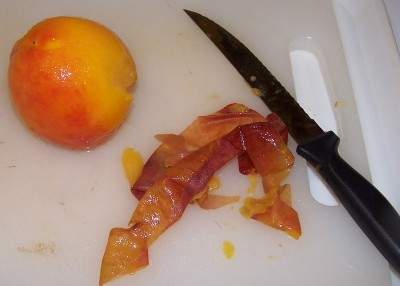
Nectarines do not need to be peeled, if you don't mind the skins. Neither do peaches, but most people prefer them with skins off - they tend to be slimy after all this.
SAVE THE PEELINGS in the fridge - to make peach honey!
And yes, you could leave the skins on, but they fall off in the jars anyway and look rather unpleasant.
Step 6 - Cut up the fruit
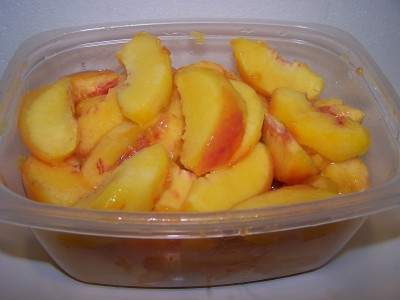 Cut out any brown spots and mushy areas. Cut the peaches,
pears, plums, apricots, etc. in half, or quarters or slices, as you
prefer! Remove pits, stems and any other inedible bits.
Cut out any brown spots and mushy areas. Cut the peaches,
pears, plums, apricots, etc. in half, or quarters or slices, as you
prefer! Remove pits, stems and any other inedible bits.
Step 7 - Prevent the fruit from darkening!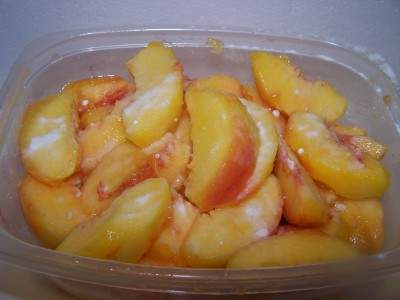
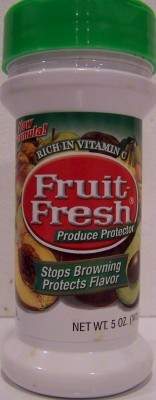
Peaches, nectarines, plums, grapes and many other fruit will turn brown when exposed to air, even air in a sealed, sterile jar. To keep the fruit from turning brown, when you get a bowlful, sprinkle 1/4 cup lemon juice or Fruit-Fresh (which is just a mix of citric acid and vitamin C, perfectly natural). Then stir the peaches to make sure all the surfaces have been coated.
Step 8 - Fill the jars
Drain the mixed fruit (I just put it in a colander). Next add 1/2 cup of
the hot syrup
from step 2 to each jar Then gently fill the jar with mixed fruit
and more hot syrup, until you reach 1/2-inch from the rim (which is called
leaving 1/2 inch of headspace)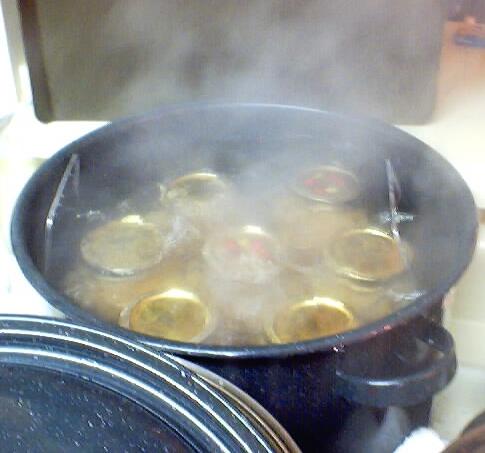
Step 9 - Process the jars in the water bath
Put the sealed jars in the canner and keep them cover with at least 1 inch of water and boiling. In general, if you are at sea level, boil them for at least 20 minutes (and no more than 30 min).
Here are more specific guidelines from the USDA for canning peaches in a boiling-water canner (neither the USDA nor Ball have times for a pressure canner, meaning they feel a water bath canner,yields the best results)
| Recommended process time for Mixed Fruit Cocktail in a boiling-water canner. | ||||
| Raw-Pack Process Time at Altitudes of | ||||
| Jar Size | 0 - 1,000 ft | 1,001 - 3,000 ft | 3,001 - 6,000 ft | Above 6,000 ft |
| Half-pints or Pints |
20 min | 25 | 30 | 35 |
Step 10 - Remove and cool
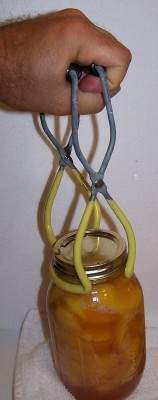 Lift
the jars out of the water and let them cool without touching or bumping them
in a draft-free place (usually takes overnight), here they won't be bumped.
You can then
remove the rings if you like, but if you leave them on, at least loosen them quite a bit, so they don't rust in place due to trapped moisture.
Lift
the jars out of the water and let them cool without touching or bumping them
in a draft-free place (usually takes overnight), here they won't be bumped.
You can then
remove the rings if you like, but if you leave them on, at least loosen them quite a bit, so they don't rust in place due to trapped moisture.
Once the jars are cool, you can check that they are sealed verifying that the lid has been sucked down. Just press in the center, gently, with your finger.
If it pops up and down (often making a popping sound), it is not sealed. If you put the jar in the refrigerator right away, you can still use it. Some people replace the lid (with a new lid) and reprocess the jar, while it's still hot for the full time in the canner - that's acceptable!
How long will the jars be good? The USDA usually recommends eating them within 1 year, but as long as you follow the recipe, the jars stay sealed, and you store them in a cool, dark place (like a basement), the keep indefinitely, although there is a slow loss of quality over time.
Other Equipment:
From left to right:
- Jar lifting tongs
helpful to pick up hot jars
- Lid lifter
- to remove lids from the pot
of hot water - Lids
- disposable - you may only
use them once - Ring
- holds the lids on the jar until after
the jars cool - then you remove them, save them and reuse them - Canning Jar funnel
- to fill the jars
Frequently asked questions!
- Is it safe to can unpeeled peaches, nectarines, apricots, plums,
etc? I've spent hours on websites and
read several books on canning - to no avail. This is the second year
I've canned unpeeled peaches and other stone fruit in a 5 to 1 water to sugar syrup (we're
still alive). All my friends, their mothers and everything I've read
says to peel and I'm beginning to buckle under all the finger
wagging!!!
Answer: Buckle not! It is perfectly safe to can peaches and other stone fruit with the skins on! Most people don't because some folks think it feels like they're swallowing a cat (short hair, not Persian) when they eat a peach with the fuzzy skin still on! :) But it is perfectly safe! (canning unskinned peaches, not cats, that is! :) ..I'm gonna get letters on this one, for sure... - I just canned mixed fruit for the first time. The seal seams good but
I have air bubbles in my jars. Is this OK?"
Answer: Yes, that's common. Some of the air came from bubbles trapped between the pieces of fruit you put in the jar. Other bubbles came from air trapped within the fruit itself. As long as the jar was processed according to the directions and it sealed properly, it is perfectly safe to eat!
- I just finished canning a 1/2 bushel of mixed fruit, including peaches. Followed your
instructions to the T. But had a very difficult time peeling the peaches
.Put them in boiling water for a minute, shocked them in ice water, but
the skin would not come off. Set them again in boiling water for 2
minutes, same shock treatment, only about 10 out of the approx.110
peaces were as easy to peel as you described. What am I doing wrong. I
want to can the second 1/2 bushel with less peeling effort.
Answer: Ah, that usually means they weren't ripe. I'll bet they were rock hard, or close to it. Not much to do about that other than let the ripen (soften) first OR peel them hard with a vegetable peeler. If you let the remaining peaches sit at room temperature for 2 or 3 days, they will soften and it will work!
This document was adapted from the "Complete Guide to Home Canning,"
Agriculture Information Bulletin No. 539, USDA, revised 2006.
Reviewed May 2009.
.
Illustrated Canning, Freezing, Jam Instructions and Recipes
[ Easy Home Canning Directions] [FAQs - Answers to common questions and problems] [Recommended books about home canning, jam making, drying and preserving!] [Free canning publications to download and print]


Looking for canning equipment and supplies?
Water bath canner with a jar rack
Pressure canners for gas, electric and induction stoves: Presto 23Qt or T-fal 22Qt
Canning scoop (this one is PERFECT)
Ball Blue book (most recent version)
Jars: 8oz canning jars for jams
Find Other types of farms:
Farm markets and roadside stands
Road trips and camping resources
Local Honey, apiaries, beekeepers
Consumer fraud and scams information
Home canning supplies at the best prices on the internet!
Maple Syrup Farms, sugarworks, maple syrup festivals
Environmental information and resources
Farms For Your Event for birthday parties, weddings, receptions, business meetings, retreats, etc.
Festivals - local fruit and vegetable festivals
Get the
most recent version of
the Ball Blue Book
