
Looking for How to Make Homemade Peanut Butter in 2025? Scroll down this page and follow the links. And if you bring home some fruit or vegetables and want to can, freeze, make jam, salsa or pickles, see this page for simple, reliable, illustrated canning, freezing or preserving directions. There are plenty of other related resources, click on the resources dropdown above. If you are having a hard time finding canning lids, I've used these, and they're a great price & ship in 2 days.
If you have questions or feedback, please let me know! There are affiliate links on this page. Read our disclosure policy to learn more.
How to Make Homemade Peanut Butter
Click here for a PDF Print Version
Here's how to make your own natural homemade peanut butter from fresh or roasted peanuts. There are many reasons to do so: taste, nutrition and safety. Almost all of the commercial peanut butters contain added sugar, salt, oils, and often preservatives. Home-made peanut butter is not only healthier, is also tastes much better! You can make it smooth, chunky or in between! You can use peanuts, cashews, pecans, hazelnuts, almonds, pistachios, or other nuts, including a mixture.You won't need to worry about your homemade peanut butter being contaminated with Salmonella nor cancer-causing alfatoxins (see this page for more information about aflatoxins). If you need a reminder that you shouldn't trust your health to corporate processed foods, just read about the many recalls of contaminated peanut butter:
- 2012, October: Sunland, Also see this page for the US Government page about the peanut butter recall (A total of 35 persons infected with the outbreak strain of Salmonella Bredeney have been reported from 19 states. Eight ill persons have been hospitalized, and no deaths have been reported. 63% percent of ill persons are children under the age of 10 years.)
- January 2009 outbreak of illnesses caused by Salmonella Typhimurium from peanut butter and peanut paste produced by the Peanut Corporation of America (PCA) at its Blakely, Georgia processing plant.
- 2007 recall of Peter Pan peanut butter
So let's see how easy it is to make your own peanut butter! Here's how to do it, complete instructions in easy steps and completely illustrated.
Prepared this way, the jars have a refrigerator shelf life of 3 or 4 months and indefinitely in the freezer. Unfortunately, it is not considered to be safe to "can" peanut and other nut butters at home.
Directions for Making Peanut Butter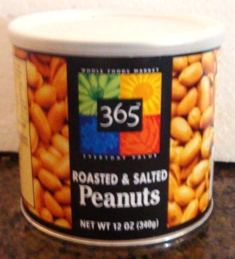
Makes about 1 quart of peanut butter
Ingredients
- 1 bag of unshelled peanuts or 1 can (2 cups or 1 lb) of shelled, raw or roasted peanuts (I think unsalted is healthier - you can always add salt, if you want to)
- Vegetable oil (just a small amount, 1 or 2 tablespoons). I prefer peanut oil, but corn, sunflower, safflower, etc,. all work. I would not use olive oil because it would adversely affect the taste.
Equipment
-
Blender or Food processor (a blender or fine food grinder seems to work best)
-
Bowl
-
Spatula
Recipe and Directions
Step 1 - Shell the peanuts
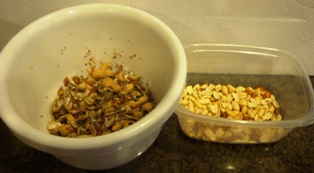
Unless you bought shelled peanuts, you will obviously need to shell them and discard the shells (they make great mulch in the garden or add to your compost) .
I just quickly shell them by hand, and don't bother much with the thin read skins. When I have the peanuts shelled, I take them outside and just blow into
the bowl while stirring it. The skins float away!
.
I just quickly shell them by hand, and don't bother much with the thin read skins. When I have the peanuts shelled, I take them outside and just blow into
the bowl while stirring it. The skins float away!
Step 2 - Assemble your blender or food processor and ingredients
Set up your blender or food processor with the metal food processor blade attached, and add 2 cups of raw or roasted shelled peanuts into it.
Step 3 - Get chopping!
Cover the bowl with the blender's lid and chop up the peanuts continuously for 2 to 3 minutes or until the mixture starts to clump up and is finely chopped.Step 4 - Scrape and finish chopping
Scrape down the food processor bowl to mix back the peanuts that are pushed to the outside where they won't get chopped. Process until you get the consistency you like (chunky or smooth).
Step 5 - Add the vegetable oil
Most peanuts don't contain enough oil naturally to make a smooth butter. You only need to add about 1 and 1/2 teaspoons of vegetable oil (peanut oil is best, obviously, but any neutral flavored oil, like sunflower or canola oil works). Just mix it in with a fork. Your blender may not be powerful enough to do this without sticking, so you may want to mix the oil in, in a separate bowl.Step 6 - Tasting
Taste the peanut but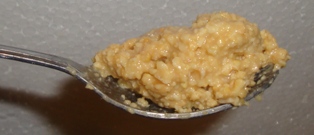 ter and add a touch of salt, if you like! For those that
prefer a sweet peanut butter, you can add 1 tablespoon of honey, brown sugar or, if you are diabetic, Stevia (in a prepared form like Truvia, it measures
same as sugar; if you use another form, you will need do your own conversion) - or Splenda, if you prefer, or other artificial sweetener.
ter and add a touch of salt, if you like! For those that
prefer a sweet peanut butter, you can add 1 tablespoon of honey, brown sugar or, if you are diabetic, Stevia (in a prepared form like Truvia, it measures
same as sugar; if you use another form, you will need do your own conversion) - or Splenda, if you prefer, or other artificial sweetener.

Step 7 - Eat or store
Just spoon peanut butter into a jar and seal. Store it in the refrigerator until you use it. It should keep for a month or two. You can also freeze it. It will keep indefinitely in the freezer. In both cases, you may need to stir the peanut butter to mix the oils back in (the oil tends to separate over time). And no, you cannot "can" the peanut butter - it is too low acid to safely can with home equipment.


Looking for canning equipment and supplies?
Water bath canner with a jar rack
Pressure canners for gas, electric and induction stoves: Presto 23Qt or T-fal 22Qt
Canning scoop (this one is PERFECT)
Ball Blue book (most recent version)
Jars: 8oz canning jars for jams
Find Other types of farms:
Farm markets and roadside stands
Road trips and camping resources
Local Honey, apiaries, beekeepers
Consumer fraud and scams information
Home canning supplies at the best prices on the internet!
Maple Syrup Farms, sugarworks, maple syrup festivals
Environmental information and resources
Farms For Your Event for birthday parties, weddings, receptions, business meetings, retreats, etc.
Festivals - local fruit and vegetable festivals
Get the
most recent version of
the Ball Blue Book
