Looking for How to make Branston pickle - made easy, and illustrated! in 2024? Scroll down this page and follow the links. And if you bring home some fruit or vegetables and want to can, freeze, make jam, salsa or pickles, see this page for simple, reliable, illustrated canning, freezing or preserving directions. There are plenty of other related resources, click on the resources dropdown above. If you are having a hard time finding canning lids, I've used these, and they're a great price & ship in 2 days.
If you have questions or feedback, please let me know! There are affiliate links on this page. Read our disclosure policy to learn more.
How to make Branston pickle - made easy, and illustrated!
Making Homemade Branston Pickle Relish
Making and canning your own Branston-style pickle relish is one of the easiest things you can do with your extra cucumbers! Here's how to do it, in easy steps and completely illustrated. This method is so easy, ANYONE can do this! It's a great thing to do with your kids! This must be stored in the refrigerator, as it has not been lab tested for storage safety outside of the fridge.
For those unfamiliar, Branston Pickle is a spiced vegetable mixture, not like any American relish. It is dark brown in color, sweet, sour and savory. It is traditionally served with "ploughman's" lunches and cheese sandwiches. Some also use it in cooking, typically added to curries, stews and Welsh rarebit.
Note: More photos are coming
Ingredients
Yield: About 3 pints
- 3/4 cup malt vinegar (apple cider vinegar will do if you can't get malt)
- 1 medium carrot, chopped into 1/8 inch cubes
- 1 cup rutabaga (called a Swede in the UK and Australia), chopped into 1/8 inch cubes. You can use turnips, if you can find rutabagas.
- 2 cloves garlic, minced (about 2 teaspoons)
- 6 dates, pitted and cut into 1/8 inch cubes
- 3 cauliflower florets, finely chopped
- 1 medium yellow onions, finely chopped
- 1 medium apple, finely chopped
- 1 medium zucchini, finely chopped
- 5 sweet gherkins, finely chopped
- 1 tablespoon Worcestershire sauce
- 1/4 cup chopped dried apricots
- 1/4 cup chopped prunes
- 1/4 cup raisins
- 1/2 pound dark brown sugar
- 1 teaspoon salt
- 1 tablespoon corn starch (aka corn flour)
- 1/4 cup lemon juice,
- caramel coloring (optional)
Equipment
- 1 large pot; Nonstick ceramic coated pots for easy cleanup.
- Large spoons and ladles,
- Half pint or pint jars.
- Lids and rings
Directions - How to Make Pickle Relish
Step 1 - Wash and Chop
Wash and chop the vegetables an dried fruits! You can use a food processor!
Step 2 - Combine and bring to a low boil
Combine ALL of the ingredients, except for 1/4 cup of the malt vinegar, the caramel coloring and cornstarch in a large pot. Heat over low heat; this is a slow process. You may want to use a crock pot (i.e., a slow cooker) on low or medium heat. The mixture should become very thick and viscous as it cooks down, but you can add a little water from time to time to maintain the consistency you desire.
Step 3 - Simmer
Simmer for about 1.5 to 2 hours or until the the rutabaga/swede/turnips are slightly softened.
Step 4 - Add the cornstarch, caramel, remaining vinegar
In a small bowl mix the cornstarch with 1/4 malt vinegar and mix to a paste, then add it to the pot. Add the caramel coloring and mix well. Stir and cook for 5 more minutes then remove from the heat and allow to cool to room temperature.
Step 5 - Let flavor develop in the fridge
After it has cooled to room temperature, put in glass jars and store in the fridge to let the flavor develop; that should take 2 to 4 weeks.
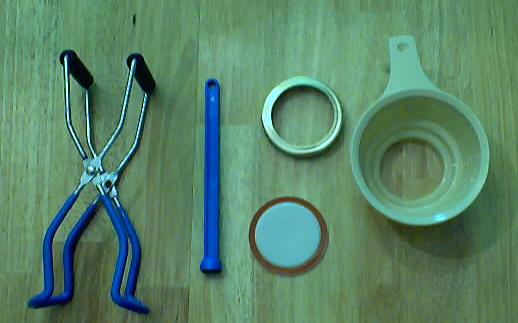
Other Equipment:From left to right:
|
 |
Looking for canning equipment and supplies?
Water bath canner with a jar rack
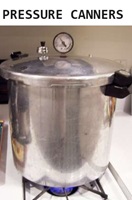
Pressure canners for gas, electric and induction stoves: Presto 23Qt or T-fal 22Qt
Canning scoop (this one is PERFECT)
Ball Blue book (most recent version)
Find Other types of farms:
- Easter egg hunts
- Children's consignment sales
- Farm markets and roadside stands
- Road trips and camping resources
- Local Honey, apiaries, beekeepers
- Local Meat, Milk and Eggs
- Consumer fraud and scams information
- Home canning supplies at the best prices on the internet!
- Maple Syrup Farms, sugarworks, maple syrup festivals
- Environmental information and resources
- Farms For Your Event for birthday parties, weddings, receptions, business meetings, retreats, etc.
- Festivals - local fruit and vegetable festivals
- Pumpkin patches and corn mazes
- Christmas Tree Farms and lots
Get the
most recent version of
the Ball Blue Book
Get the
most recent version of
the Ball Blue Book of Home Canning
Find other types of farms:
- Easter egg hunts
- Children's consignment sales
- Farm markets and roadside stands
- Local Honey
- Local Meat, Milk and Eggs
- Road trip and camping
- Pumpkin patches and corn mazes
- Christmas Tree Farms and lots
- Maple Syrup farms and sugarworks
Highly rated canning supplies:
- Regular Mouth Canning Lids with food-grade with BPA Free Silicone seals for Ball, Kerr Jars for Canning
- Canning accessories kit: funnel, jar tongs, lid lifter, etc
- Food Dehydrator, 400W Electric with 8 Trays, 48 hour Timer and Temperature Control 95-176℉, BPA-Free
- Water Bath Canner, 21 Qts with lid, Jar Rack, Speckled Black, cans 7 quart jars, 9 pint jars or 13 half-pint jars
- Air Fryer: Instant Pot Instant Vortex Plus XL 8QT Clear Windows, Custom Programming, 8-in-1 Functions that Crisps, Broils, Roasts, Dehydrates, Bakes, Reheats
- Pressure canner: All American 921, 21.5qt Pressure Cooker/Canner, never needs gaskets, Great for Gas, Electric or Flat Top Stoves - Made in the USA
- The Backyard Homestead:a guide to homesteading , on 1/4 acre, how to raise grains and vegetables; raise animals for meat, eggs, and dairy; and keep honey bees
- Smart silent HEPA Air Purifiers for Home, Large Rooms for Allergies, Smoke, Pets. Eliminates 99.97% of Dust, Pet Hair, Odors


