
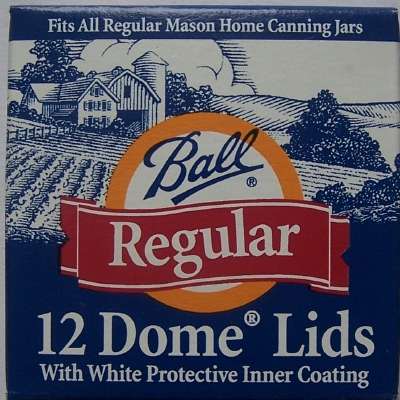
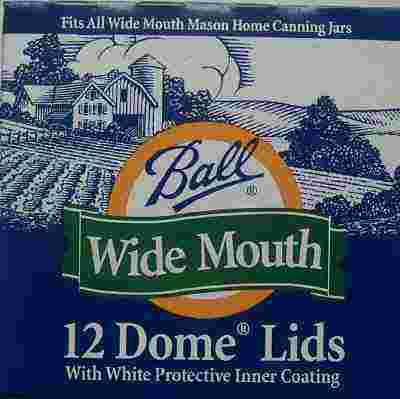
Looking for How to Make Hot Relish, Dixie Relish or Fall Garden Relish - Easily! With Step-by-step Directions, Photos, Ingredients, Recipe and Costs in 2025? Scroll down this page and follow the links. And if you bring home some fruit or vegetables and want to can, freeze, make jam, salsa or pickles, see this page for simple, reliable, illustrated canning, freezing or preserving directions. There are plenty of other related resources, click on the resources dropdown above. If you are having a hard time finding canning lids, I've used these, and they're a great price & ship in 2 days.
If you have questions or feedback, please let me know! There are affiliate links on this page. Read our disclosure policy to learn more.
How to Make Hot Relish, Dixie Relish or Fall Garden Relish - Easily! With Step-by-step Directions, Photos, Ingredients, Recipe and Costs
Yield: About 4 pint jars
Click here for a PDF print version (coming soon)
Making and canning your own hot relish, Dixie Relish or Fall Garden Relish (they are all very similar) is easy and safe. This is traditional recipe found in many canning books like the Ball Blue Book and the USDA's National center for Home food Preservation.
Ingredients
- 1 quart chopped cabbage (about 1 small head)
- 3 cups chopped cauliflower (about 1 medium head) - Cauliflower is optional; the Ball Book Book recipes omits it.
- 2 cups chopped green tomatoes (about 4 medium)
- 2 cups chopped onions
- 2 cups chopped sweet or hot green peppers (about 4 medium) - most people prefer sweet peppers, but if you like it really hot, go for it.
- 1 cup chopped sweet or hot red peppers (about 2 medium)
- 33/4 cups white vinegar (5%)
- 3 tablespoons canning salt - if you are on a low salt diet, you can use potassium chloride
- 23/4 cups sugar
- 3 teaspoons celery seed
- 3 teaspoons dry mustard
- 11/2 teaspoons turmeric
Equipment
- 1 water bath canner (a huge pot to sanitize the jars after filling (about $30 to $35 at mall kitchen stores, sometimes at big box stores and grocery stores.). Note: we sell many sizes and types of canners for all types of stoves and needs - see canning supplies
- Jar grabber (to pick up the hot jars)
- Jar funnel ($5 at Target, other big box stores, and often grocery stores; and available online - see this page)
- 1 large pots; Nonstick ceramic coated pots for easy cleanup.
- Large spoons and ladles,
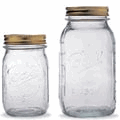
- Pint canning jars (Ball or Kerr jars can be found at grocery stores, like Safeway, Publix, Kroger, grocery stores, even online - about $13 per dozen 8-ounce jars, more for quilted design or larger jars, including the lids and rings). Be sure to get wide mouth jars to fit the pickles in! Pint size works best!
- Lids - thin, flat, round metal lids with a gum binder that seals them against the top of the jar. They may only be used once.
- Rings - metal bands that secure the lids to the jars. They may be reused many times.
- See this page for pickling supplies, equipment, books, crocks and additives.
Directions - Step by Step
Step 1 - Wash jars and lids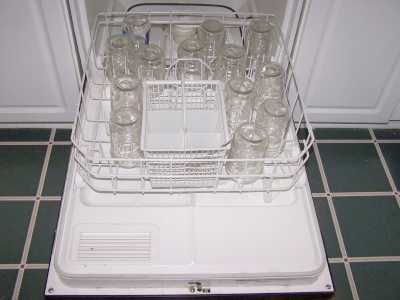
The dishwasher is fine for the jars; especially if it has a "sanitize" cycle.
I get that going while I'm preparing everything else, so it's done by the
time I'm ready to fill the jars. If you don't have a
dishwasher, submerge the jars in a large pot (the canner itself) of
water and bring it to a boil.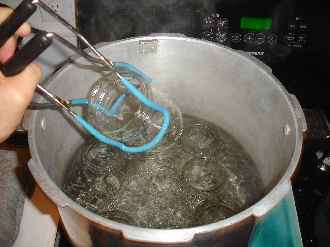 The c water bath processing includes time to sanitize the jars again, so
this step is really just a pre-cleaning step, not the final assurance of
sterilization.
The c water bath processing includes time to sanitize the jars again, so
this step is really just a pre-cleaning step, not the final assurance of
sterilization.
Be sure to let it go through the rinse cycle to get rid of any soap!
Get the canner heating up
Fill the canner about 1/2 full of water and start it heating (with the lid on).
Start the water for the lids
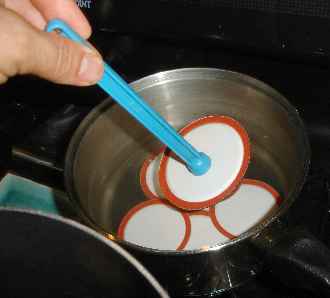 Put the lids into a pan of hot, but not quite boiling water for at least
several minutes. Note: everything gets
sanitized in the water
bath (step 7)
anyway, so this just helps to ensure
there is no spoilage later!)
Put the lids into a pan of hot, but not quite boiling water for at least
several minutes. Note: everything gets
sanitized in the water
bath (step 7)
anyway, so this just helps to ensure
there is no spoilage later!)
 Need lids, rings and replacement jars?
Get them all here, delivered direct to your home, at the best prices on the internet!
Step 2 - Wash the vegetables
Just rinse the vegetables in cold water to remove any dirt or bugs!
Step 3 - Chop the vegetables
Chop the vegetables as finely as you like in a relish. Typically 1/8 to 1/4 inch pieces.
Step 4 - Combine and chill
Sprinkle the chopped vegetables with the 3 tablespoons salt. Mix well then cover and let stand for 4 to 6 hours in the refrigerator.
Step 5 - Drain
Drain off the liquids and discard (the liquid). If you are on a low salt
diet, rinse the veggies in a sieve with cold water and drain.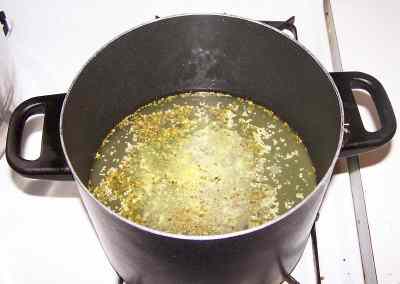
Step 6 - Combine the vinegar, sugar and spices and simmer
Combine the vinegar, sugar and spices in a pot and mix well. Simmer the mixture over medium heat for 10 minutes.
Step 7 - Add veggies
Add vegetables; simmer another 10 minutes. After the 10 minutes of simmering, raise the heat to bring to a boil.
Step 8 - Fill jars
Once it reaches a boil, remove from the heat and start filling the jars.
Step 9 - Seal and process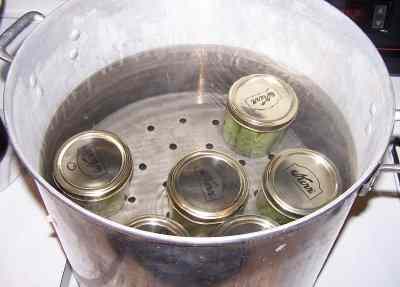
Ladle the boiling hot relish into hot jars, leaving 1/2 inch headspace. Remove air bubbles and adjust headspace if needed. Wipe rims of jars with a dampened clean paper towel; adjust two-piece metal canning lids. Process in a Boiling Water Canner for 10 minutes. If you are located more than 1,000 ft above sea level, see the table below:
| Recommended process time for Fall Garden Relish in a boiling-water canner. | ||||
| Process Time at Altitudes of | ||||
| Style of Pack | Jar Size | 0 - 1,000 ft | 1,001 - 6,000 ft | Above 6,000 ft |
| Hot | Pints | 10 min | 15 | 20 |
Step 10 - Cool and store
This document was adapted from "So Easy to Preserve", 5th ed. 2006. Bulletin 989, Cooperative Extension Service, The University of Georgia, Athens. Revised by Elizabeth L. Andress. Ph.D. and Judy A. Harrison, Ph.D., Extension Foods Specialists.
This document was adapted from the "Complete Guide to Home Canning,"
Agriculture Information Bulletin No. 539, USDA, revised 2006.
Reviewed May 2009.
Tips
Comments and Feedback
Illustrated Canning, Freezing, Jam Instructions and Recipes
[ Easy Home Canning Directions] [FAQs - Answers to common questions and problems] [Recommended books about home canning, jam making, drying and preserving!] [Free canning publications to download and print]


Looking for canning equipment and supplies?
Water bath canner with a jar rack
Pressure canners for gas, electric and induction stoves: Presto 23Qt or T-fal 22Qt
Canning scoop (this one is PERFECT)
Ball Blue book (most recent version)
Jars: 8oz canning jars for jams
Find Other types of farms:
Farm markets and roadside stands
Road trips and camping resources
Local Honey, apiaries, beekeepers
Consumer fraud and scams information
Home canning supplies at the best prices on the internet!
Maple Syrup Farms, sugarworks, maple syrup festivals
Environmental information and resources
Farms For Your Event for birthday parties, weddings, receptions, business meetings, retreats, etc.
Festivals - local fruit and vegetable festivals
Get the
most recent version of
the Ball Blue Book
