Looking for How to Make Gazpacho - Easily! With Step-by-step Photos, Recipe, Directions, Ingredients and Costs in 2025? Scroll down this page and follow the links. And if you bring home some fruit or vegetables and want to can, freeze, make jam, salsa or pickles, see this page for simple, reliable, illustrated canning, freezing or preserving directions. There are plenty of other related resources, click on the resources dropdown above. If you are having a hard time finding canning lids, I've used these, and they're a great price & ship in 2 days.
If you have questions or feedback, please let me know! There are affiliate links on this page. Read our disclosure policy to learn more.
How to Make Gazpacho - Easily! With Step-by-step Photos, Recipe, Directions, Ingredients and Costs
Making and Homemade Gazpacho from Fresh Tomatoes!
Click here for a PDF print version
Yields 8 - 10 servings
Making and freezing your own Gazpacho gives you a great tasting, healthy treat you can enjoy. No store bought Gazpacho compares with the taste of this classic Spanish soup made from your own tomatoes from your garden or fresh-picked from a local farm!
Unfortnately, no, you can't can it (it will turn to glop, and even with a Pressure Canner, it's still very low acid). You will have to enjoy it fresh.
Here's how to do it, in easy steps and completely illustrated. This method is so easy, ANYONE can do this! It's a great thing to do with your kids!
Ingredients
- Tomatoes - 6 large ripe tomatoes, peeled and chopped
- 1 purple onions, finely chopped
- 1 cucumber, peeled, seeded, chopped
- 1 sweet red bell pepper (or green) seeded and chopped
- 2 tablespoons tomato paste
- 2 stalks celery, chopped
- 1/3 cup chopped fresh cilantro
- 1-2 Tbsp chopped fresh parsley
- 4 cups tomato juice
- 2 Tbsp chopped fresh chives
- 1 clove garlic, minced
- 1/4 cup red wine vinegar
- 1/4 cup olive oil
- 2 Tbsp freshly squeezed lemon juice
- 2 teaspoons sugar
- Salt and fresh ground pepper to taste
- 6 or more drops of Tabasco sauce to taste
- 1 teaspoon Worcestershire sauce
Equipment
- Pint (or smaller) jars or containers
- 1 large pot.
- Large spoons and ladles,
Process - How to Make Gazpacho from Fresh Tomatoes
Step 1 - Selecting the tomatoes
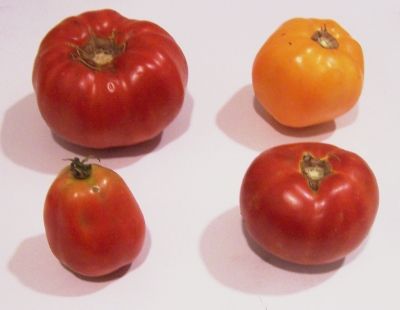
It's fun to go pick your own and you can obviously get better quality tomatoes!
At right is a picture of tomatoes from my garden - they are so much better than anything from the grocery store. And if you don't have enough, a pick-your-own farm is the pace to go! At right are 4 common varieties that will work:
| Top left: Beefsteak | Top right: Lemon Boy, yellow |
| Bottom left: Roma, paste-type | Bottom right: Better Boy |
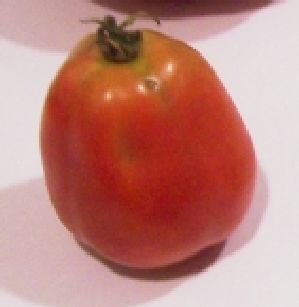
The picture at left shows the best variety of tomato to use: Roma; also called paste tomatoes. they have fewer sides, thicker, meatier walls, and less water.
Also, you don't want mushy, bruised or rotten tomatoes!
Step 2 - Removing the tomato skins
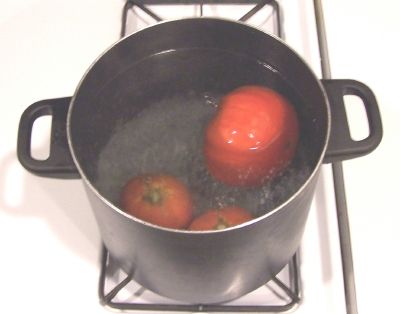
Here's a trick you may not know: put the tomatoes, a few at a time in a large pot of boiling water for no more than 1 minute (30 - 45 seconds is usually enough)
then....
Plunge them into a waiting bowl of ice water.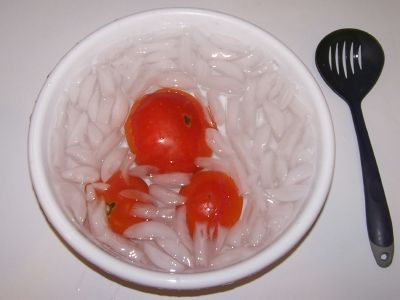
This makes the skins slide right off of the tomatoes! If you leave the skins in, they become tough and chewy in the sauce, not very pleasant.
Step 3 - Removing seeds and water
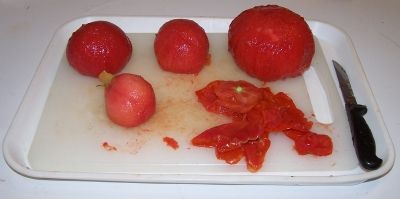
After you have peeled the skins off the tomatoes, cut the tomatoes in half. Now we need to remove the seeds and excess water.
Step 4 - Squeeze of the seeds and water

 Just like it
sounds: wash your hands then squeeze each tomato and use your finger
or a spoon to scoop and shake out most of the seeds. You don't
need to get fanatical about it; removing just most will do. Another
way to do it is to cut each tomato in half, across it, instead of
lengthwise. Then just shake the seeds and juice out.
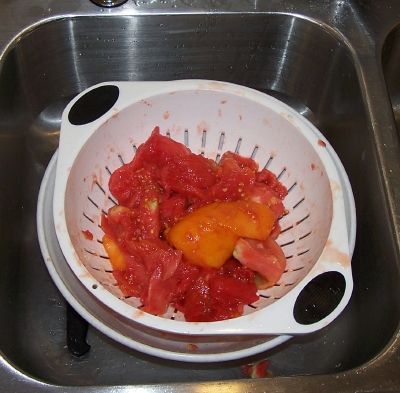 Step 5 - Drain and dice the tomatoes
Toss the squeezed (Squozen? :) tomatoes into a colander or drainer, while you work on others. This helps more of the water to drain off. You may want to save the liquid: if you then pass it through a sieve, screen or cheesecloth, you have fresh tomato juice; great to drink cold or use in cooking!
Next chop them up - I like 1/2 inch size cubes.
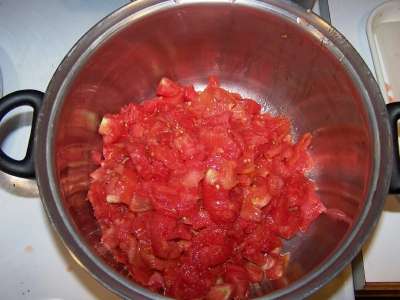 Step 6 - Separate the chopped tomatoes into 2 parts
Keep about 1/2 cup apart to add at the end. Put the rest into the food processor, chopped or blender.
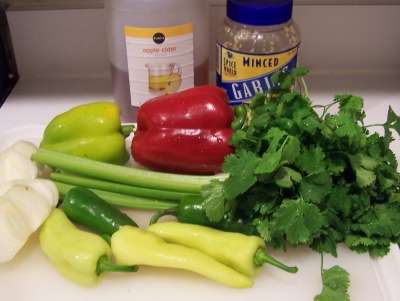 Step 6 - Prep the other stuff for the food processor
I use an electric chopper (food processor) to dice the seasonings fairly fine, about 1/8 inch cubes. You can separate about 1 cup of it before it gets too finely pureed, so you can add it at the end to give it some chunky buts.
- 1 purple onion; finely chopped
- 1 cucumber, peeled, seeded, chopped
- 1 sweet red bell pepper (or green) seeded and chopped
- 2 tablespoons tomato paste
- 2 stalks celery, chopped
- 1/3 cup chopped fresh cilantro
- 1-2 Tbsp chopped fresh parsley
- 2 Tbsp chopped fresh chives
- 1 clove garlic, minced
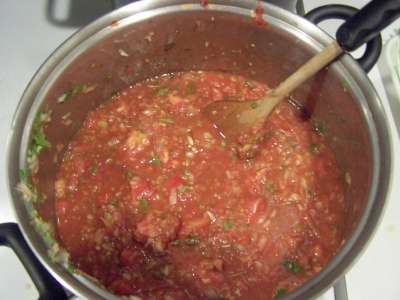
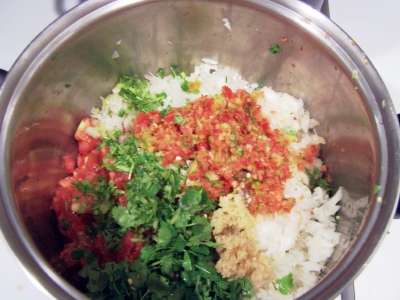 Step 7 - Mix ingredients in the pot or large bowl
Mix and the put them
Add the seasonings and mix well:
- 1/4 cup red wine vinegar
- 1/4 cup olive oil
- 2 Tbsp freshly squeezed lemon juice
- 2 teaspoons sugar
- Salt and fresh ground pepper to taste
- 6 or more drops of Tabasco sauce to taste
- 1 teaspoon Worcestershire sauce
Taste and if you like it spicier, you can more Tabasco.
And if you like your Gazpacho thick, add more tomato paste. If it is too thick, add tomato juice!
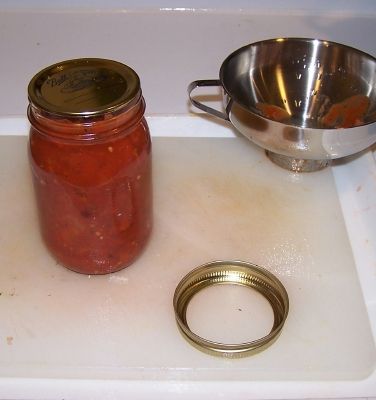 Step 8 - Fill the jars, ziploc bags or other containers and
refrigerate
Fill non-metal, non-reactive storage containers, cover them tightly and refrigerate overnight, allowing flavors to blend.
This must be stored in the fridge!
Summary - Cost of Making Homemade Gazpacho - makes 9 pints | ||||
| Item | Quantity | Cost in 2025 | Source | Subtotal |
| Tomatoes | 20 - 25 lbs (to make about 16 cups of prepared tomato) | free from the garden, or $0.50 cents at a PYO | Garden | $0.00 |
| Canning jars (pint size, wide mouth), includes lids and rings | 9 jars | $8.00/dozen | Grocery stores, like Publix, Kroger and Safeway and local "big box" stores; sometimes Big Lots and even hardware stores | $6.00 |
| seasoning | See step 7 | $2.00? | Grocery stores, like Publix, Kroger and Safeway and local "big box" stores | $2.00 |
| Sala mix | 1 packet | $4.00 per package | Grocery stores, like Publix, Kroger and Safeway and local "big box" stores; sometimes Big Lots and even hardware stores | |
| Total |
$8.00 total or about $0.95 per pint INCLUDING the jars - which you can reuse! | |||
* - This assumes you already have the pots, pans, ladles,, and reusable equipment. Note that you can reuse the jars! Many products are sold in jars that will take the lids and rings for canning. For example, Classico salsa is in quart sized jars that work with Ball and Kerr lids and rings | ||||
Answers to Common Questions
What did I do wrong if my jars spoil?
Tomatoes are a borderline acid / low acid fruit (see this page about tomato acidity for more information) - adding lemon juice helps boost the acid level of the sauce, by adding 2 tablespoons of lemon juice (or 1/2 teaspoon of citric acid per quart)
Canning Books, Supplies and Accessories
These are my favorite essential canning tools, books and supplies. I've been using many of these for over 50 years of canning! The ones below on this page are just the sampling of. my preferred tools. but you can find much more detailed and extensive selections on the pages that are linked below.
- Strainers, pit removers, seed-skin-stem removers, jelly strainers, etc. All types, makes and prices (from $19 to $350)
- Selecting a KitchenAid mixer and attachments for home canning
- Vacuum Foodsealers for freezing, dried foods, and refrigerated foods - the FoodSaver line
- Cherry pitters reviews, prices and ordering
- Steam Juicers
- Food dehydrators - easy and fast to dry your own fruits, veggies, sun-dried tomatoes, etc.
The All New Ball Book Of Canning And Preserving: Over 350 of the Best Canned, Jammed, Pickled, and Preserved Recipes Paperback
This is THE book on canning! My grandmother used this book when I was a child.; It tells you in simple instructions how to can almost anything; complete with recipes for jam, jellies, pickles, sauces, canning vegetables, meats, etc.
If it can be canned, this book likely tells you how! Click on the link below for more information and / or to buy (no obligation to buy)The New Ball Blue Book of Canning and Preserving
Canning and Preserving for Dummies by Karen Ward
This is another popular canning book. Click here for more information, reviews, prices for Canning and Preserving For Dummies
Of course, you do not need to buy ANY canning book as I have about 500 canning, freezing, dehydrating and more recipes all online for free, just see Easy Home Canning Directions.
Home Canning Kits
See here for related tools, equipment, supplies on Amazon See here for related tools, equipment, supplies on Amazon
I have several canners, and my favorite is the stainless steel one at right. It is easy to clean and seems like it will last forever. Mine is 10 years old and looks like new.
The black ones are the same type of standard canner that my grandmother used to make everything from applesauce to jams and jellies to tomato and spaghetti sauce.
This complete kit includes everything you need and lasts for years: the canner, jar rack, Jar grabber tongs, lid lifting wand, a plastic funnel, labels, bubble freer, It's much cheaper than buying the items separately. It's only missing the bible of canning, the Ball Blue Book.
You will never need anything else except jars & lids (and the jars are reusable)!
The complete list of canners is on these pages:
- Water bath canners - Good for acidic foods, like applesauce, pickles, salsa, jams, jellies, most fruits
- Pressure canners - needed for low and non-acidic foods, like canned vegetables (corn, green beans, etc), and meats
- Canners for glass top stoves if you have a glass or ceramic stove
- Canners for induction stovetops
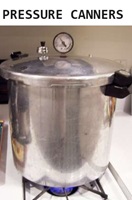
Pressure Canners
If you plan on canning non-acidic foods and low acid foods that are not pickled - this means: meats, seafood, soups, green beans corn, most vegetables, etc., then you ABSOLUTELY must use a Pressure Canner.
Of course, you can use a pressure canner as a water bath canner as well - just don't seal it up, so it does not pressurize. This means a Pressure Canner is a 2-in-1 device. With it, you can can almost ANYTHING.
There are also other supplies, accessories, tools and more canners, of different styles, makes and prices, click here!
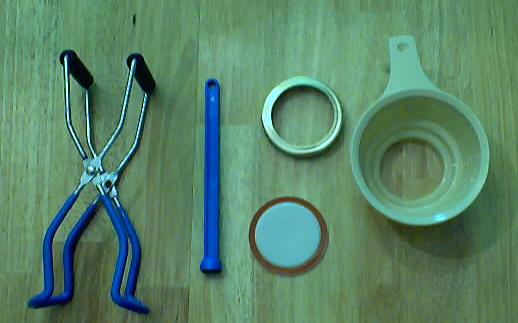
Basic Canning Accessories
From left to right:
- Jar lifting tongs to pick up hot jars
- Lid lifter - to remove lids from the pot of boiling water (sterilizing )
- Lids- disposable - you may only use them once
- Ring - holds the lids on the jar until after the jars cool - then you remove them, save them and reuse them
- Canning Jar funnel - to fill the jars
Strainers
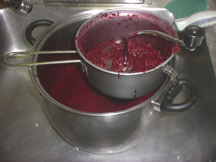
These are very useful for making sauces like applesauce, tomato sauce, spaghetti sauce, jellies, etc. Below are my favorites. The complete list is on these pages:
- Strainers, pit removers, seed-skin-stem removers, jelly strainers, etc. All types, makes and prices (from $19 to $350)
- Selecting a KitchenAid mixer and attachments for home canning
Inexpensive Old School Strainers: hand cranked Foley Food Mills
- The hand-cranked Foley food mill (see this page or clock the ad box) has been used for well over 100 years in homes all over America (and variants around the world). It is effective and inexpensive, and ideal for small batches. However, if you need to make many quarts, you will sure end up with tunnel carpel syndrome or some other repetitive strain injury.
Norpro 1951 Manual Food Strainer and other brand stariners, with optional motors; (almost identical to Victorio V250, Villaware and Roma models, all discontinued)
This is The next step up from the Foley food mill. First, it's far more ergonomic, and its handle is easier to use. Next, it works in continuous mode rather than batch mode. So you can do much larger volumes easily. Finally, It has an optional motor, so you can. remove the manual labor. It also offers many different size strainers to use for different types of berries, vegetables and fruit.
See the seller's website for more information, features, pricing and user reviews!
- A Johnny, Weston or Oxo strainer (about $60 - $100, see further down the page) or
- This trainer is. simply a more upscale and improved version of the one above.
- See this page for more information, reviews, descriptions of other strainers and supplies or to order!
KitchenAid - Best Large Volume Strainers
If you're going to do large volumes of fruit or vegetables , or do it year after year, then. you really should think about getting a higher end kitchen. utility device. Kitchen aids are the cream of the crop. Once you buy one of these, you keep at the rest of your life and it gets handed down to the next generation. . My sister is using one she inherited from my mother 25 years ago, who got it in the 1940s as a wedding gift. So, although the initial cost is high, they literally last for many lifetime. So the cost on an annual basis is pretty trivial, especially when you consider the cost of therapy and treatment for. the repetitive strain injuries you will get from manual cranking day after day. Add to that of course the cost of therapy for the emotional injuries you'll get from going insane, standing there hand cranking something for hours.
KitchenAid's with a sieve/grinder (with the attachments, costs about $400, but it lasts a lifetime and is fast and easy to use - I can make 100 quart jars of applesauce per day with one of these).
FREE Illustrated Canning, Freezing, Jam Instructions and Recipes
Don't spend money on books. that you don't need to. Almost everything you can find in some book sold online or in a store is on my website here for free. Start with theEasy Home Canning Directions below. That is a master list of canning directions which are all based upon the Ball Bblue book, the National Center for Home Food Preservation and other reputable lab tested recipes. Almost every recipe I present in addition to being lab tested com. is in a step by step format with photos for each step and complete. explanations. that tell you how to do it, where to get the supplies and pretty much everything you need to know. In addition, there almost always in a PDF format so you can print them out and use them while you cook.
[ Easy Home Canning Directions]
[FAQs - Answers to common questions and problems]
[Recommended books about home canning, jam making, drying and preserving!]
Looking for canning equipment and supplies?
Water bath canner with a jar rack
Pressure canners for gas, electric and induction stoves: Presto 23Qt or T-fal 22Qt
Canning scoop (this one is PERFECT)
Ball Blue book (most recent version)
Jars: 8oz canning jars for jams
Find Other types of farms:
Farm markets and roadside stands
Road trips and camping resources
Local Honey, apiaries, beekeepers
Consumer fraud and scams information
Home canning supplies at the best prices on the internet!
Maple Syrup Farms, sugarworks, maple syrup festivals
Environmental information and resources
Farms For Your Event for birthday parties, weddings, receptions, business meetings, retreats, etc.
Festivals - local fruit and vegetable festivals
Get the
most recent version of
the Ball Blue Book
With this Presto 23 quart pressure canner and pressure cooker, you can "can" everything, fruits, vegetables, jams, jellies, salsa, applesauce, pickles, even meats, soups, stews. Model 01781

You can make jams, jellies, can fruit, applesauce, salsa and pickles with water bath canners, like this Granite Ware 12-Piece Canner Kit, Jar Rack, Blancher, Colander and 5 piece Canning Tool Set


