Looking for How to make and can homemade pizza sauce from fresh tomatoes - easy and illustrated! in 2025? Scroll down this page and follow the links. And if you bring home some fruit or vegetables and want to can, freeze, make jam, salsa or pickles, see this page for simple, reliable, illustrated canning, freezing or preserving directions. There are plenty of other related resources, click on the resources dropdown above. If you are having a hard time finding canning lids, I've used these, and they're a great price & ship in 2 days.
If you have questions or feedback, please let me know! There are affiliate links on this page. Read our disclosure policy to learn more.
How to make and can homemade pizza sauce from fresh tomatoes - easy and illustrated!
How to make and can homemade pizza sauce from fresh tomatoes!
Waterbath Canning is below - See this page if you have a Pressure Canner.
Click here for a PDF print version!
Making and canning your own pizza sauce is something families remember years later. No store bought pizza sauce compares with the taste of that made from your own tomatoes from your garden or fresh-picked from a local farm! In the middle of the winter, you can make a meal with your pizza sauce and taste the summer flavor of fresh tomatoes. This recipe is for pizza sauce WITHOUT meat, so you can use a water bath canner or a Pressure Canner. The USDA does not have a recipe for pizza sauce for a water bath canner,(they only have a spaghetti sauce recipe for a Pressure Canner, it's a bit different; if you have a Pressure Canner, you may want to see this page for spaghetti sauce using a Pressure Canner), but both the prepackage season mixes (like Ball's, Mrs. Wages) and the Ball Blue book do have a water bath canner,version. Keep in mind that the only difference between spaghetti sauce and pizza sauce is the labeling. In most cases the recipes are identical. Anyway, the homemade version (Ball), which they call "seasoned tomato sauce" requires the addition of lemon juice (not vinegar) to help acidify it.
You can add meats, but that requires a Pressure Canner and a different set of directions (see this page for directions for spaghetti / pizza sauce with meat)
Here's how to do it, in easy steps and completely illustrated. This method is so easy, ANYONE can do this! It's a great thing to do with your kids!
I've added free labels for your jars here, in a Word format! Just download, edit, and print in label paper.
Ingredients
Yield: 7 pints
- Tomatoes - about 20 lbs (yes, you need a big basketful - you remove the skins, seeds and a lot of the water, so it takes a lot to start.)
- Use a spaghetti sauce mix or your own seasonings. The Mrs. Wages, Ball or Harvest home canning spaghetti sauce mix sells for about $2.00 to $4.00 per packet. A packet will make about a 7 pint jars. See step 7 below for making your own seasonings.
Equipment
- 1 water bath canner (a huge pot to sanitize the jars after filling (about $30 to $35 - $30 at mall kitchen stores and local "big box" stores. Note: we sell many sizes and types of canners for all types of stoves and needs - see canning supplies). Tomatoes are on the border between the high-acid fruits that can be preserved in a boiling-water bath and the low-acid fruits, vegetables and meats that need pressure canning
- Pint canning jars (Ball or Kerr jars can be found at Publix, Kroger, Safeway and local "big box" stores - about $13 per dozen 8-ounce jars, more for quilted design or larger jars, including the lids and rings). Pint size works best, but quarts are allowed, too, since the pressure canner will thoroughly heat them.!
- Lids - thin, flat, round metal lids with a gum binder that seals them against the top of the jar. They may only be used once.
- Rings - metal bands that secure the lids to the jars. They may be reused many times.
- Jar grabber (to pick up the hot jars)
- Lid lifter (I like the lid rack that holds 12 lids or you can pull them out one at a time with the lid-lifter that has a magnet from the almost-boiling water where you sanitize them. ($4 at mall kitchen stores and local "big box" stores, but it's usually cheaper online from our affiliates)
- 1 large pot.
- Large spoons and ladles,
- Jar funnel ($3-Grocery stores, like Publix, Kroger and Safeway and local "big box" stores; sometimes even hardware stores)
Process - How to Make pizza sauce from Fresh Tomatoes
 Step 1 - Selecting the
tomatoes
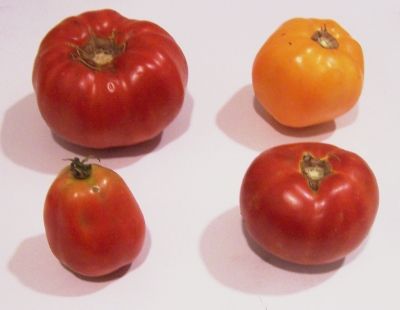
It's fun to go pick your own and you can obviously get better quality tomatoes!
At right is a picture of tomatoes from my garden - they are so much better than anything from the grocery store. And if you don't have enough, a pick-your-own farm is the pace to go! At right are 4 common varieties that will work:
| Top left: Beefsteak | Top right: Lemon Boy, yellow |
| Bottom left: Roma, paste-type | Bottom right: Better Boy |
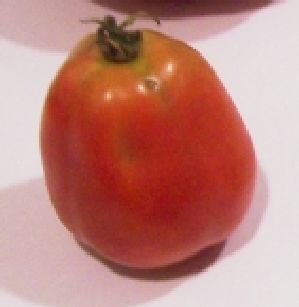 The
picture at right shows the best variety of tomato to use: Roma; also called
paste tomatoes. They have fewer sides, thicker, meatier walls, and
less water.
And that means thicker sauce in less cooking time!
Also, you don't want mushy, bruised or rotten tomatoes!
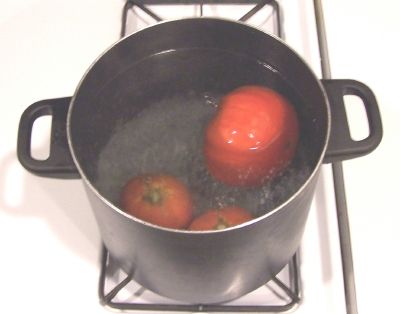 Step 2 - Removing the tomato skins
Here's a trick you may not know: put the tomatoes, a few at a time in a large pot of boiling water for no more than 1 minute (30 - 45 seconds is usually enough)
then....
Plunge them into a waiting bowl of ice water.
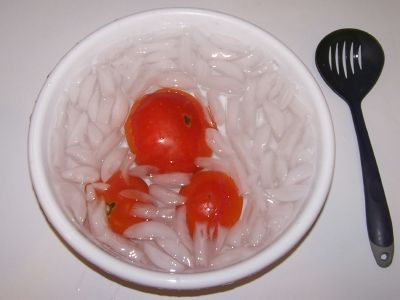 This makes the skins slide
right off of the tomatoes! If you leave the skins in, they become
tough and chewy in the sauce, not very pleasant.
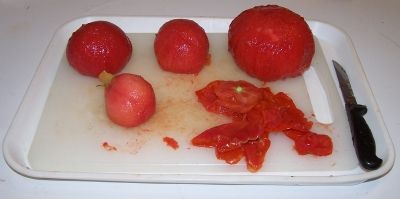 Step 3 - Removing seeds and water
After you have peeled the skins off the tomatoes, cut the tomatoes in half. Now we need to remove the seeds and excess water.
 Step 4 - Squeeze of the seeds and water
Just like it sounds: wash your hands then
squeeze each tomato and use your finger or a
 spoon to scoop and shake out
most of the seeds. You don't need to get fanatical about it;
removing just most will do. Another way to do it is to cut each tomato in half, across it, instead of lengthwise. Then just shake the seeds and juice out.
Step 5 - Drain the tomatoes
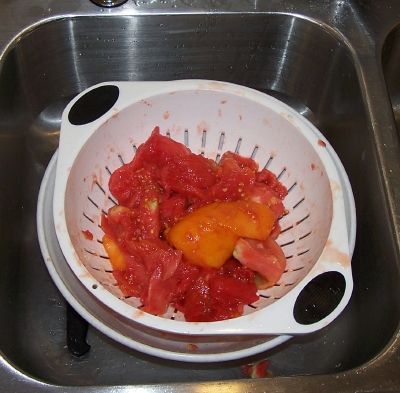 Toss the squeezed (Squozen? :) tomatoes into
a colander or drainer, while you work on others. This helps more of the
water to drain off. You may want to save the liquid: if you then
pass it through a sieve, screen or cheesecloth, you have fresh tomato
juice; great to drink cold or use in cooking! By draining the water
off now, you will end up with a thicker pizza sauce in less cooking
time! And that preserves vitamins (and your sanity).
FYI, the 20 pounds of raw, fresh, whole tomatoes you started with should produce about 7 - 9 pints of "squeezed" tomatoes
Step 6 - Get the jars and lids sanitizing
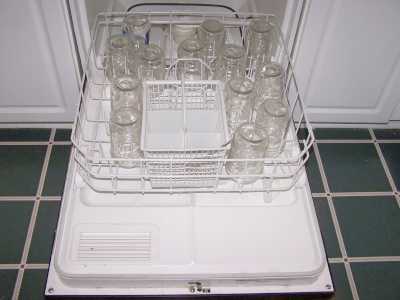 The dishwasher is fine for the jars; especially if it has a "sanitize" cycle.
I get that going while I'm preparing everything else, so it's done by the
time I'm ready to fill the jars.
Be sure to let it go through the rinse cycle to get rid of any soap!
Lids: Put the very hot (but not quite boiling; around 180 F, steaming water is fine)
water for at least
several minutes.
Note: everything gets
sanitized in the water
bath (step 7)
anyway, so this just helps to ensure
there is no spoilage later!)
Step 7. Mix or your own seasoning?
Either works equally well. The pizza sauce mix (see the box below) for canning has the advantage of being tested and VERY easy to use. It's basically a type of corn starch, onion powder, salt and seasoning. It doesn't have any preservative to improve the canning, so the advantage is just that it is easier and safe. Remember, this recipe is for NO meat! (see this page for directions for spaghetti sauce with meat)
Otherwise, this slightly modified version of the Ball Blue Book recipes works well:
- 2 cups chopped fresh onions (then sauté or microwave them until they are soft)
- 3 Tablespoons of oregano
- 3 clove of garlic, minced
- 2 bay leaves
- 2 Tablespoons diced, fresh OR dried basil
- 1/4 teaspoon black pepper
- 2 tablespoons chopped celery (optional, may be too strong for some folk's tastes)
- 2 Tablespoons chopped red sweet peppers
- 2 teaspoon salt (optional - I don't put any in!)
- 1/4 cup lemon juice (helps to acidify it, not necessary if you have a Pressure Canner)
- 1/4 cup red wine (optional) I think a little burgundy makes it!)
- And if you like your pizza sauce thick, add either tomato paste - 1 or 2 small cans should do it,
A note about spices: Less spice, especially garlic and onions in canned sauce is better. They tend to strengthen and sometimes become bitter in storage. So use less when you prepare the sauce and add more when you actually use it, if you want!
Step 8 - Combine and bring the sauce to a gentle simmer
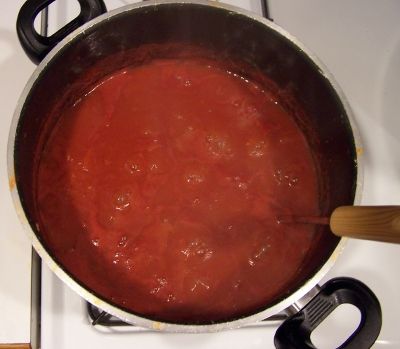 Combine the tomatoes and spices together in a big pot. There's
generally no need to add liquid, most types of tomatoes have so much
water, we will need to boil it down to drive off much of the water to
thicken the sauce. If your tomatoes are watery, boil it down before
you add the spices, to avoid them becoming too strong.
You don't need to overcook it; just bring it to boiling to sanitize it, mix the seasonings and cook down the tomatoes.
As they cook, the tomatoes will fall apart into sauce with out much need of mushing!
Step 9 - Fill the jars with sauce and put the lid and rings on
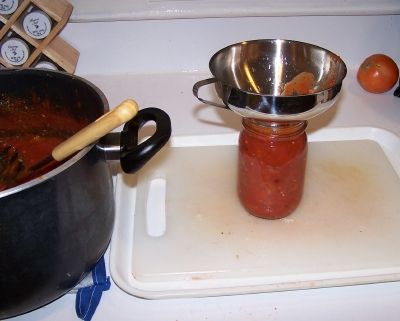 Fill them to within 1/4-inch of the top,
seat the lid and hand-tighten the ring around them.
NOTE: if you want to freeze the sauce instead, just fill your freezer containers (I like Ziploc freezer bags in the quart size), fill them completely, eliminate air pockets, seal them and pop them in the freezer. You're done!
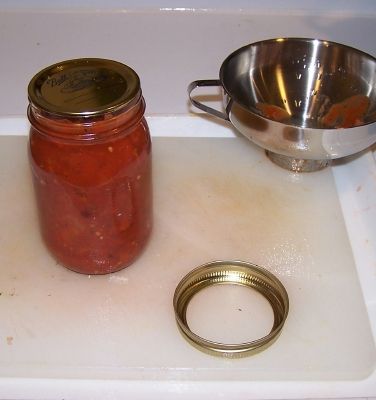 Be sure the contact surfaces (top of the jar
and underside of the ring) are clean to get a good seal!
Step 10 - Process (Boil) the jars in the canner
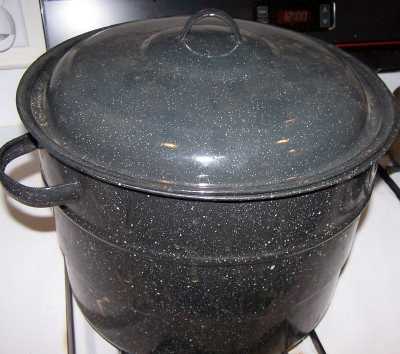
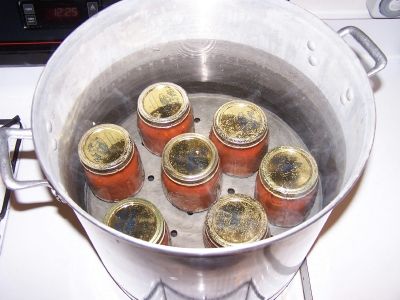 Put them
in the canner and keep them covered with at least 1 inch of water. Keep
the water
boiling. Process the jars in a boiling-water bath for 35 minutes for pints
and 40 minutes for quarts. This processing time is based on the Ball
Blue Book's "Seasoned Tomato Sauce" recipe which is very similar (our
recipe is actually more conservative, using less non-acidic ingredients).
Of course, if you use a packet of spaghetti sauce canning mix, follow the processing times in their directions.
This document was adapted from the "Complete Guide to Home Canning," Agriculture Information Bulletin No. 539, USDA, revised 1994. Reviewed June 2006.
Step 11 - Done
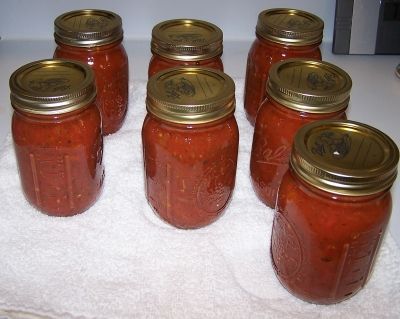
Lift the jars out of the water and let them cool without touching or bumping them in a draft-free place (usually takes overnight) You can then remove the rings if you like, but if you leave them on, at least loosen them quite a bit, so they don't rust in place due to trapped moisture. Once the jars are cool, you can check that they are sealed verifying that the lid has been sucked down. Just press in the center, gently, with your finger. If it pops up and down (often making a popping sound), it is not sealed. If you put the jar in the refrigerator right away, you can still use it. Some people replace the lid and reprocess the jar, then that's a bit iffy. If you heat the contents back up, re-jar them (with a new lid) and the full time in the canner, it's usually ok.
A note about pressure canners
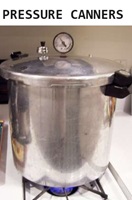
Pressure canners work better for tomatoes and other low acid foods - you will get less spoilage with a Pressure Canner.
I prefer a Pressure Canner (see photo below) or a larger 33 quarter water bath canner, it is much deeper, so it is neater, no boilovers, and allows you to cover the tallest jars with several inches of water to ensure safety! To order one, click on Canning supplies and select the canner that is right for your stove (regular or flat bottomed for glass or ceramic stoves)
Frequently Asked Questions about making tomato sauces - Click here
Q. How can I make pizza sauce to freeze, instead of can?
A. Easy. Just make the canned sauce as shown above, but instead of canning it, stop after step 8 ,
let it cool to room temperature, fill the Ziploc bags and freeze it instead!
Q. Can I add olive oil or any other oil to the recipe?
A. No, both Ball and the USDA warn that their research shows that adding oil to home canning recipes increases the risk of botulism. If you like the taste oil oil, add it after you open the jars when you go to use them!
Summary - Cost of Making Homemade pizza sauce - makes 7 pint jars, 16 oz each* |
||||
| Item | Quantity | Cost in 2019 | Source | Subtotal |
| Tomatoes | 20 - 25 lbs (to make about 16 cups of prepared tomato) | free from the garden, or $0.50 cents at a PYO | Garden | $0.00 |
| Canning jars (pint size, wide mouth), includes lids and rings | 7 jars | $8.00/dozen | Grocery stores, like Publix, Kroger and Safeway and local "big box" stores; sometimes Big Lots and even hardware stores | $4.50 |
| seasoning | See step 7 | $2.00? | Grocery stores, like Publix, Kroger and Safeway and local "big box" stores | $2.00 |
| Spaghetti mix | 1 packet | $3.00 per package | Grocery stores, like Publix, Kroger and Safeway and local "big box" stores; sometimes Big Lots and even hardware stores | |
| Total | $6.50 total or about $0.95 per jar INCLUDING the jars - which you can reuse! |
|||
|
* - This assumes you already have the pots, pans, ladles,, and reusable equipment. Note that you can reuse the jars! Many products are sold in jars that will take the lids and rings for canning. For example, Classico Spaghetti sauce is in quart sized jars that work with Ball and Kerr lids and rings. Note that the Classico's manufacturer does not recommend reuse of their jars: see what they have to say on this page: |
||||
Answers to Common Questions
What did I do wrong if my jars spoil?
Tomatoes are a borderline acid / low acid fruit (see this page about tomato acidity for more information) - adding lemon juice helps, processing at least 35 minutes in the water bath canner, or better still, using a Pressure Canner almost eliminates spoilage. If you don't have a pressure canner, you must boost the acid level of the sauce, by adding 2 tablespoons of lemon juice or 1/2 teaspoon of citric acid per quart of sauce.
The question everyone asks: Can you add meat?
With a water bath canner, absolutely, definitely NOT. The temperatures do not get high enough to kill the type of bacteria that can attack meat and make you sick, or even kill you. However, with a Pressure Canner, it IS possible. I have complete directions here! I don't do it, simply because... have you ever tasted canned meat? Yes, it is called SPAM. My recommendation is to can without the meat and add fresh browned ground meat or meatballs when you use the sauce!
Meat, Part 2 - I noticed you said it is best not to put meat in the sauce, as it might spoil as a child my mom canned all her meat with nothing but salt in it as she had no freezer. I cannot remember a problem with it going bad. She submerged the jars in a canning pot with a wire rack under it and boiled it for 4 hours always making sure the meat in the jar was covered with water so it would not spoil, also the jars kept covered with water at all times for four hours of boiling. "
It is statistically possible to engage in a very dangerous activity and still experience no harm. For example, one of my father's friends charged the beach at Iwo Jima in World War 2, (definitely, one of the riskiest things you could do) and yet he survived without a scratch, while 7 of 10 of his platoon died. Canning meat in a water bath is the same.
The problem is that Botulism is not killed by temperatures under 240. Water baths only reach 212. You could boil it for 4 days and the botulism would still survive. By the time you ate the jars, enough may not have grow to make you ill. But it is still very, very dangerous.
I could send you dozens and dozens of statements supporting what I stated above from many universities and food authorities. Here is one example from the University of Maine:
Match the canner to the food
There are two types of home canning methods: boiling-water-bath canners and pressure canners. The type of canner that you use should be based upon the type of food you are preserving. According to UMaine Food ScienceSpecialist Beth Calder, fruits, pickled foods, sauerkraut, marmalades, fruit spreads, jams, jellies, fruit butters (except for pumpkin) and salsa can be safely preserved using the water-bath canning method. "However, make sure you use a scientifically tested recipe from a reputable resource," she says.
All other foods should be preserved using a pressure canner. This is because botulism-producing bacteria produce spores that can survive boiling water temperatures, but are destroyed using a pressure canner with the appropriate time and pressure, which reaches temperatures between 240 and 250 degrees F.
I have read in other homemade pizza sauce recipes that you need to cook the mixture for at least 4-5 hours. Is this necessary?
I suppose if you really want to make sure that absolutely no vitamins
survive, you could cook it that long! :) The only reason people used to tomato
sauce that long was the Roma paste-type tomatoes, with thicker walls, meatier
with fewer seeds and less water didn't exist, so they had to cook it for hours
to get rid of water and thicken it. And of course, modern sauce mixes that
contain a little bit of corn starch as a thickener, also help shorten the time.
And for those who want to go strictly organic and au naturale, my method of
squeezing out the excess water and seeds eliminates much of the excess juice
(which you can save as tomato juice for drinking) and lets you start with a
thicker tomato pulp which means much shorter cooking time!
Canning Books, Supplies and Accessories
These are my favorite essential canning tools, books and supplies. I've been using many of these for over 50 years of canning! The ones below on this page are just the sampling of. my preferred tools. but you can find much more detailed and extensive selections on the pages that are linked below.
- Strainers, pit removers, seed-skin-stem removers, jelly strainers, etc. All types, makes and prices (from $19 to $350)
- Selecting a KitchenAid mixer and attachments for home canning
- Vacuum Foodsealers for freezing, dried foods, and refrigerated foods - the FoodSaver line
- Cherry pitters reviews, prices and ordering
- Steam Juicers
- Food dehydrators - easy and fast to dry your own fruits, veggies, sun-dried tomatoes, etc.
The All New Ball Book Of Canning And Preserving: Over 350 of the Best Canned, Jammed, Pickled, and Preserved Recipes Paperback
This is THE book on canning! My grandmother used this book when I was a child.; It tells you in simple instructions how to can almost anything; complete with recipes for jam, jellies, pickles, sauces, canning vegetables, meats, etc.
If it can be canned, this book likely tells you how! Click on the link below for more information and / or to buy (no obligation to buy)The New Ball Blue Book of Canning and Preserving
Canning and Preserving for Dummies by Karen Ward
This is another popular canning book. Click here for more information, reviews, prices for Canning and Preserving For Dummies
Of course, you do not need to buy ANY canning book as I have about 500 canning, freezing, dehydrating and more recipes all online for free, just see Easy Home Canning Directions.
Home Canning Kits
See here for related tools, equipment, supplies on Amazon See here for related tools, equipment, supplies on Amazon
I have several canners, and my favorite is the stainless steel one at right. It is easy to clean and seems like it will last forever. Mine is 10 years old and looks like new.
The black ones are the same type of standard canner that my grandmother used to make everything from applesauce to jams and jellies to tomato and spaghetti sauce.
This complete kit includes everything you need and lasts for years: the canner, jar rack, Jar grabber tongs, lid lifting wand, a plastic funnel, labels, bubble freer, It's much cheaper than buying the items separately. It's only missing the bible of canning, the Ball Blue Book.
You will never need anything else except jars & lids (and the jars are reusable)!
The complete list of canners is on these pages:
- Water bath canners - Good for acidic foods, like applesauce, pickles, salsa, jams, jellies, most fruits
- Pressure canners - needed for low and non-acidic foods, like canned vegetables (corn, green beans, etc), and meats
- Canners for glass top stoves if you have a glass or ceramic stove
- Canners for induction stovetops
Pressure Canners
If you plan on canning non-acidic foods and low acid foods that are not pickled - this means: meats, seafood, soups, green beans corn, most vegetables, etc., then you ABSOLUTELY must use a Pressure Canner.
Of course, you can use a pressure canner as a water bath canner as well - just don't seal it up, so it does not pressurize. This means a Pressure Canner is a 2-in-1 device. With it, you can can almost ANYTHING.
There are also other supplies, accessories, tools and more canners, of different styles, makes and prices, click here!
Basic Canning Accessories
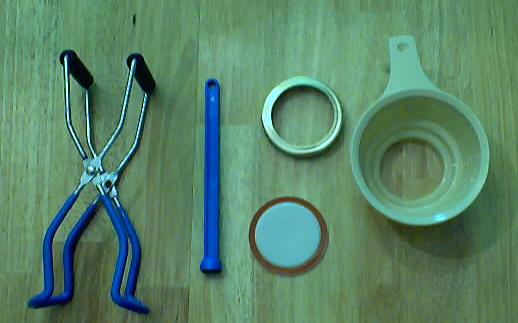
From left to right:
- Jar lifting tongs to pick up hot jars
- Lid lifter - to remove lids from the pot of boiling water (sterilizing )
- Lids- disposable - you may only use them once
- Ring - holds the lids on the jar until after the jars cool - then you remove them, save them and reuse them
- Canning Jar funnel - to fill the jars
Strainers
These are very useful for making sauces like applesauce, tomato sauce, spaghetti sauce, jellies, etc. Below are my favorites. The complete list is on these pages:
- Strainers, pit removers, seed-skin-stem removers, jelly strainers, etc. All types, makes and prices (from $19 to $350)
- Selecting a KitchenAid mixer and attachments for home canning
Inexpensive Old School Strainers: hand cranked Foley Food Mills
- The hand-cranked Foley food mill (see this page or clock the ad box) has been used for well over 100 years in homes all over America (and variants around the world). It is effective and inexpensive, and ideal for small batches. However, if you need to make many quarts, you will sure end up with tunnel carpel syndrome or some other repetitive strain injury.
Norpro 1951 Manual Food Strainer and other brand stariners, with optional motors; (almost identical to Victorio V250, Villaware and Roma models, all discontinued)
This is The next step up from the Foley food mill. First, it's far more ergonomic, and its handle is easier to use. Next, it works in continuous mode rather than batch mode. So you can do much larger volumes easily. Finally, It has an optional motor, so you can. remove the manual labor. It also offers many different size strainers to use for different types of berries, vegetables and fruit.
See the seller's website for more information, features, pricing and user reviews!
- A Johnny, Weston or Oxo strainer (about $60 - $100, see further down the page) or
- This trainer is. simply a more upscale and improved version of the one above.
- See this page for more information, reviews, descriptions of other strainers and supplies or to order!
KitchenAid - Best Large Volume Strainers
If you're going to do large volumes of fruit or vegetables , or do it year after year, then. you really should think about getting a higher end kitchen. utility device. Kitchen aids are the cream of the crop. Once you buy one of these, you keep at the rest of your life and it gets handed down to the next generation. . My sister is using one she inherited from my mother 25 years ago, who got it in the 1940s as a wedding gift. So, although the initial cost is high, they literally last for many lifetime. So the cost on an annual basis is pretty trivial, especially when you consider the cost of therapy and treatment for. the repetitive strain injuries you will get from manual cranking day after day. Add to that of course the cost of therapy for the emotional injuries you'll get from going insane, standing there hand cranking something for hours.
KitchenAid's with a sieve/grinder (with the attachments, costs about $400, but it lasts a lifetime and is fast and easy to use - I can make 100 quart jars of applesauce per day with one of these).
FREE Illustrated Canning, Freezing, Jam Instructions and Recipes
Don't spend money on books. that you don't need to. Almost everything you can find in some book sold online or in a store is on my website here for free. Start with theEasy Home Canning Directions below. That is a master list of canning directions which are all based upon the Ball Bblue book, the National Center for Home Food Preservation and other reputable lab tested recipes. Almost every recipe I present in addition to being lab tested com. is in a step by step format with photos for each step and complete. explanations. that tell you how to do it, where to get the supplies and pretty much everything you need to know. In addition, there almost always in a PDF format so you can print them out and use them while you cook.
[ Easy Home Canning Directions]
[FAQs - Answers to common questions and problems]
[Recommended books about home canning, jam making, drying and preserving!]
Looking for canning equipment and supplies?
Water bath canner with a jar rack
Pressure canners for gas, electric and induction stoves: Presto 23Qt or T-fal 22Qt
Canning scoop (this one is PERFECT)
Ball Blue book (most recent version)
Jars: 8oz canning jars for jams
Find Other types of farms:
Farm markets and roadside stands
Road trips and camping resources
Local Honey, apiaries, beekeepers
Consumer fraud and scams information
Home canning supplies at the best prices on the internet!
Maple Syrup Farms, sugarworks, maple syrup festivals
Environmental information and resources
Farms For Your Event for birthday parties, weddings, receptions, business meetings, retreats, etc.
Festivals - local fruit and vegetable festivals
Get the
most recent version of
the Ball Blue Book
With this Presto 23 quart pressure canner and pressure cooker, you can "can" everything, fruits, vegetables, jams, jellies, salsa, applesauce, pickles, even meats, soups, stews. Model 01781

You can make jams, jellies, can fruit, applesauce, salsa and pickles with water bath canners, like this Granite Ware 12-Piece Canner Kit, Jar Rack, Blancher, Colander and 5 piece Canning Tool Set

