How to freeze okra from your garden (directions, recipe, with photos)
This month's notes: August 2025: Stored US apples are still available. See your state's crop availability calendar for more specific dates of upcoming crops.
Valentine's Day - February 14 - See this website for Valentines Day history, facts and top picks for fast, easy, inexpensive gifts for the man, woman or children in your life!
Easter will be April 16, 2017 - if you want to take your children to a free Easter egg hunt - see our companion website to find a local Easter Egg hunt!
And we have home canning, preserving, drying and freezing directions. You can access recipes and other resources from the drop down menus at the top of the page or the site search. If you have any questions or suggestions, feel free to write me! Also make your own ice cream; see How to make ice cream and ice cream making equipment and manuals. Have fun, eat healthier and better tasting, and save money by picking your own locally grown fruit and vegetables, and then using our easy directions
 Subscribe
to our: Email
alerts; Follow us on Twitter
Add
this page to your favorites! -
Email this page to a friend, or to yourself
How to Freeze Okra
If you like frozen okra in the winter, just imagine how good it would taste if you had picked a firm, fresh okra yourself and then quickly froze them at home! It is also one of the simplest ways to put up a vegetable for the winter. Here's how to do it, complete instructions in easy steps and completely illustrated. The okra will taste MUCH better than anything you've ever had from a store.
Directions for Freezing okra
Ingredients
- fresh okra - any quantity. I figure one medium sized okra per serving (it does cook down)
Equipment
- 1 Large pot of boiling water
- 2 large bowls, one filled with cold water and ice.
- 1 sharp knife
- Vacuum food sealer or "ziploc" type freezer bags (the freezer bag
version is heavier and protects better against freezer burn.
See here for related tools, equipment, supplies on Amazon
Instructions
|
|
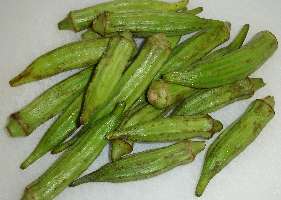
Step 1 - Get the okra!Start with fresh okra - as fresh as you can get. If there is a delay between harvesting and freezing, put it in the refrigerator or put ice on it. Select young tender pods and separate into small pods (4 inches or under) and large pods. The smooth type varieties freeze as well as or better than the ridged varieties because they do not split as easily. |
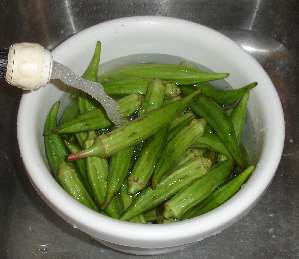
Step 2 - Wash the okra!I'm sure you can figure out how to rinse the okra in plain cold or lukewarm water. |
|
|
|
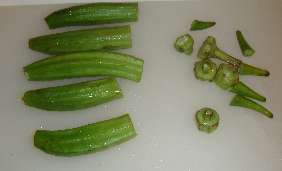
Step 3 - Slice the okraJust take a sharp knife and remove the stems at the end of the seed cells, being careful not to expose the seed cell. Prepare quickly, (if you leave it sit cut for more than a half hour, it will start to discolor). Do enough okra for one blanching at a time. |
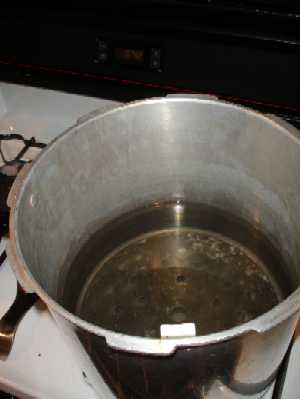 |
Step 4 - Get the pots readyGet the pot of boiling water ready (about 2/3 filled). Also get a LARGE bowl of ice and cold water ready to receive the okra after blanching. |
Step 5 - Blanch the okra.All fruits and vegetables contain enzymes and bacteria that, over time, break down the destroy nutrients and change the color, flavor, and texture of food during frozen storage. okra requires a brief heat treatment, called blanching, in boiling water or steam, to destroy the enzymes before freezing. Cook (blanch) small pods 3 minutes and large pods 4 minutes.
|
Begin counting the blanching time as soon as you place the okra in the boiling water. Cover the kettle and boil at a high temperature for the required length of time. You may use the same blanching water several times (up to 5). Be sure to add more hot water from the tap from time to time to keep the water level at the required height. |
Step 6 - Cool the okraRemove the okra from the boiling water with a slotted spoon and place in ice water to cool for about 5 minutes (until cold). Cooling them quickly prevents overcooking. Keep adding more ice as needed. Drain thoroughly (2 or 3 minutes). You can leave the okra whole
or slice it crosswise so it is ready to use. |
|
Step 6A - IF YOU WILL BE FRYING THE OKRA LATERIf you will be using the okra for frying later, you can prepare it now. If you will not be frying it later, or don't know; skip this step and continue to step 8. Slice the okra crosswise and dredge it with corn meal or flour. Spread in a single layer on shallow trays. Place the trays in freezer just long enough to freeze solid (usually 2 to 4 hours) |
|
Step 7 - bag the okraI love the FoodSavers (see this page for more information) with their vacuum sealing! I am not paid by them, but these things really work. If you don't have one, ziploc bags work, too, but it is hard to get as much air out of the bags. remove the air to prevent drying and freezer burn. TIP: If you don't own a vacuum food sealer to freeze foods, place food in a Ziploc bags, zip the top shut but leave enough space to insert the tip of a soda straw. When straw is in place, remove air by sucking the air out. To remove straw, press straw closed where inserted and finish pressing the bag closed as you remove straw. |
Foodsaver vac bag |
|
Ziploc bag |
Step 8 - Done!Pop them into the freezer, on the quick freeze shelf, if you have one!
|
Tips:
- Harvest the okra at its peak maturity (firm, not limp or old)
- Process promptly after harvesting, or keep cooled in the fridge or with ice until then.
- If the okra is watery when thawed, discard the liquid before using.
- An alternative method is to cook the okra first - using you favorite recipe for a zucchini casserole, or sauteed okra, etc., and then simply freeze the cooked okra! Of course, it does take up more room in your freezer.
Frequently Asked Questions
- How long can they be frozen?
It depends upon how cold is your freezer and how you packed them. Colder (deep freezes) are better than frost free compartments, which actually cycle above freezing (that's how they melt the ice). Vacuum packing results in longer storage capability, too. Thicker bags also help prevent freezer burn.
In general, up to 9 months in a ziploc bag in an ordinary freezer, and 14 months in a deep freeze in a vacuum packed bag. After that, they beans won't make you sick; they just won't taste a s good.
Picking Tips
[General picking tips and a guide to each fruit and vegetable] [How
much do I need to pick?
(Yields - how much raw makes how much cooked or frozen)] [Selecting
the right varieties to pick] [All
about apple varieties - which to pick and why!] [Picking tips for Vegetables]
[ Strawberry picking tips]
[ Blueberries picking tips]
Illustrated Canning, Freezing, Jam Instructions and Recipes
[ All About Home Canning, Freezing and Making Jams, Pickles, Sauces, etc. ] [FAQs - Answers to common questions and problems] [Recommended books about home canning, jam making, drying and preserving!] [Free canning publications to download and print]


