
Looking for How to Freeze Tomatoes - Easily! With Step-by-step Photos, Recipe, Directions, Ingredients and Costs in 2025? Scroll down this page and follow the links. And if you bring home some fruit or vegetables and want to can, freeze, make jam, salsa or pickles, see this page for simple, reliable, illustrated canning, freezing or preserving directions. There are plenty of other related resources, click on the resources dropdown above. If you are having a hard time finding canning lids, I've used these, and they're a great price & ship in 2 days.
If you have questions or feedback, please let me know! There are affiliate links on this page. Read our disclosure policy to learn more.
How to Freeze Tomatoes - Easily! With Step-by-step Photos, Recipe, Directions, Ingredients and Costs
How to Freeze Tomatoes From Your Garden
Are your tomato plants producing more tomatoes than you can use or give away and you haven't got time to can? Here's how to easy freeze the tomatoes, in a way that saves space in your freezer and makes canning or using the tomatoes later much easier. Then, when you have time later, you can use them to make a fresh spaghetti sauce, lasagna, chili, or other tomato-based meals for that fresh garden taste.
Freezing home grown or farm fresh tomatoes for use in winter cooking is very easy to do! The flavor of spaghetti sauce, lasagna, and salsas you make then will be superior to those made from canned tomatoes or store bought so called "fresh" tomatoes.
Here's how to do it, in easy steps and completely illustrated. This method is so easy, ANYONE can do this! It's a great thing to do with your kids! If you'd rather can your tomatoes, see this page for canning directions for tomatoes!
These pages may also interest you:
Ingredients and Equipment
|
|
Process - How to Make Spaghetti Sauce from Fresh Tomatoes
Step 1 - Selecting the tomatoes
It's fun to go pick your own and you can obviously get better quality tomatoes!
At right is a picture of tomatoes from my garden -
they are so much better than anything from the grocery store. And if you
don't have enough, a pick-yo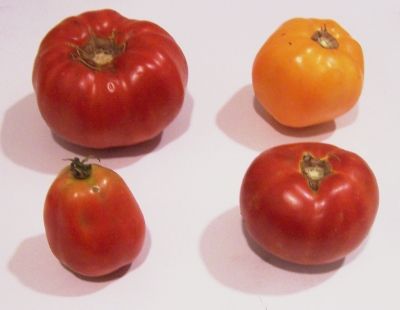 u-own
farm is the place to go! Below are 4 common varieties that will work:
u-own
farm is the place to go! Below are 4 common varieties that will work:
Top left: Beefsteak
Bottom left: Roma, paste-type
Top right: Lemon Boy, yellow
Bottom right: Better Boy
 The
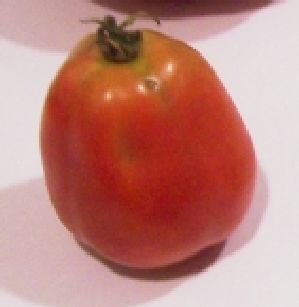
picture at right shows the best variety of tomato to use: Roma; also called
paste tomatoes. They have fewer sides, thicker, meatier walls, and
less water.
And that means thicker sauce in less cooking time!
The
picture at right shows the best variety of tomato to use: Roma; also called
paste tomatoes. They have fewer sides, thicker, meatier walls, and
less water.
And that means thicker sauce in less cooking time!
Also, you don't want mushy, bruised or rotten tomatoes!
Step 2 - Removing the tomato skins
Here's a trick you may not know: put the tomatoes, a few at a time in a large pot of boiling water for no more than 1 minute (30 - 45 seconds is usually enough)
then....
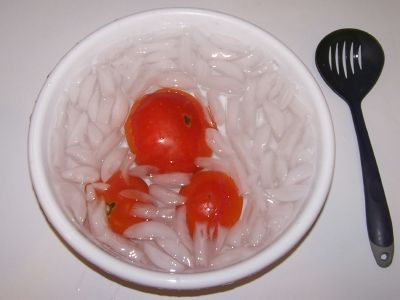
Plunge them into a waiting bowl of ice water.
This makes the skins slide right off of the tomatoes! If you leave the skins in, they become tough and chewy in the sauce, not very pleasant.
 Step
3 - Removing the skins, bruises and tough parts
Step
3 - Removing the skins, bruises and tough parts
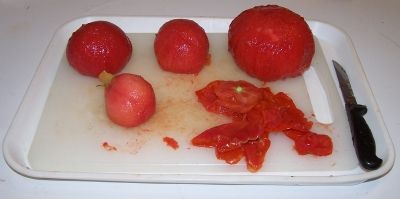
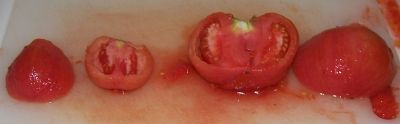
The skins should practically slide off the tomatoes. then you can cut the tomatoes in quarters and remove the tough part around the stem and any bruised or soft parts.
After you have peeled the skins off the tomatoes, cut the tomatoes in half. Now we need to remove the seeds and excess water.
Note: why remove the skins? They become tough and discolored in storage. You wouldn't want to eat them!
Step 4 - Squeeze of the seeds and water
Just like it sounds: wash your hands then squeeze each tomato and use your finger or a spoon to scoop and shake out most of the seeds. You don't need to get fanatical about it; removing just most will do. Another way to do it is to cut each tomato in half, across it, instead of lengthwise. Then just shake the seeds and juice out. Here are before and after photos:
![]()
Step 5 - Drain the tomatoes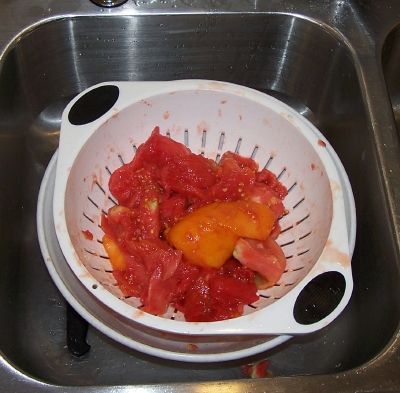
Toss the squeezed (Squozen? :) tomatoes into a colander or drainer, while you work on others. This helps more of the water to drain off. You may want to save the liquid: if you then pass it through a sieve, screen or cheesecloth, you have fresh tomato juice; great to drink cold or use in cooking! By draining the water off now, you will end up with a thicker spaghetti sauce in less cooking time! And that preserves vitamins (and your sanity).
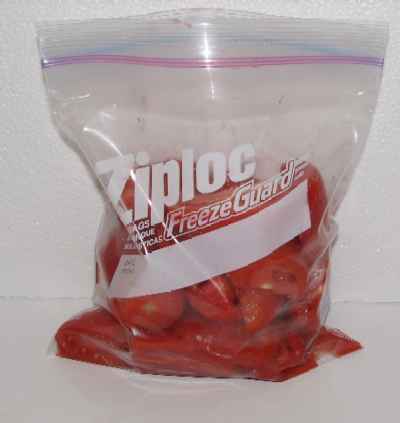
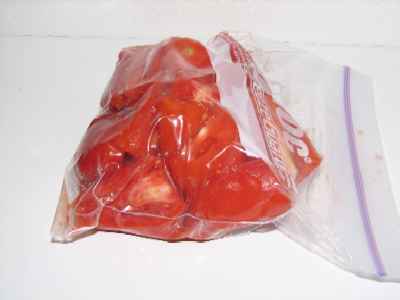
Step 6 - Fill the freezer bags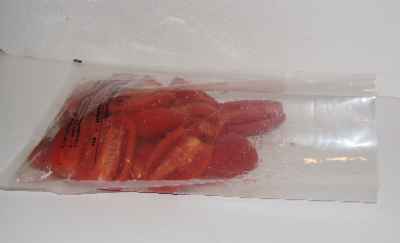
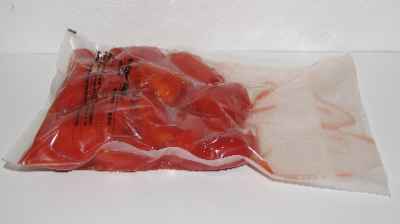
Don't overfill the bags, leave a little room for expansion. Do try to avoid leaving any air pockets! A vacuum bag is shown at left, but you can use ziploc (or similar) bags, show below. But be sure to squeeze out the extra air (below left is before, below right is after squeezing out the excess air)
Step 7 - Vacuum seal the bags (if you have a vacuum sealer)
 Obviously
if you haven't got a vacuum food sealer, just inspect the bags and you
may need to open them and reseal them to eliminate any air pockets!
Obviously
if you haven't got a vacuum food sealer, just inspect the bags and you
may need to open them and reseal them to eliminate any air pockets!
TIP: If you don't own a vacuum food sealer to freeze foods, place food in a Ziploc bags, zip the top shut but leave enough space to insert the tip of a soda straw. When straw is in place, remove air by sucking the air out. To remove straw, press straw closed where inserted and finish pressing the bag closed as you remove straw.
Step 8 - Freeze the bags
 Pop
them into the freezer (on the quick freeze shelf, if you have one).
Now leave them for 2 or 3 hours till frozen.
Pop
them into the freezer (on the quick freeze shelf, if you have one).
Now leave them for 2 or 3 hours till frozen.
Put in the back (coldest part) of your freezer
And wait for a cold winter night when it is dark and dreary out, to remove it and defrost (microwave works well) and use in making so fresh tasting spaghetti sauce or other tomato cooking!
Freezing keeps tomatoes safe to eat almost indefinitely, but the recommended maximum storage time of 12 months is best for taste and quality. The quality of the frozen tomatoes is maintained best in a very cold freezer (deep freezer), and one that keeps them frozen completely with no thaw cycles. Excluding any air from inside the bags which leads to freezer burn, by using vacuum-sealed bags, is also important to maintaining quality
|
|
|
Other Equipment:From left to right:
|
 |
| McSunley 21.5 quart Water Bath Canner, Stainless Steel Granite Ware 21 QT, 9 Piece Enamelware Water bath Canning Pot with Canning kit, Colander and Rack VKP Brands Water Bath AND Steam Canner, 20 Quart Stainless Steel, flat-bottomed Induction range compatible and safe for smooth top ranges. 
|
Home Canning KitsThis is the same type of standard canner that my grandmother used
to make everything from applesauce to jams and jellies to tomato and
spaghetti sauce. This complete kit includes everything you need and lasts
for years: the canner, jar rack, Jar grabber tongs, lid lifting wand, a
plastic funnel, labels, bubble freer, and the bible of canning, the Ball
Blue Book. It's much cheaper than buying the items separately. You will never need anything else except jars & lids! To see more canners, of different styles, makes and prices, click here!For
more information and current pricing: |
Summary - Cost of Making Homemade Spaghetti Sauce - makes 7 pint jars, 16 oz each* |
||||
| Item | Quantity | Cost in 2025 | Source | Subtotal |
| Tomatoes | 20 - 25 lbs (to make about 16 cups of prepared tomato) | free from the garden, or $0.50 cents at a PYO | Garden | $0.00 |
| Canning jars (pint size, wide mouth), includes lids and rings | 7 jars | $8.00/dozen | Grocery stores, like Publix, Kroger and Safeway and local "big box" stores; sometimes Big Lots and even hardware stores | $4.50 |
| Total | $6.50 total or about $0.95 per jar INCLUDING the jars - which you can reuse! |
|||
|
* - This assumes you already have the pots, pans, ladles,, and reusable equipment. Note that you can reuse the jars! Many products are sold in jars that will take the lids and rings for canning. For example, Classico Spaghetti sauce is in quart sized jars that work with Ball and Kerr lids and rings. Note that the Classico's manufacturer does not recommend reuse of their jars: see what they have to say on this page: |
||||
Answers to Common Questions
What did I do wrong if my jars spoil?
Tomatoes are a borderline acid / low acid fruit (see this page about tomato acidity for more information) - adding lemon juice helps, processing at least 35 minutes in the water bath canner, or better still, using a Pressure Canner almost eliminates spoilage. If you don't have a pressure canner, you must boost the acid level of the sauce, by adding 2 tablespoons of lemon juice or 1/2 teaspoon of citric acid per quart of sauce.
I have read in other homemade spaghetti sauce recipes that you need to cook the mixture for at least 4-5 hours. Is this necessary?
I suppose if you really want to make sure that absolutely no vitamins
survive, you could cook it that long! :) The only reason people used to tomato
sauce that long was the Roma paste-type tomatoes, with thicker walls, meatier
with fewer seeds and less water didn't exist, so they had to cook it for hours
to get rid of water and thicken it. And of course, modern sauce mixes that
contain a little bit of corn starch as a thickener, also help shorten the time.
And for those who want to go strictly organic and au naturale, my method of
squeezing out the excess water and seeds eliminates much of the excess juice
(which you can save as tomato juice for drinking) and lets you start with a
thicker tomato pulp which means much shorter cooking time!


Looking for canning equipment and supplies?
Water bath canner with a jar rack
Pressure canners for gas, electric and induction stoves: Presto 23Qt or T-fal 22Qt
Canning scoop (this one is PERFECT)
Ball Blue book (most recent version)
Jars: 8oz canning jars for jams
Find Other types of farms:
Farm markets and roadside stands
Road trips and camping resources
Local Honey, apiaries, beekeepers
Consumer fraud and scams information
Home canning supplies at the best prices on the internet!
Maple Syrup Farms, sugarworks, maple syrup festivals
Environmental information and resources
Farms For Your Event for birthday parties, weddings, receptions, business meetings, retreats, etc.
Festivals - local fruit and vegetable festivals
Get the
most recent version of
the Ball Blue Book
