
Looking for Crabapple Jelly - Make and Jar Your Own Easily! Fully Illustrated and Step-by-Step Recipe! in 2025? Scroll down this page and follow the links. And if you bring home some fruit or vegetables and want to can, freeze, make jam, salsa or pickles, see this page for simple, reliable, illustrated canning, freezing or preserving directions. There are plenty of other related resources, click on the resources dropdown above. If you are having a hard time finding canning lids, I've used these, and they're a great price & ship in 2 days.
If you have questions or feedback, please let me know! There are affiliate links on this page. Read our disclosure policy to learn more.
Crabapple Jelly - Make and Jar Your Own Easily! Fully Illustrated and Step-by-Step Recipe!
How to Make Homemade Crabapple Jelly
Yield: About 10 to 12 half-pint (8-ounce) jars
Making and canning your own crabapple jelly is quite easy. Here's how to do it, in 13 easy steps and completely illustrated. These directions work equally well for pear, peach, nectarine, plum and apricot jellies. For jam of these fruit, see this page; or see this page for berry jams, this page for Fig Jam and this page for Blueberry Jam directions!Also, see our pages on tips for picking apples at a farm, easy illustrated directions to make applesauce, apple butter and apple pie; and our list of apple festivals!
Ingredients
- 6 lbs. of crabapples to yield about 6 cups of crabapple juice (see step 1) OR 6 cups of crabapple juice (skip to step 7)
- Water (in which to cook the crabapples). about 6 cups of water. You can cook them in apple juice for a more intense apple flavor)
- Sweetener: sugar, no-sugar, Stevia (but you will have to experiment with amount, each brand of Stevia is a different concentration), or Splenda, or a mix of sugar and Stevia (or Splenda) or fruit juice - see step 7
- Cinnamon (optional!) I like 1/2 teaspoon per batch
- Pectin: Crabapples normally have sufficient natural pectin in them to form a gel, but I have found adding a half packet of dry no-sugar-needed pectin yields a more reliable set, and can substantially reduce or eliminate the need to add sugar.
Equipment
- Jar grabber (to pick up the hot jars)
- Jar funnel ($4 at mall kitchen stores and local "big box" stores, but it's usually cheaper online from our affiliates)
- At least 1 large pot
- Jelly strainer (see step 6) or cheesecloth
- Large spoons and ladles,
- Canning jars (often called Ball jars, Mason jars or Kerr jars) (Publix, Kroger, other grocery stores and some "big box" stores carry them - now about $12 per dozen quart jars (up 50% in 2 years!) including the lids and rings)
- 1 water bath canner (a huge pot with a lifting rack to sanitize the jars of crabapple jelly after filling (about $30 to $35 at mall kitchen stores and local "big box" stores, but it's usually cheaper online from our affiliates) You CAN use a large pot instead, but the canners are deeper, and have a rack top make lifting the jars out easier. If you plan on canning every year, they're worth the investment.
- Vegetable / fruit peeler ($1.99 at the grocery store)
Recipe and Directions
Step 1 - Selecting the crabapples
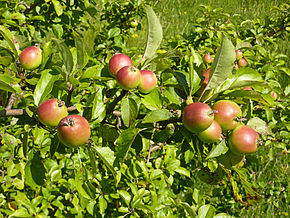 The
most important step! Crabapples are not sweet nor usually all that
perfectly shaped, but they should not be rotten or buggy. Your fact
for the day is: The crabapple is the only apple native to North America.
The
most important step! Crabapples are not sweet nor usually all that
perfectly shaped, but they should not be rotten or buggy. Your fact
for the day is: The crabapple is the only apple native to North America.
Step 2 - How many crabapples and where to get them
You can pick your own, or buy them at some farm stands. Crabapple trees are often used as pollinators for apple orchards, so ask at apple orchards. They may let you pick them for little or free. But for large quantities, you will find that real farmer's markets, like the State Farmer's Market in Forest Park, Georgia have them at the best prices. It's rare, but they do occasionally carry them.
Select firm, crisp crabapples, about 1/4 firm ripe and 3/4 fully ripe.
You will get about 14 quarts of crabapple jelly per bushel of crabapples.
Step 3 -Wash the crabapples!
I'm sure you can figure out how to wash the apples in plain cold water and remove any stickers or labels on them.
Note: a steam juicer works best for extracting juice from crabapple, but the method below will yield the same results, it's just more work.
Note: You CAN use a juicer, if you have one. In which case, just wash and chop the crabapples as the directions with your juicer require, juice the crabapples and skip to step 7. Juicing results in a more clear jelly, if that matters to you.
Step 4 -Chop the crabapples!
Remove stem and blossom ends; do not pare or core. Cut crabapples into
small pieces. 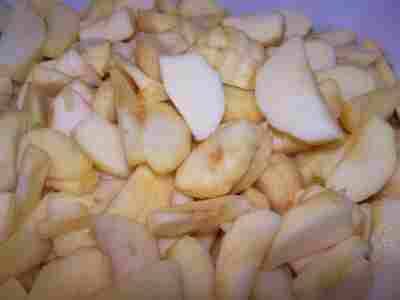 They
do not need to be peeled! (even though the picture shows peeled!)
They
do not need to be peeled! (even though the picture shows peeled!)
Using a paring knife, be sure to remove any hard parts (usually the part around the seeds) and any mush or dark areas.
Step 5 - Cook the Apples
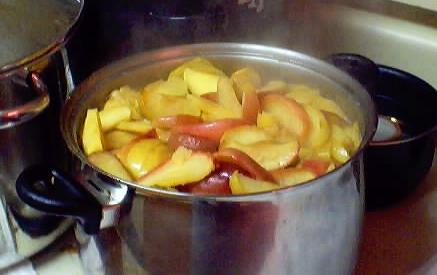 Pretty
simple! Put about 6 cups of water (I use filtered tap water) on the
bottom of a huge, thick-bottomed pot. . How much water to use is not an exact science, since some
varieties of apples are much more juicy, and even the same variety
varies depending upon the weather.
Pretty
simple! Put about 6 cups of water (I use filtered tap water) on the
bottom of a huge, thick-bottomed pot. . How much water to use is not an exact science, since some
varieties of apples are much more juicy, and even the same variety
varies depending upon the weather.
Put the lid on, and the heat on high. When it gets really going, turn it to medium high. Stir to prevent scorching. Simmer for 20 to 25 minutes, or until crabapples are soft through and through. Do not overcook; excess boiling will destroy the pectin, flavor and color.
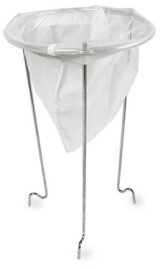
Step 6 - Sieve the cooked apples
|
When fruit is tender, pour everything through a double layer of dampened cheesecloth or a damp jelly bag. You can either put the soft cooked apples through a jelly strainer (about $9.00, see ordering at right, or pour them through cheesecloth in a colander. Drain the juice without pressing or squeezing, which will cause cloudy jelly. If a fruit press is used, the juice should be restrained through a jelly bag. Or if you don't mind slightly chunky jelly, you don't need to sieve it. Just let the juice stand for 20 minutes, and Decant (pour off) the mostly clear liquid to use. Discard the bigger chunks of solids left behind at the bottom. Then pour the rest through a plain kitchen sieve. The only purpose of the sieve/filtering is to make a clearer jelly. The more you filter it, the clearer it is. But it tastes the same! I pointed out in the ingredients list that you could start with apple juice, store bought or your own. Either way, you will need about 5 or 6 cups of juice now. |
Step 7 - Measure out the sweetener
Depending upon which type of jam you're making (sugar, no-sugar, Stevia (but you will have to experiment with amount, each brand of Stevia is a different concentration), or Splenda, or a mix of sugar and Stevia (or Splenda) or fruit juice) you will need to use a different amount of sugar and type of pectin. The precise measurements are found in directions inside each and every box of pectin sold (every brand, Ball, Kerr, Mrs. Wages, etc. has directions inside). I haven't seen a jelly recipe that uses only Stevia (in a prepared form like Truvia, it measures same as sugar; if you use another form, you will need do your own conversion) - or Splenda, if you prefer, , and I haven't yet tried it; I suspect it would taste bland.
| Type of jam |
Type of pectin to buy |
Sweetener |
| regular | no-sugar or regular | 7 cups of sugar |
| low sugar | no-sugar | 4.5 cups of sugar |
| lower sugar | no-sugar | 2 cups sugar and 2 cups Splenda (or about 1/3 that if you use Stevia, which is my preference) |
| no sugar | no-sugar | 4 cups Splenda (or about 1/3 that if you use Stevia, which is my preference) |
| natural | no-sugar | 3 cups fruit juice (grape, peach, apple or mixed) |
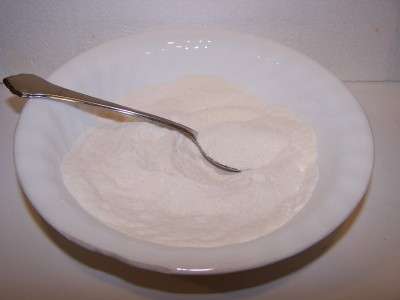
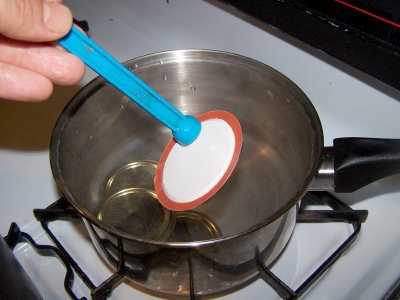
Step 8 - Mix the dry pectin with about 1/4 cup of sugar or other sweetener
First, let me say that crabapples are normally very high in pectin naturally, so you may not need to use any pectin at all. I usually use half a packet (3 Tablespoons) of dry, no-sugar-needed pectin, just to be sure I get a good firm jelly. It's up to you! Note: 1 packet of dry pectins is equal to 3 Tablespoons of pectin.
 In
a small bowl, mix the dry pectin with about 1/4 cup of sugar (or other
sweetener). Keep this separate from the rest of the sugar. If you are not
using sugar, you will just have to stir more vigorously to prevent the pectin
from clumping.
In
a small bowl, mix the dry pectin with about 1/4 cup of sugar (or other
sweetener). Keep this separate from the rest of the sugar. If you are not
using sugar, you will just have to stir more vigorously to prevent the pectin
from clumping.
Notes about pectin: Crabapple jelly should only require about a half packet of pectin per batch, more if you are adding less or no sugar. With a little practice, you will find out exactly how much pectin to get the thickness you like.
For more about the types of pectin sold, see this page!
Is your jam too runny? Pectin enables you to turn out perfectly set jam
every time. Made from natural apples, there are also natural no-sugar
pectins that allow you to reduce the sugar you add by half or even eliminate
sugar.!
Get canning jars, rings, lids and pectin deliverd:
Step 9 - Mix the crabapple juice with the pectin (if you decided to add pectin) and cook to a full boil
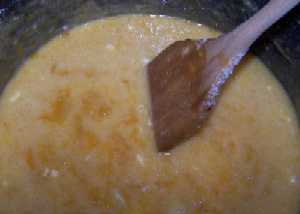 Stir
the pectin into the crabapple juice and put the mix in a big pot on the
stove over medium to high heat (stir often enough to prevent burning).
It should take about 5 to 10 minutes to get it to a full boil (the kind
that cannot be stirred away).
Stir
the pectin into the crabapple juice and put the mix in a big pot on the
stove over medium to high heat (stir often enough to prevent burning).
It should take about 5 to 10 minutes to get it to a full boil (the kind
that cannot be stirred away).
Some foam on the surface is normal. You will skim it off later.
Step 10 - Add the remaining sugar and bring to a boil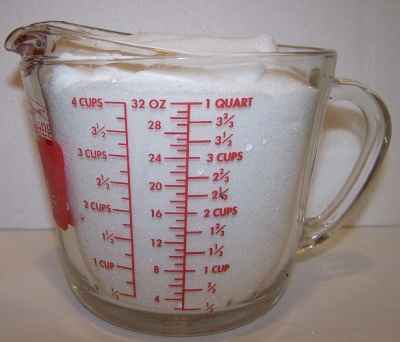
When the crabapple-pectin mix has reached a full boil, add the rest of the sugar (or other sweetener) or other sweetener, and then bring it back to a boil and boil hard for 1 minute.
Step 10 - Testing for "jell" (thickness)
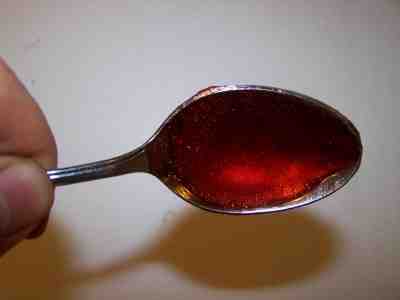 I
keep a metal tablespoon sitting in a glass of ice water, then take a half
spoonful of the mix and let it cool to room temperature on the spoon. If
it thickens up to the consistency I like, then I know the jam is ready. If
not, I mix in a little more pectin (about 1/4 to 1/2 of another package)
and bring it to a boil again for 1 minute.
I
keep a metal tablespoon sitting in a glass of ice water, then take a half
spoonful of the mix and let it cool to room temperature on the spoon. If
it thickens up to the consistency I like, then I know the jam is ready. If
not, I mix in a little more pectin (about 1/4 to 1/2 of another package)
and bring it to a boil again for 1 minute.
(Yes, I know the jam on the spoon in the photo is red - that was from making strawberry jam, but aside from the color, it should look the same).
Step 11 - Fill the jars and put the lid and rings on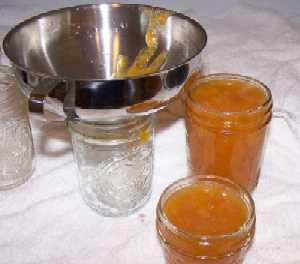
Fill them to within 1/4-inch of the top, (that's the "headspace") wipe any spilled jam off the top, seat the lid and tighten the ring around them. Then put the filled jars into the canner!
This is where the jar tongs and lid lifter come in really handy!
Step 12 - Process the jars in the boiling water bath
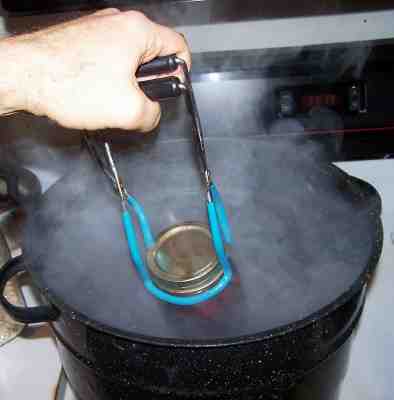 Keep
the jars covered with at least 2 inches of water. Keep the water boiling. In
general, boil them for 10 minutes, which is what SureJell (the makers of the
pectin) recommend. I say "in general" because you have to process
(boil) them longer at higher altitudes than sea level, or if you use larger
jars,
or
if you did not sanitize the jars and lids right before using them. The
directions inside every box of pectin will tell you exactly. The
directions on the pectin tend to be pretty conservative. Clemson
University says you only need to process them for 5 minutes. I usually
hedge my bets and start pulling them out after 7 minutes, and the last jars
were probably in for 10. I rarely have a jar spoil, so it must work.
Keep
the jars covered with at least 2 inches of water. Keep the water boiling. In
general, boil them for 10 minutes, which is what SureJell (the makers of the
pectin) recommend. I say "in general" because you have to process
(boil) them longer at higher altitudes than sea level, or if you use larger
jars,
or
if you did not sanitize the jars and lids right before using them. The
directions inside every box of pectin will tell you exactly. The
directions on the pectin tend to be pretty conservative. Clemson
University says you only need to process them for 5 minutes. I usually
hedge my bets and start pulling them out after 7 minutes, and the last jars
were probably in for 10. I rarely have a jar spoil, so it must work.
Note: Some people don't even boil the jars; they just ladle it hot into hot jars, put the lids and rings on and invert them, (this is called "open kettle" processing). Open kettle process is universally condemned by all of the authorities (USDA, FDA, Universities - Clemson, UGa, Minnesota, WI, Michigan, etc,.) as being inherently dangerous and conducive to botulism. It does not create a sterile environment; it does create the ideal environment for botulism to grow.
Putting the jars in the boiling water bath REALLY helps to reduce spoilage!
To me, it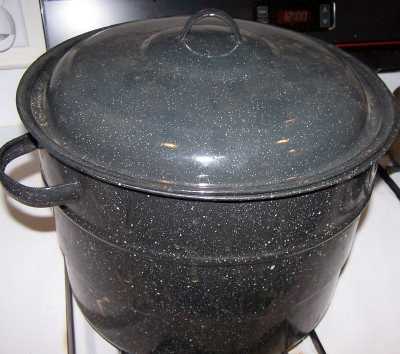 makes little sense to put all the working into making the jam and then
not to process the jars to be sure they don't spoil or risk your family's
health.!
makes little sense to put all the working into making the jam and then
not to process the jars to be sure they don't spoil or risk your family's
health.!
Step 13 - Remove and cool the jars - Done!
Lift
the jars out of the water and let them cool without touching or bumping
them in a draft-free place (usually takes overnight) You can then remove
the rings if you like, but if you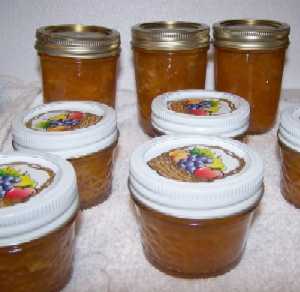 leave them on, at least loosen them
quite a bit, so they don't rust in place due to trapped moisture. Once
the jars are cool, you can check that they are sealed verifying that the
lid has been sucked down. Just press in the center, gently, with your
finger. If it pops up and down (often making a popping sound), it is not
sealed. If you put the jar in the refrigerator right away, you can still
use it. Some people replace the lid and reprocess the jar, then that's a
bit iffy. If you heat the contents back up, re-jar them (with a new lid)
and the full time in the canner, it's usually ok.
leave them on, at least loosen them
quite a bit, so they don't rust in place due to trapped moisture. Once
the jars are cool, you can check that they are sealed verifying that the
lid has been sucked down. Just press in the center, gently, with your
finger. If it pops up and down (often making a popping sound), it is not
sealed. If you put the jar in the refrigerator right away, you can still
use it. Some people replace the lid and reprocess the jar, then that's a
bit iffy. If you heat the contents back up, re-jar them (with a new lid)
and the full time in the canner, it's usually ok.
Once cooled, they're ready to store. I find they last up to 12 months. But after about 6 to 8 months, they get darker in color and start to get runny. They still are safe to eat, but the flavor and texture aren't as good. So eat them in the first 6 months after you prepare them!
Other Equipment:
From left to right:
- Jar lifting tongs
helpful to pick up hot jars
- Lid lifter
- to remove lids from the pot
of hot water - Lids
- disposable - you may only
use them once - Ring
- holds the lids on the jar until after
the jars cool - then you remove them, save them and reuse them - Canning Jar funnel
- to fill the jars


Looking for canning equipment and supplies?
Water bath canner with a jar rack
Pressure canners for gas, electric and induction stoves: Presto 23Qt or T-fal 22Qt
Canning scoop (this one is PERFECT)
Ball Blue book (most recent version)
Jars: 8oz canning jars for jams
Find Other types of farms:
Farm markets and roadside stands
Road trips and camping resources
Local Honey, apiaries, beekeepers
Consumer fraud and scams information
Home canning supplies at the best prices on the internet!
Maple Syrup Farms, sugarworks, maple syrup festivals
Environmental information and resources
Farms For Your Event for birthday parties, weddings, receptions, business meetings, retreats, etc.
Festivals - local fruit and vegetable festivals
Get the
most recent version of
the Ball Blue Book
