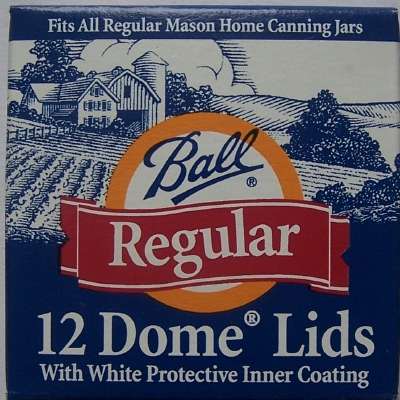
Looking for Canning Beets: How to can your own homemade canned beets in 2025? Scroll down this page and follow the links. And if you bring home some fruit or vegetables and want to can, freeze, make jam, salsa or pickles, see this page for simple, reliable, illustrated canning, freezing or preserving directions. There are plenty of other related resources, click on the resources dropdown above. If you are having a hard time finding canning lids, I've used these, and they're a great price & ship in 2 days.
If you have questions or feedback, please let me know! There are affiliate links on this page. Read our disclosure policy to learn more.
Canning Beets: How to can your own homemade canned beets
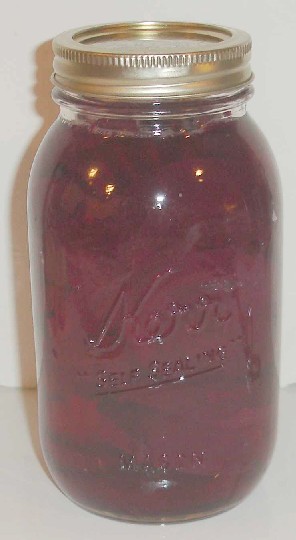 How to Make Homemade Canned Beets
You think making and canning your own beets is difficult or expensive? Not at all! You can do it with basic equipment already in your kitchen - the only special equipment required is a Pressure Canner. So, here's how to can beets! The directions are complete with instructions in easy steps and completely illustrated. In the winter when you open a jar, the beets will taste MUCH better than any store-bought canned beets! Prepared this way, the jars have a shelf life of about 12 months, and aside from storing in a cool, dark place, require no special attention.
One other important note: you will need a Pressure Canner. Beets are a low acid food, so you cannot use a water bath canner . It must be a Pressure Canner. Pressure canners cost more than water bath canners, but they are more versatile and last a lifetime, and your children and grandchildren may be using it. I've had mine for 20 years and it looks good for another 50 years. See this page for more information about pressure canners.
See this FAQ for more details: Can I use a water-bath canner instead of a Pressure Canner for low acid foods?
And should you have any problems, click here for Frequently asked questions about canning beets.
Directions for Making Canned Beets
Ingredients
- 7 to 8 lbs of prepared beets (see step 1)
- 11/2 teaspoons canning or pickling salt (Optional - only if you like the taste; it is not needed for dany other reason. I do not use any salt)
Equipment
1 Pressure Canner (a large pressure pot with a lifting rack to sanitize the jars after filling about $75 to $200 at mall kitchen stores and "big box" stores, but it is cheaper online; see this page for more about pressure canners).
Ball jars (Publix, Kroger, other grocery stores and some "big box" stores carry them - about $7 per dozen pint jars including the lids and rings)
- Jar grabber (to pick up the hot jars)
- Jar funnel ($4 at mall kitchen stores and local "big box" stores, but it's usually cheaper online from our affiliates)At least 1 large pot and 1 medium pot or saucepan
- Large spoons and ladles,
Recipe and Directions
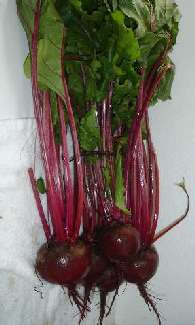
Step 1 - Selecting the beets
The most important step! You need beets that are FRESH and crisp. Limp, old beets will make nasty tasting canned beets. Guests will probably throw them at you.. Select firm, crisp beets. Remove and discard any soft, diseased, spotted and chewed up beets. Beets with a diameter of 1 to 2 inches are preferred for whole packs. Beets larger than 3 inches in diameter are often fibrous.
How many beets and where to get them
You can grow your own, pick your own, or buy them at the grocery store. About 7 pounds of 2- to 2 1/2-inch diameter beets makes about 4 pints of beets. An average of 21 pounds (without tops) is needed per canner load of 7 quarts; an average of 14 pounds of beets is needed per canner load of 9 pints. A bushel (without tops) weighs 52 pounds and yields 15 to 20 quarts--an average of 3 pounds per quart. But fitting the beets in the jars means this may vary considerably, especially when you change jar sizes..
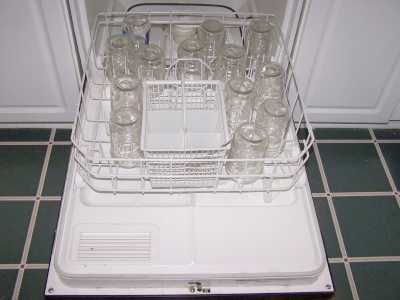
Step 2 - Prepare the jars and canner
Wash the jars and lids
This is a good time to get the jars ready! The dishwasher is fine for the jars; especially if it has a "sanitize" cycle. Otherwise put the jars in boiling water for 10 minutes. I just put the lids in a small pot of almost boiling water for 5 minutes, and use the magnetic "lid lifter wand" (available from target, other big box stores, and often grocery stores; and available online - see this page) to pull them out.
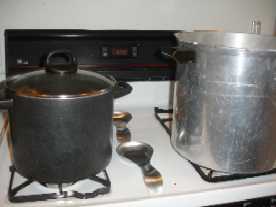
Get the canner heating up
Rinse out your canner, put the rack in the bottom, and fill it with hot tap water. (Of course, follow the instruction that came with the canner, if they are different). Put it on the stove over low heat just to get it heating up for later on. You can also get the large pot 2/3 filled with water boiling, and the saucepan with 6 quarts of water boiling too. The saucepan provides make-up hot water to use when filling the jars later on!
Step 3 - Trim the ends and cut into smaller pieces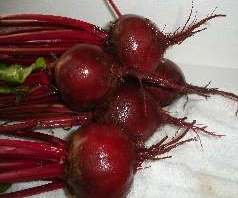
Just take a sharp knife and trim off beet tops, leaving an inch of stem and roots to prevent bleeding of color.
Step 4 -Wash the beets!
I'm sure you can figure out how to scrub the beets in plain cold or lukewarm water using your hands or a vegetable brush.
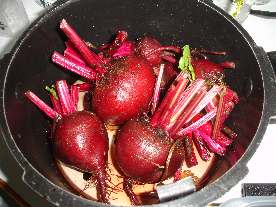
Step 5 - Cook the beets
Put similar sized beets (hopefully, they're ALL of a similar size so they take the same time to cook) together with enough boiling water to cover them and cook until tender (usually about 30 to 45 minutes in an open pot, or 10 - 15 minutes in a pressure cooker). Drain and discard the liquid.
Step 6 - Cool the beets
 You can pour ice over them, or just let them cool on their own. It's just to coll them enough so you can handle them to remove the skins, stems, roots and then slice or quarter them.
Step 7 - Rinse the pot and refill with fresh water
Rinse the pot that you cooked the beets in, and refill with fresh water and bring to a boil. You will use this to cover the beets, after you fill the jars in step 10.
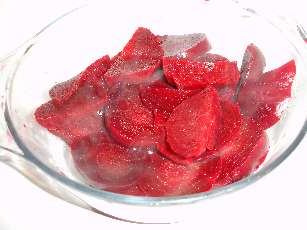 Step 8 - Trim, peel and slice
Trim off the roots and stems. The skins should easily slide off. Slice the beets into 1/4-inch slices. You can leave the beets whole (if they are small, say 1 inch or less), or cut medium or large beets into 1/2-inch cubes or slices. Halve or quarter very large slices.
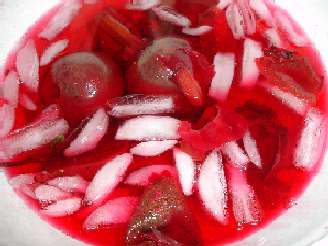
Step 9 - Pack the beets in the canning jars
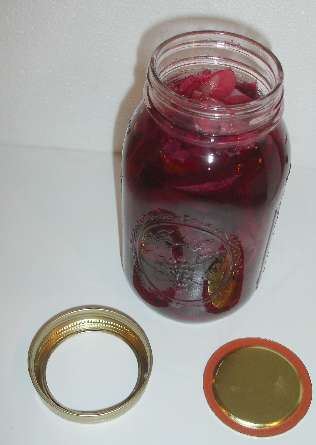 Fill the jars with beets and onions, leaving 3/4 to 1 inch headspace. Pack the jars fairly tightly, but be sure to leave 3/4 inch of space at the TOP of the jar. That is called "headspace" and is needed for expansion during heating in the water bath. Add 1 teaspoon of salt per quart to the jar, if desired (I don't add salt - you can always add it at the table; it doesn't affect the preserving!)
Step 10 - Pour boiling fresh water into each packed jar
Remember the saucepan of boiling water? Use a ladle or pyrex measuring cup to carefully fill each packed jar with fresh boiling hot water, leaving 3/4 to 1-inch headspace. The beets should be covered and there should still be 3/4 inch of airspace left in the top of each jar. Be careful not to burn yourself, (or anyone else - children should be kept back during this step!) If you wanted to add the canning salt (optional - only if you like the taste), add it to the cooking liquid and stir, before you pour the liquid into the jars.
Step 11 - Put the lids and rings on
Put the lids on each jar and seal them by putting a ring on and screwing it down snugly (but not with all your might, just "snug").
Step 12 - Put the jars in the canner and the lid on the canner (but still vented)
Using the jar tongs, put the jars on the rack in the canner. By now the water level has probably boiled down to 3 inches. If it is lower than that, add more hot tap water to the canner. When all the jars that the canner will hold are in, out on the lid and twist it into place, but leave the weight off (or valve open, if you have that type of pressure canner). 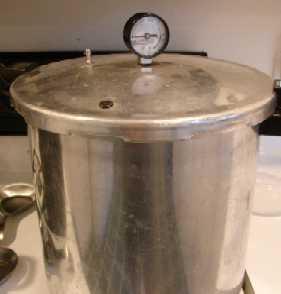
Step 13 - Let the canner vent steam for 10 minutes
Put the heat on high and let the steam escape through the vent for 10 minutes to purge the airspace inside the canner.
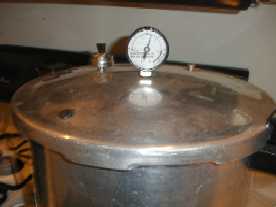 Step 14 - Put the weight on and let the pressure build
After 10 minutes of venting, put the weight on and close any openings to allow the pressure to build to 11 pounds.
Step 15 - Process in the pressure canner
if you have a dial-type pressure canner, like me, once the gauge hits 11 pounds, start your timer going - for 30 minutes for pint jars, 35 minutes for quart jars. Adjust the heat, as needed, to maintain 11 pounds of pressure.
Note: the chart below will help you determine the right processing time and pressure, if you have a different type of canner, or are above sea level.
It is important to learn how to operate your pressure canner by reading the owner's manual that came with your particular canner. If you cannot find your owner's manual, you can obtain find one online: Here is where to find some common manufacturer's manuals:
or by contacting the company that made your canner. Give the model number to the manufacturer, and they will send you the right manual. Click here for more information about pressure canners and a variety of models you can order.
Recommended process time for beets in a dial-gauge pressure canner. | |||||
| Canner Pressure (PSI) at Altitudes of | |||||
| Jar Size | Process Time | 0 - 2,000 ft | 2,001 - 4,000 ft | 4,001 - 6,000 ft | 6,001 - 8,000 ft |
| Pints | 30 min | 11 lb | 12 lb | 13 lb | 14 lb |
| Quarts | 35 | 11 | 12 | 13 | 14 |
Recommended process time for beets in a weighted-gauge pressure canner. | |||
| Canner Pressure (PSI) at Altitudes of | |||
| Jar Size | Process Time | 0 - 1,000 ft | Above 1,000 ft |
| Pints | 30 min | 10 lb | 15 lb |
| Quarts | 35 | 10 | 15 |
Step 16 - Turn off the heat and let it cool down
When the processing time from the chart above is up, turn off the heat, and allow the pressure canner to cool and the pressure to drop to zero before opening the canner. Let the jars cool without being jostled. After the pressure drops to zero (usually, you can tell but the "click" sound of the safety release vents opening, as well as but the gauge. Let the pressure in the canner drop to zero by itself. This may take 45 minutes in a 16-quart canner filled with jars and almost an hour in a 22-quart canner. If the vent is opened before the pressure drops to zero OR if the cooling is rushed by running cold water over the canner, liquid will be lost from the jars. Too rapid cooling causes loss of liquid in the jars!
Step 17 - Remove the jars
Lift the jars out of the water and let them cool on a wooden cutting board or a towel, without touching or bumping them in a draft-free place (usually takes overnight), here they won't be bumped. You can then remove the rings if you like, but if you leave them on, at least loosen them quite a bit, so they don't rust in place due to trapped moisture. Once the jars are cool, you can check that they are sealed verifying that the lid has been sucked down. Just press in the center, gently, with your finger. If it pops up and down (often making a popping sound), it is not sealed. If you put the jar in the refrigerator right away, you can still use it. Some people replace the lid and reprocess the jar, then that's a bit iffy. If you heat the contents back up, re-jar them (with a new lid) and the full time in the canner, it's usually ok. You're done!
Other Equipment:
 From left to right:
- Jar lifting tongs
helpful to pick up hot jars - Lid lifter
- to remove lids from the pot
of hot water - Lids
- disposable - you may only
use them once - Ring
- holds the lids on the jar until after
the jars cool - then you remove them, save them and reuse them - Canning Jar funnel
- to fill the jars
FAQs:
Click here for Frequently asked questions about canning beets.
Pressure canners!If you want to can low-acid foods such as red meats, sea food, poultry, milk, and all fresh vegetables with the exception of most tomatoes, you will need a Pressure Canner. These foods fit into the low acid group since they have an acidity, or pH level, of 4.6 or greater. The temperature which must be reached and maintained (for a specified amount of time) to kill the bacteria is 240 F. Pressure canning is the only canning method recommended safe by the U.S.D.A. for low-acid foods such as vegetables, meats, and fish. Ordinary water bath canners can only reach 212 F and cannot to kill the types of bacteria that will grow in low acid foods. This temperature can be reached only by creating steam under pressure as achieved in quality pressure canners. There are several manufacturers of pressure canners. The two leading ones are Presto and All American (Wisconsin Aluminum). They are more expensive than water bath canners, but extremely well built - I bought mine in 1988 and it still looks and works like new! | |

|
Presto 01781 23-Quart Pressure Cooker/CannerThis is one of the least expensive but reliable pressure canners available. I've been using mine for 30 years! See the seller's website for more information, features, pricing and user reviews! See the seller's website for more information, features, pricing and user reviews!
|
|
See the seller's website for more information, features, pricing and user reviews! |
| All-American 941 Pressure Canner All-American 930 Pressure Canner | All American Pressure Canner and Cookers - In 3 SizesSee the seller's website for more information, features, pricing and user reviews! |
|
Lids, Rings, Jars, mixes, pectin, etc.Need lids, rings and replacement jars? Or pectin to make jam, spaghetti sauce or salsa mix or pickle mixes? Get them all here, and usually at lower prices than your local store! Get them all here at the best prices on the internet! |
| See here for related tools, equipment, supplies on Amazon | BUT, with a Pressure Canner it's easy. And although a Pressure Canner costs $100 to $200 (see this page for pressure canners models, makes and prices), they last a lifetime, and your children and grandchildren may be using it. You can also find free information from the USDA in this PDF file (it will take a while to load!) about selecting and using canners here! |
Can't find the equipment? We ship to all 50 states!
This page was updated on


Looking for canning equipment and supplies?
Water bath canner with a jar rack
Pressure canners for gas, electric and induction stoves: Presto 23Qt or T-fal 22Qt
Canning scoop (this one is PERFECT)
Ball Blue book (most recent version)
Jars: 8oz canning jars for jams
Find Other types of farms:
Farm markets and roadside stands
Road trips and camping resources
Local Honey, apiaries, beekeepers
Consumer fraud and scams information
Home canning supplies at the best prices on the internet!
Maple Syrup Farms, sugarworks, maple syrup festivals
Environmental information and resources
Farms For Your Event for birthday parties, weddings, receptions, business meetings, retreats, etc.
Festivals - local fruit and vegetable festivals
Get the
most recent version of
the Ball Blue Book
Get the
most recent version of
the Ball Blue Book of Home Canning
Find other types of farms:
- Easter egg hunts
- Children's consignment sales
- Farm markets and roadside stands
- Local Honey
- Local Meat, Milk and Eggs
- Road trip and camping
- Pumpkin patches and corn mazes
- Christmas Tree Farms and lots
- Maple Syrup farms and sugarworks
Highly rated canning supplies:
- Regular Mouth Canning Lids with food-grade with BPA Free Silicone seals for Ball, Kerr Jars for Canning
- Canning accessories kit: funnel, jar tongs, lid lifter, etc
- Food Dehydrator, 400W Electric with 8 Trays, 48 hour Timer and Temperature Control 95-176℉, BPA-Free
- Water Bath Canner, 21 Qts with lid, Jar Rack, Speckled Black, cans 7 quart jars, 9 pint jars or 13 half-pint jars
- Air Fryer: Instant Pot Instant Vortex Plus XL 8QT Clear Windows, Custom Programming, 8-in-1 Functions that Crisps, Broils, Roasts, Dehydrates, Bakes, Reheats
-
- Most recent version of the Ball Blue Book
- The Backyard Homestead:a guide to homesteading , on 1/4 acre, how to raise grains and vegetables; raise animals for meat, eggs, and dairy; and keep honey bees
- Smart silent HEPA Air Purifiers for Home, Large Rooms for Allergies, Smoke, Pets. Eliminates 99.97% of Dust, Pet Hair, Odors