Looking for How to Make Homemade Sun-Dried Tomatoes, From Tomatoes from Your Garden - Easily! With Step-by-step Photos, Recipe, Directions in 2025? Scroll down this page and follow the links. And if you bring home some fruit or vegetables and want to can, freeze, make jam, salsa or pickles, see this page for simple, reliable, illustrated canning, freezing or preserving directions. There are plenty of other related resources, click on the resources dropdown above. If you are having a hard time finding canning lids, I've used these, and they're a great price & ship in 2 days.
If you have questions or feedback, please let me know! There are affiliate links on this page. Read our disclosure policy to learn more.
How to Make Homemade Sun-Dried Tomatoes, From Tomatoes from Your Garden - Easily! With Step-by-step Photos, Recipe, Directions
 How to Make Sun-Dried Tomatoes From Your Garden
Click here for a PDF print version!
Sun-dried tomatoes, either in olive oil, seasoned, or plain, add a gourmet touch and great flavor to many dishes and salads. But the price in the stores is exorbitant! Did you know it is incredibly easy to make your own sun-dried tomatoes at home with no special equipment? The quality can be better than any you've bought and now you have an easy way to use your excess tomatoes, as well as have them for use in the winter. They make excellent gifts, too.
Here's how to do it, in easy steps and completely illustrated. This method is so easy, ANYONE can do this! It's a great thing to do with your kids! And yes, although they're called "sun-dried" tomatoes; almost no one lives in a climate that makes that the best method. According to the USDA, few, if any store-bought "sun dried" tomatoes are actually sun dried (but the regulations allow them to call them that!). Anyway, they will taste the same (or better, actually) using an oven or food dehydrator. For those of you ultra-crunchy granola types (not that there's anything wrong with that, as Seinfeld would say), you can use your car (hybrid, electric, gasoline or diesel) on a hot sunny day - I'll explain below. And see this page for a comparison of the cost of various oven heating methods and oven types.
If you'd rather can your tomatoes, see this page for canning directions for tomatoes!
Ingredients
- Tomatoes - any quantity, ripe, but not over ripe, still firm. The yield varies considerably depending upon the moisture content of the tomatoes, which depends upon the type of tomato and the weather. Paste tomatoes (Roma) work best and typically yield 2 cups of dried tomatoes for each 5 lbs of fresh.
Equipment
- 1 large pot and Large slotted spoon (if you want them peeled first)
- Vacuum food sealer or plastic zipper (Ziploc) type bags
And one of the following:
- An oven OR
- a food dehydrator OR
- an automobile on a hot sunny day!
Process - How to Make Sun Dried Tomatoes from Fresh Tomatoes
Step 1 - Selecting the tomatoes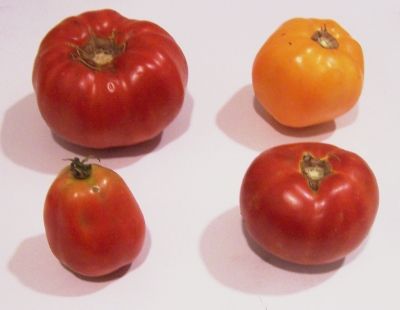
It's fun to go pick your own and you can obviously get better quality tomatoes!
At right is a picture of tomatoes from my garden - they are so much better than anything from the grocery store. And if you don't have enough, a pick-your-own farm is the place to go! Below are 4 common varieties that will work, although any variety (even grape and cherry tomatoes) will work, but they might take longer too dry, due to their higher water content:
Top left: Beefsteak
Bottom left: Roma, paste-type
Top right: Lemon Boy, yellow
Bottom right: Better Boy
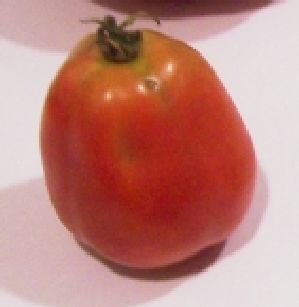 The
picture at right shows the best variety of tomato to use: Roma; also
called paste tomatoes. They have fewer sides, thicker, meatier
walls, and less water.
And that means thicker sauce in less cooking time!
Also, you don't want mushy, bruised or rotten tomatoes!
Step 2 - (Optional) Removing the tomato skins
 If
you do not want to remove the skins, skip to step 4. This is completely
optional; some people prefer them with skins, some without. The type you
buy in the stores usually has the skins intact, but skins can become tough and chewy, I think the final result is much better with the skins removed..
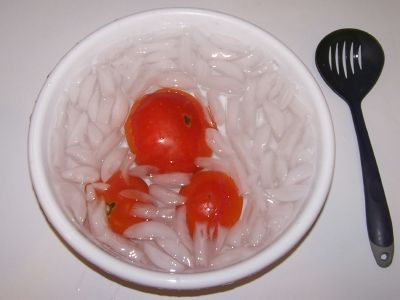
Here's a trick you may not know: put the tomatoes, a few at a time in a large pot of boiling water for no more than 1 minute (30 - 45 seconds is usually enough)
then....
Plunge them into a waiting bowl of ice water.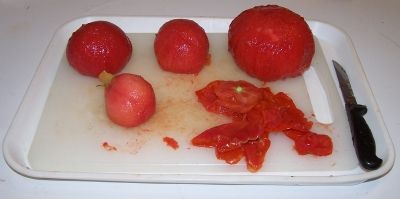
This makes the skins slide right off of the tomatoes!
With a gentle tug, the skins should practically slide off the tomatoes.
 Step
3 - Removing bruises and tough parts, and cut in half
Cut the tomatoes in half lengthwise.
Cut out the tough part around the stem and any bruised or soft parts.
I usually then cut the tomatoes in half again, so I get four lengthwise quarters from each tomatoes. It just depends how big or small you want the final dried pieces to be. Usually they shrink to 1/4 their original size.
 Step
4 - (Optional) - Remove the seeds
I generally don't bother with Roma-type tomatoes, they have so few seeds, anyway. If I'm using regular Big Boy, beefstake tomatoes, then sometimes I do. Just scoop them out with a spoon or with a nudge from your finger!
Step 5 - Drying the tomatoes
As I said at the beginning, you have 3 choices:
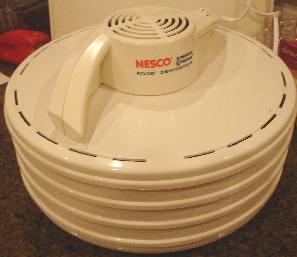
- A Food dehydrator - which is the easiest way, and since it is designed for this purpose, yields the most consistent results. I learned this through experience! Also, those with adjustable thermostats (temperature control and a timer are best - more expensive, but, as Borat might say "very nice!" See this page for food dehydrator makes and models and ordering information.
- An oven - everyone has one of these, so that means you need no additional equipment
- A car (well, or truck, suv, minivan, etc.) and a very hot , sunny day.
Regardless of the drying method you use, you spread the tomato slice out on their trays and you may opt to sprinkle them with salt or dried herbs (basil, thyme and/or oregano are commonly used).
Here are the specific directions for each method: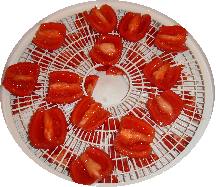
- Food dehydrator: Arrange the pieces on each rack so that air can circulate, preferably with the pieces not touching each other, but there's no need to become obsessive about it. Some people prefer to sprinkle the tomatoes with sea salt, kosher salt and/or some spices (typically basil). Turn the dehydrator on and enjoy the aroma. If your food drier has a thermostat, set it for 140 degrees F. It will take 6 to 12 hours. See "how to tell when they are done" in step 6, below.
- Oven: preheat the oven to 140 - 150 degrees F (65 degrees C or gas mark 1). If you don't have these settings, just use the lowest setting you've got. Arrange the tomatoes on cake racks, spread out, not touching each other. Cookie sheets will work if you don't have cake racks or screens - but you need to flip or stir the tomatoes once in a while to expose the other side of them. Some people prefer to sprinkle the tomatoes with sea salt, kosher salt and/or some spices (typically basil). Close the oven. It takes about 10 to 20 hours, but you will need to verify periodically, including rotating the shelves and moving them up or down to get even heating. If you want to speed it up, you can bump the heat up to as high as 200 degrees F ( 93 degrees C), but you will need to watch them much more closely. See "how to tell when they are done" in step 6, below.
- Automobile and a hot sunny day: It sounds strange, but the same stifling hot car that burns your legs makes an excellent food dryer. Spread the tomato slices out on shallow trays (they work better than cookie sheets, since you don't need to worry about leaking juice!). Cover them loosely with cheesecloth to keep any potential for bugs to come in contact. Put the trays on the dashboard of your car and roll all the windows up and park in the sunniest spot you've got. It's best to start in the morning and let it go to sunset. It may take 2 days - bring the tomatoes in the house overnight. Some people prefer to sprinkle the tomatoes with sea salt, kosher salt and/or some spices (typically basil). but you will need to verify periodically. See "how to tell when they are done" in step 6, below. N
Step 6 - How to tell when they're done
The amount of time it takes depends on the water content of the tomatoes, the thickness of the slices, and how well the air is able to circulate around them. The USDA says it typically takes 6 to 12 hours. When done, the tomatoes should be in the range of "leathery" to "brittle". I would go more toward the brittle end of the spectrum as removing more water will reduce the potential for spoilage. Ball and USDA describe them as being done with they are at least to the stage of leathery with a deep red color, without free water or a tacky feeling.
Step 7 - Cool, then Fill the Zipper-type bags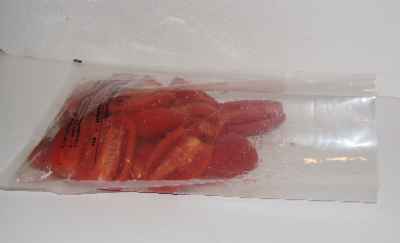
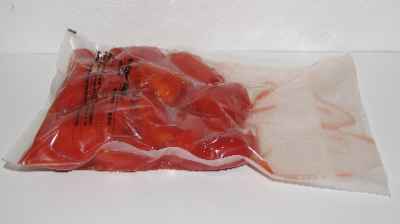
Let the tomatoes cool to room temperature (about 20 to 30 minutes), then fill the bags. Don't overfill the bags, leave a little room for expansion. Do try to avoid leaving any air pockets! A vacuum bag is shown at left, but you can use ziploc (or similar) bags, shown below. But be sure to squeeze out the extra air (below left is before, below right is after squeezing out the excess air).
Step 8 - Vacuum seal the bags (if you have a vacuum sealer)
 Obviously
if you haven't got a vacuum food sealer, just inspect the bags and you
may need to open them and reseal them to eliminate any air pockets! But
the rate of spoilage and preservation of flavor is MUCH better with the
vacuum-sealed tomatoes. TIP: If you don't own a vacuum food
sealer to freeze foods, place food in a Ziploc bags, zip the top shut
but leave enough space to insert the tip of a soda straw. When straw is
in place, remove air by sucking the air out. To remove straw,
press straw closed where inserted and finish pressing the bag closed as
you remove straw.
Step 9 - Store the bags in the fridge, freezer or very cool, dark, dry place
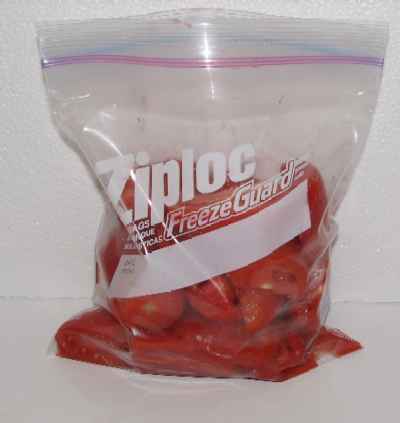
The freezer is best, there the dried tomatoes will retain their color and flavor for about 9 to 12 months. A fridge is ok for a few weeks, but if there is much moisture left in them, they WILL start to get moldy in a month or so. The vacuum bag food sealers really help to increase the longevity of dried tomatoes in the fridge (see this page for more information) with their vacuum sealing! I am not paid by them, but these things really work. DO not store this outside of the freezer or fridge. This is a low acid food and sealed up, without air, botulism can grow at temperatures above 40 F.
Dried tomatoes quickly reabsorb moisture, so be sure your containers really are airtight. If they re-absorb moisture, they may then go moldy. If they are still too moist, they will also go moldy.
Check the newly packaged dried tomatoes daily for about a week to make sure there isn't any condensation in the containers. If you see any moisture in the containers, remove the tomatoes immediately, put them back in the food dryer and resume the drying process.
Notes about packing in oils:
If you like to have your dried tomatoes in a seasoned oil, such as olive oil with basil, thyme, oregano and/or minced or powdered garlic or garlic salt, it is best to do this when you are ready to eat them, or shortly before, and refrigerate them. There aren't many university studies about the safety of home-dried tomatoes packed in oil, but the information that's available suggests that it is best to just do that as you use them or make up small batches and refrigerate them.
|
|
|
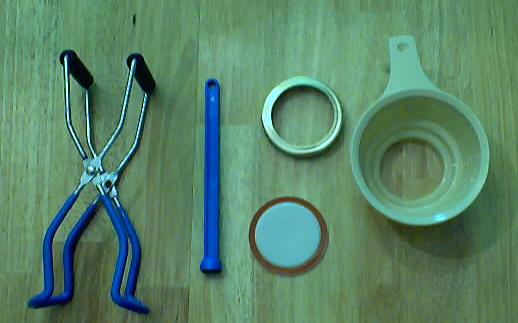
Other Equipment:From left to right:
|
 |
| McSunley 21.5 quart Water Bath Canner, Stainless Steel Granite Ware 21 QT, 9 Piece Enamelware Water bath Canning Pot with Canning kit, Colander and Rack VKP Brands Water Bath AND Steam Canner, 20 Quart Stainless Steel, flat-bottomed Induction range compatible and safe for smooth top ranges. 
|
Home Canning KitsThis is the same type of standard canner that my grandmother used
to make everything from applesauce to jams and jellies to tomato and
spaghetti sauce. This complete kit includes everything you need and lasts
for years: the canner, jar rack, Jar grabber tongs, lid lifting wand, a
plastic funnel, labels, bubble freer, and the bible of canning, the Ball
Blue Book. It's much cheaper than buying the items separately. you will never need anything else except jars & lids! To see more canners, of different styles, makes and prices, click here!For
more information and current pricing: |
Summary - Cost of Making Homemade Sun-Dried Tomatoes - makes 4 cups |
||||
| Item | Quantity | Cost in 2025 | Source | Subtotal |
| Tomatoes | 10 lbs (to make about 4 cups of dried tomato) | free from the garden, or $0.75 cents/lb at a PYO | Garden | $0.00 |
| Ziplock type food storage bags | 3 or 4 bags | $3.00 for 15 | Grocery stores, like Publix, Kroger and Safeway and local "big box" stores; sometimes Big Lots and even hardware stores | $0.75 |
| seasoning | Optional - 1 or 2 tablespoons - See step 6 | $0.50? | Grocery stores, like Publix, Kroger and Safeway and local "big box" stores | $0 |
| Total | $0.75 total or about $0.20 per cup |
|||
|
|
||||
Answers to Common Questions
Looking for canning equipment and supplies?
Water bath canner with a jar rack
Pressure canners for gas, electric and induction stoves: Presto 23Qt or T-fal 22Qt
Canning scoop (this one is PERFECT)
Ball Blue book (most recent version)
Jars: 8oz canning jars for jams
Find Other types of farms:
Farm markets and roadside stands
Road trips and camping resources
Local Honey, apiaries, beekeepers
Consumer fraud and scams information
Home canning supplies at the best prices on the internet!
Maple Syrup Farms, sugarworks, maple syrup festivals
Environmental information and resources
Farms For Your Event for birthday parties, weddings, receptions, business meetings, retreats, etc.
Festivals - local fruit and vegetable festivals
Get the
most recent version of
the Ball Blue Book
With this Presto 23 quart pressure canner and pressure cooker, you can "can" everything, fruits, vegetables, jams, jellies, salsa, applesauce, pickles, even meats, soups, stews. Model 01781

You can make jams, jellies, can fruit, applesauce, salsa and pickles with water bath canners, like this Granite Ware 12-Piece Canner Kit, Jar Rack, Blancher, Colander and 5 piece Canning Tool Set

