Looking for Pepper Jelly: How to Make Your Own Homemade Pepper Jelly (canned, complete directions with photos) in 2025? Scroll down this page and follow the links. And if you bring home some fruit or vegetables and want to can, freeze, make jam, salsa or pickles, see this page for simple, reliable, illustrated canning, freezing or preserving directions. There are plenty of other related resources, click on the resources dropdown above. If you are having a hard time finding canning lids, I've used these, and they're a great price & ship in 2 days.
If you have questions or feedback, please let me know! There are affiliate links on this page. Read our disclosure policy to learn more.
Pepper Jelly: How to Make Your Own Homemade Pepper Jelly (canned, complete directions with photos)
 How to Make Homemade Pepper Jelly,
Hot or sweet,
including chilies, jalapeno, and pimiento
Click here for a PDF print version
It's not hard to make your own jalapeno pepper jelly, and can it so you can give it away or store it on the shelf for the winter! And unlike canned peppers, you can use an ordinary water bath canner. So, here's how to can pepper jelly! The directions are complete with instructions in easy steps and completely illustrated. In the winter when you open a jar, the pepper jelly will taste MUCH better than any store-bought jalapeno jelly.
Prepared this way, the jars have a shelf life of about 12 months, and aside from storing in a cool, dark place, require no special attention.
Directions for Making Pepper Jelly / Jalapeno Jelly
Yield: 5 jars (8 oz each)
Ingredients
- 3/4 lb to 1 pound of cleaned Peppers seeds and stems removed (see step 1)
- 6 cups sugar (or other sweeteners - see step 6)
- 2 cups of 5% apple cider vinegar (if you don't have any, use plain white 5% vinegar). OR, you may use an equivalent amount of lemon juice, instead.
- 3 packets of dry pectin (1 packet is equal to 3 Tablespoons of pectin) (or 3 pouches of liquid pectin) See this page for types of pectin and where to get it.
- green food coloring (optional)
Equipment
- Jar funnel ($4 at mall kitchen stores and local "big box" stores, but it's usually cheaper online from our affiliates)t, hardware stores, etc.)
- Jar grabber (to pick up the hot jars)
- At least 1 large pot
- Large spoons and ladles,
- Canning jars (often called Ball jars, Mason jars or Kerr jars) (Publix, Kroger, other grocery stores and some "big box" stores carry them - about $7 per dozen 8 oz jars including the lids and rings)
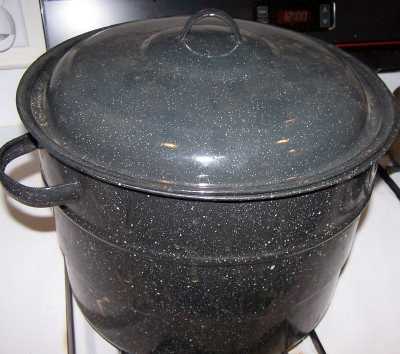
- 1 water bath canner (a huge pot to sanitize the jars after filling (about $30 to $35 - $30 at mall kitchen stores and local "big box" stores. Note: we sell many sizes and types of canners for all types of stoves and needs - see canning supplies). Tomatoes are on the border between the high-acid fruits that can be preserved in a boiling-water bath and the low-acid fruits, vegetables and meats that need pressure canning
- One 6 - 8 quart pot or saucepan
Recipe and Directions
Step 1 - Selecting the peppers
The most important step! You need peppers that are FRESH and crisp. Limp, old peppers will make nasty tasting jalapeno jelly. Guests will probably throw them at you. Select filled but tender, firm, crisp peppers. Remove and discard any soft, diseased, spotted and rusty pods. Select small peppers, preferably 1 inch to 1 and 1/4-inch in diameter. Larger peppers are often too fibrous and tough.
You can use jalapeno, chili or any peppers you like!
Hot pepper
caution: Wear plastic or rubber gloves and do not touch your face while
handling or cutting hot peppers. If you do not wear gloves, wash hands
thoroughly with soap and water before touching your face or eyes. Hot
peppers can burn your eyes and skin - ever heard of pepper spray?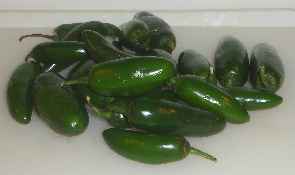
How many peppers and where to get them
You can grow your own, pick your own, or buy them at the grocery store. An average of 1 pound is needed per batch of 5 jars (8 oz each). For reference, a bushel of peppers weighs 25 pounds.
Step 2 - Prepare the jars and pressure canner
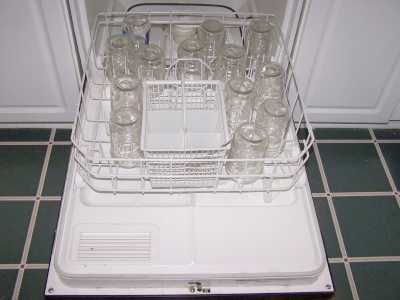 Wash
the jars and lids
Wash
the jars and lids
This is a good time to get the jars ready! The dishwasher is fine for the jars; especially if it has a "sanitize" cycle. Otherwise put the jars in boiling water for 10 minutes. I just put the lids in a small pot of almost boiling water for 5 minutes, and use the magnetic "lid lifter wand" (available from target, other big box stores, and often grocery stores; and available online - see this page) to pull them out.
Get the water bath canner heating up
Rinse out your canner, fill it with hot tap water and put it on the stove on low heat (for now) so it will be ready (but not boiled away) by the time you are ready for it later.
Step 3 -Wash the peppers!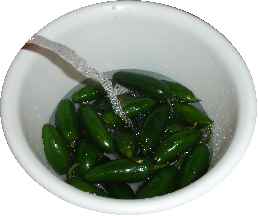
I'm sure you can figure out how to rinse the peppers in plain cold or lukewarm water.
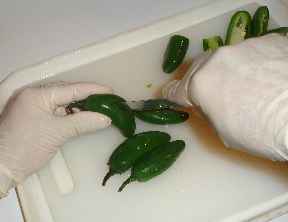
Step 4 - Remove stems and seeds
Cut off the stems (left) and scrape out the seeds.
Step 5 - Puree the peppers in a blender
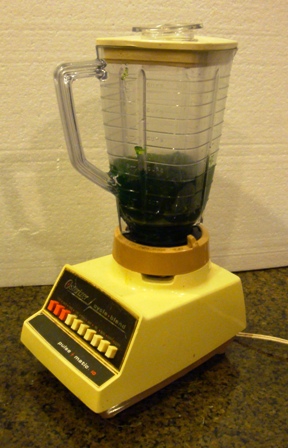 Pop
the peppers into a blender or food processor and puree them. You
may need to add 1 cup of the vinegar now to get the blender to work
properly with them!
Pop
the peppers into a blender or food processor and puree them. You
may need to add 1 cup of the vinegar now to get the blender to work
properly with them!
Step 6 - Measure out the sweetener
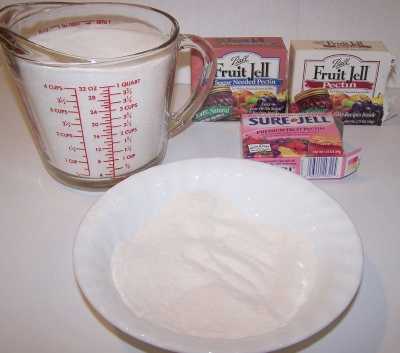 Depending
upon which type of jelly you're making (sugar, no-sugar, Stevia (but you will have to experiment with amount, each brand of Stevia is a different concentration), or Splenda, or a mix of sugar and Stevia (or Splenda) or fruit juice) you will need to use a different
amount of sugar and type of pectin. The precise measurements are found
in each and every box of pectin sold. It is easiest to use a no-sugar
needed pectin, because you can always use as much sugar or sweetener as
you want then.
Depending
upon which type of jelly you're making (sugar, no-sugar, Stevia (but you will have to experiment with amount, each brand of Stevia is a different concentration), or Splenda, or a mix of sugar and Stevia (or Splenda) or fruit juice) you will need to use a different
amount of sugar and type of pectin. The precise measurements are found
in each and every box of pectin sold. It is easiest to use a no-sugar
needed pectin, because you can always use as much sugar or sweetener as
you want then.
NOTE: To get best results (a
firm jelly) - I highly recommend using a no-sugar pectin AND sugar.
Pomona pectin is particularly good for this
| Type of jam |
Type of pectin to buy |
Sweetener |
| regular | no-sugar or regular | 6 cups of sugar |
| low sugar | no-sugar | 4.5 cups of sugar |
| lower sugar | no-sugar | 2 cups sugar and 2 cups Splenda (or about 1/3 that if you use Stevia, which is my preference) |
| no sugar | no-sugar | 4 cups Splenda (or about 1/3 that if you use Stevia, which is my preference) |
| natural | no-sugar | 3 cups fruit juice (grape, peach, apple or mixed) |
For more about the types of pectin sold, see this page!
Notes:
- Nutrasweet (aspartame) will NOT work - it breaks down during heating).
- Stevia sustitutes 1 to 3 with sugar and if you prefer, Splenda (sucralose) substitutes exactly with sugar. BUT even the manufacturers of Splenda will tell you that you get best results if you just use a 50-50 mix; half regular sugar and half Stevia or Splenda.
- Sugar not only affects the sweetness, but also the color and flavor. It does not affect the preserving or spoilage properties - that has to do with acid and the processing method.
- you can use "no sugar" pectin in place of "low sugar" pectin - you can still add sugar or other sweeteners.
- Honey or agave may be used - 75% of the sugar amount (use 3/4 cup for each 1 cup of sugar)
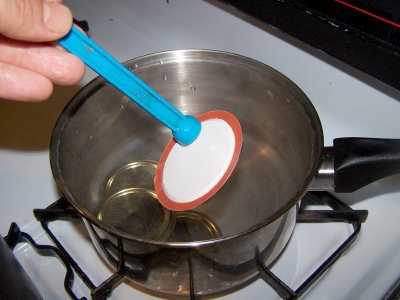
Step 7 - Mix the pectin and some sugar / sweetener
Mix the 2.5 (two and a half) packets of dry pectin (1 packet is equal to 3 Tablespoons of pectin) with about 1/2 cup of sugar or other sweetener and set aside.
Step 8 - Cook the peppers, vinegar and sugar / sweetener
Combine the pepper puree, the remaining apple cider
vinegar and the remaining sweetener in a pot and heat to a boil over
medium heat, while stirring periodically, to prevent burning. Boil for
10 minutes, continuing to stir as needed to prevent burning.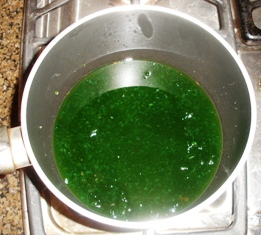
Note: The recipes that were first developed and tested (in labs) used vinegar. The commonly used acids in home canning are vinegar, lemon and lime juice. Lemon and lime juices are more acidic than vinegar, but have less effect on flavor. Consequently, you may safely substitute an equal amount of lemon juice for vinegar in recipes using vinegar.
Step 9 - Add the pectin and boil hard for one minute
After boiling for 10 minutes, add the pectin from step 7, return the mix to a boil and then boil hard for 1 minute, stirring constantly.
Step 10 - Skim any excessive foam
Foam... What is it? Just jam with a lot of air from the boiling. But it tastes more like, well, foam, that jam, so most people remove it. It is harmless, though. Some people add 1 teaspoon of butter or margarine to the mix in step 6 to reduce foaming, but food experts debate whether that may contribute to earlier spoilage, so I usually omit it and skim.
But save the skimmed foam! You can recover jam from it to use fresh! See this page for directions!
Step 11 - Testing for "jell" (thickness)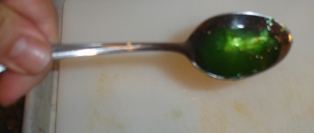
I keep a metal tablespoon sitting in a glass of ice water, then take a half spoonful of the mix and let it cool to room temperature on the spoon. If it thickens up to the consistency I like, then I know the jam is ready. If not, I mix in a little more pectin (about 1/3 to 1/2 of another package) and bring it to a boil again for 1 minute. Get a few jars out of the dishwasher (still hot) and get your funnel, lid lifter and ladle ready. I put an old towel down - it makes clean up easier.
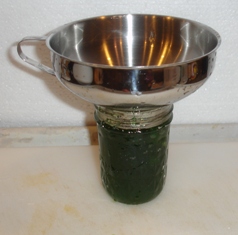
Step 12 - Fill the jars and put the lid and rings on
Fill them to within 1/4-inch of the top, wipe any spilled jam off the
top, seat the lid and tighten the ring around the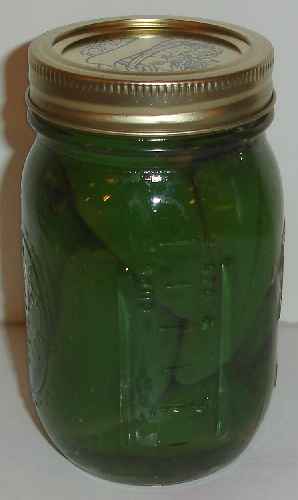 m.
m.
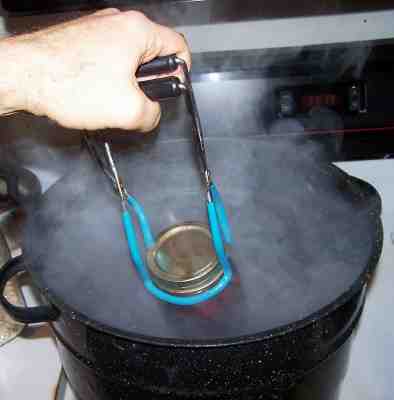
Put the lids on each jar and seal them by putting a ring on and screwing it down snugly (but not with all your might, just "snug"). (Yes, that is a photo of pickled peppers - my photos of the next 2 steps didn't turn out! :)
 This
is where the jar tongs and lid lifter come in really handy!
This
is where the jar tongs and lid lifter come in really handy!
 Step
13 - Process the jars in the boiling water bath
Step
13 - Process the jars in the boiling water bath
Keep the jars covered with at least 2 inches of water. Keep the water
boiling. In general, boil them for 10 minutes. I say "in general"
because you have to process (boil) them longer at higher altitudes than
sea level, or if you use larger jars, or if you did not
 sanitize
the jars and lids right before using them. The directions inside
every box of pectin will tell you exactly. The directions on the
pectin tend to be pretty conservative. Clemson University says you
only need to process them for 10 minutes. I usually hedge my bets
and start pulling them out after 10 minutes, and the last jars were
probably in for 12. I rarely have a jar spoil, so it must work.
sanitize
the jars and lids right before using them. The directions inside
every box of pectin will tell you exactly. The directions on the
pectin tend to be pretty conservative. Clemson University says you
only need to process them for 10 minutes. I usually hedge my bets
and start pulling them out after 10 minutes, and the last jars were
probably in for 12. I rarely have a jar spoil, so it must work.
Note: Some people don't even boil the jars; they just ladle it hot into hot jars, but putting the jars in the boiling water bath REALLY helps to reduce spoilage! To me, it makes little sense to put all the working into making the jam and then not to process the jars to be sure they don't spoil!
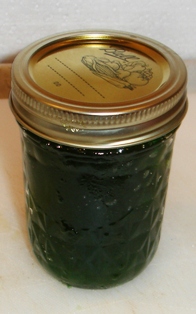
Step 14 - Remove and cool the jars - Done!
Lift the jars out of the water and let them cool without touching or bumping them in a draft-free place (usually takes overnight) You can then remove the rings if you like, but if you leave them on, at least loosen them quite a bit, so they don't rust in place due to trapped moisture. Once the jars are cool, you can check that they are sealed verifying that the lid has been sucked down. Just press in the center, gently, with your finger. If it pops up and down (often making a popping sound), it is not sealed. If you put the jar in the refrigerator right away, you can still use it. Some people replace the lid and reprocess the jar, then that's a bit iffy. If you heat the contents back up, re-jar them (with a new lid) and the full time in the canner, it's usually ok.
The contents should "set" or gel within 24hours. If they don't, which does happen from time to time due to variations in ingredients, you can remake it - see this page for how to fix runny jam and jelly.
Once cooled, they're ready to store. I find they last about 18 months. After that, the get darker in color and start to get runny. They still seem safe to eat, but the flavor is bland. So eat them in the first 12 to 18 months after you prepare them!
Other Equipment:
From left to right:
- Jar lifting tongs

helpful to pick up hot jars - Lid lifter
- to remove lids from the pot
of hot water - Lids
- disposable - you may only
use them once - Ring
- holds the lids on the jar until after
the jars cool - then you remove them, save them and reuse them - Canning Jar funnel
- to fill the jars
Feedback, Comments and Frequently Asked Questions
- A visitor writes on July 23, 2013: "My jalapeno jam has
tiny bubbles covering the top of it. Is it safe to eat?"
Definitely! Tiny bubbles are normal!
- A visitor writes on August 14, 2013: "Why did the pulp
rise to the top in my jalapeno jelly after it cooled in the jars
after canning?"
Definitely! That's common with many home canned products, due to entrained air and the difference in density between the pulp and the solution around it. Commercial manufacturers/canners get around this by adding flocculants and other chemical additives. Most home canners prefer to simply stir the contents after opening!
- Comments from a visitor on August 27, 2012: "This e-mail is to THANK YOU for the perfect recipe for jalapeno pepper jelly. I have tried other recipes and failed, now I know why!!!!!!! the instructions were not as detailed as you have them, Thanks again, oh and by the way, my jelly is perfectly set. I made it this morning and it is great, Sincerely,Rhena. Your website is in my Favorites"
Pressure canners!Not Necessary for Pepper jelly If you want to can low-acid foods such as red meats, sea food, poultry, milk, and all fresh vegetables with the exception of most tomatoes, jams, jellies and pickled vegetables, you will need a pressure canner. These foods fit into the low acid group since they have an acidity, or pH level, of 4.6 or greater. The temperature which must be reached and maintained (for a specified amount of time) to kill the bacteria is 240 F. Pressure canning is the only canning method recommended safe by the U.S.D.A. for low-acid foods such as vegetables, meats, and fish. Ordinary water bath canners can only reach 212 F and cannot to kill the types of bacteria that will grow in low acid foods. This temperature can be reached only by creating steam under pressure as achieved in quality pressure canners. There are several manufacturers of pressure canners. The two leading ones are Presto and All American (Wisconsin Aluminum). They are more expensive than water bath canners, but extremely well built - I bought mine in 1988 and it still looks and works like new!
|
|||

|
Presto 01781 23-Quart Pressure Cooker/CannerThis is usually one of the best-priced pressure canners. They are reliable and inexpensive. I've had mine for 40 years. There is also a 16 quart version for even less. Click on the links at left or above for more info and current pricing. |
||
|
|
Shown at left is the Presto 23 quart pressure canner. Features below and
click here for more information or to purchase from Target.
See the seller's website for features, pricing and user reviews! |
||
| All-American 915 pressure canner All-American 930 Pressure Canner |
All American Pressure Canner and Cooker #921See the seller's website for features, pricing and user reviews! |
||