Click here for a PDF print version!
 It's
easy to can your own pears! Here's how to do it, complete instructions in easy
steps and completely illustrated. In the winter when you open a jar, the pears
will taste MUCH bett
It's
easy to can your own pears! Here's how to do it, complete instructions in easy
steps and completely illustrated. In the winter when you open a jar, the pears
will taste MUCH bett er than anything you've ever had from a store, and by
selecting the right fruit, it will use less sugar than store-bought canned
pears. Pears, plums, cherries or nectarines can be packed in very light,
light or medium sugar syrup. They can also be packed in water, apple juice or
white grape juice.
er than anything you've ever had from a store, and by
selecting the right fruit, it will use less sugar than store-bought canned
pears. Pears, plums, cherries or nectarines can be packed in very light,
light or medium sugar syrup. They can also be packed in water, apple juice or
white grape juice.
Prepared this way, the jars have a shelf life of about 12 to 18 months, and aside from storing in a cool, dark place, require no special attention.
You might also be interested in making pear butter!
Directions for Making Canned Pears
Ingredients
- Fresh pears (for Asian pears, see this page!)n
- Syrup to fill the jars (about 3 quarts for each 7 quart jars - but it really depends how tightly you fill and pack the jars)
Equipment
- Jar grabber (to pick up the hot jars)
- Lid lifter (I like the lid rack that holds 12 lids or you can pull them out one at a time with the lid-lifter that has a magnet from the almost-boiling water where you sanitize them. ($4 at mall kitchen stores and local "big box" stores, but it's usually cheaper online from our affiliates)
- Jar funnel ($4 at mall kitchen stores and local "big box" stores, but it's usually cheaper online from our affiliates)
- At least 1 large pot
- Large spoons and ladles,
- Canning jars (often called Ball jars, Mason jars or Kerr jars) (Publix, Kroger, other grocery stores and some "big box" stores carry them - now about $12 per dozen quart jars (up 50% in 2 years!) including the lids and rings)
- 1 water bath canner (a huge pot with a lifting rack to sanitize the jars of pears after filling (about $30 to $35 at mall kitchen stores and local "big box" stores, but it's usually cheaper online from our affiliates) You CAN use a large pot instead, but the canners are deeper, and have a rack top make lifting the jars out easier. If you plan on canning every year, they're worth the investment.
Recipe and Directions
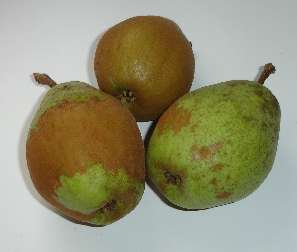
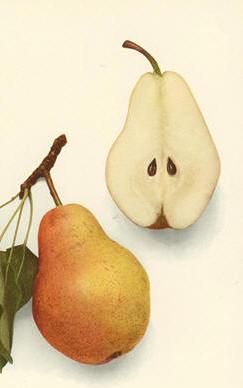
Step 1 - Selecting the pears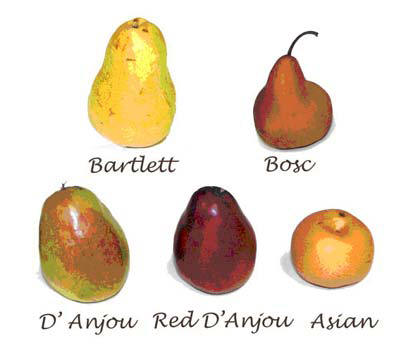
 The
most important step! You need pears that are sweet, and ripe.
A little known fact: Pears are picked unripe - they don't ripen well on
the tree. So, unlike peaches, pears WILL ripen at home! Proper ripeness of
pears at canning time is important to the quality
The
most important step! You need pears that are sweet, and ripe.
A little known fact: Pears are picked unripe - they don't ripen well on
the tree. So, unlike peaches, pears WILL ripen at home! Proper ripeness of
pears at canning time is important to the quality
of the product; as it
affects color, flavor, aroma, and over-all quality of finished product
Choose ripe, mature fruit of ideal quality for eating fresh or cooking. They should not be mushy, but they also should not be rock hard: just as ripe as you would eat them fresh.
The most popular variety is Bartlett pears, typically available the first two weeks in September in many areas. Orcas and El Dorado are also varieties commonly used for canning. See the FAQ. If they are to be transported or not processed immediately, pick while slightly green and allow them to ripen in a cool, dark place.
Store fresh pears in the refrigerator for up to 3 weeks.
Step 2 - How many pears and where to get them
An average of 171/2 pounds is needed per canner load of 7 quarts; an average of 11 pounds is needed per canner load of 9 pints. A bushel weighs 50 pounds and yields 16 to 25 quarts - an average of 21/2 pounds per quart. A pound of pears yields 2 cups of sliced pears.
You can pick your own, or buy them at the grocery store. But for large quantities, you will find that real* farmer's markets, like the Farmer's Market in Forest Park, Georgia have them at the best prices.
* - not the cutesy, fake farmer's markets that are just warehouse grocery stores that call themselves farmer's markets.
Step 3
- Prepare the sugar (or other sweetener) solution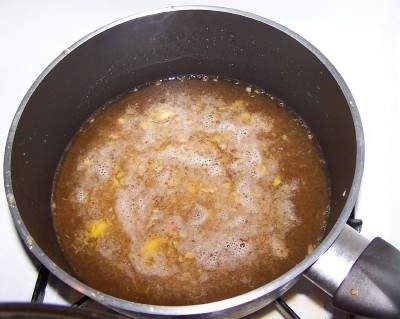
Pears must be packed in a solution of water and sugar or fruit juice. It's up to you which to use. Sugar is added to improve flavor, help stabilize color, and retain the shape of the fruit. It is not added as a preservative. Sugar solution is much less expensive (unless you have a supply of cheap grape juice), so I usually use a light solution to keep sugar (and the added calories) to a minimum.
| Syrup | Sugar | Water | Yield |
| Light | 2 cups | 6 cups | 7 cups |
|---|---|---|---|
| Medium | 3 cups | 6 cups | 6 1/2 cups |
| Heavy | 4 cups | 6 cups | 7 cups |
To prepare syrup, while heating water, add sugar slowly, stirring constantly to dissolve. Bring to a gentle boil. Fill jars while syrup is still boiling hot. After preparing the liquid syrup, keep it hot (but not boiling).
Step 4 - Wash the jars and lids
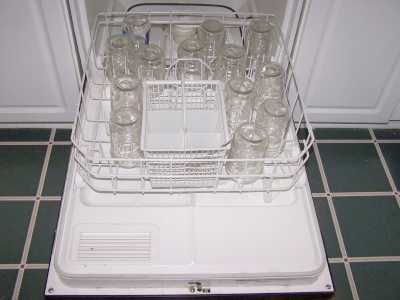 This
is a good time to get the jars ready! The dishwasher is fine for the jars;
especially if it has a "sanitize" cycle. Otherwise put the jars in boiling
water for 10 minutes. I just put the lids in a small pot of almost boiling
water for 5 minutes, and use the magnetic "lid lifter wand" (available
from target, other big box stores, and often grocery stores; and available
online - see this page) to pull them out.
This
is a good time to get the jars ready! The dishwasher is fine for the jars;
especially if it has a "sanitize" cycle. Otherwise put the jars in boiling
water for 10 minutes. I just put the lids in a small pot of almost boiling
water for 5 minutes, and use the magnetic "lid lifter wand" (available
from target, other big box stores, and often grocery stores; and available
online - see this page) to pull them out.
Step 5 -Wash the pears!
I'm sure you can figure out how to wash the pears in plain cold or lukewarm water
Step 6 - Peel and cut up the pears
Peel pears just like you would a potato or an apple. Cut lengthwise in halves and remove the core (it has seeds just like an apple). A melon baller or metal measuring spoon is perfect for coring pears.Cut out any brown spots and mushy areas. Cut the pears in half, or quarters or slices, as you prefer! Remove pits!
Tip from a visitor (I haven't tried this one yet, but it does work for peaches):
A visitor writes on September 19, 2013: "I thought I'd pass on a tip I was told from a farmer wife 37 years ago. You can blanch pears. Bring your pot of water to a boil. Put in 2-4 pears at a time and then remove. Don't let them sit in the water more than a few seconds. Place under cold water and the skin comes right off. I then put it in a bowl of cold water with fresh fruit. This has been a life saver for me and thought you'd like to know about it."
Step 7 - Prevent the fruit from darkening!
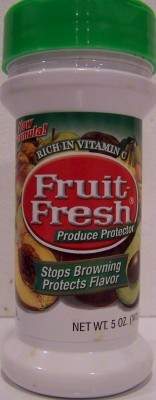 Now,
to keep the fruit from turning brown, when you get a bowlful, sprinkle
1/4 cup lemon juice or Fruit-Fresh (which is just a mix of citric acid
and vitamin C, perfectly natural). Then stir the pears to make
sure all the surfaces have been coated.
Now,
to keep the fruit from turning brown, when you get a bowlful, sprinkle
1/4 cup lemon juice or Fruit-Fresh (which is just a mix of citric acid
and vitamin C, perfectly natural). Then stir the pears to make
sure all the surfaces have been coated.
Here's a tip from another visitor. I haven't tried it yet, but it's worth a try, if you are having problems with pears turning pink:
"I just canned them last week and the water bath produced nice white pears, but the pressure canner turned them pink. I had never seen that before, glad to see from your instructions that the pears are ok. Suggestion for keeping pears from turning brown from an old Farm Journal Freezing and Canning cookbook: After peeling, coring, etc. the pears, drop them in a solution of 2 tblsp. each of salt and vinegar to 1 gal. water. Drain before packing jars or putting into syrup for hot pack. Used this method many times and always produced nice pears. Thanks again for the information. "
Step 8 - Prepare the hot pack syrup
Hot
packing is recommended for all fruits because it is a bit safer and
makes fruit easier to pack in jars. Raw packs also make poor quality
pears. Hot packed pears are less likely to float than pears canned
by the raw-pack method. Just put the cut pears into the boiling syrup
solution for 5 minutes.
Neither the USDA nor the Ball Blue Book recommend nor have a recipe for cold packing or raw packing pears.
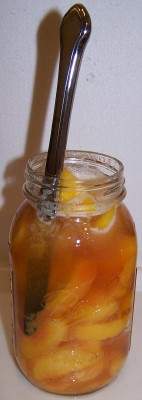
Note: you both heat the pears and then pack the pears in the same syrup!
Note: the photos below are of peaches (my pear photos came out blurry) - it it is IDENTICAL in every single regard.
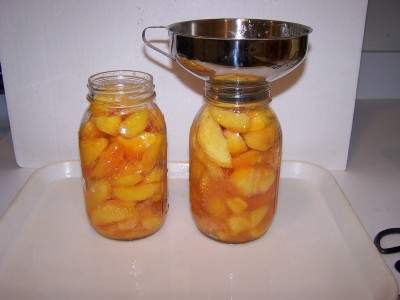
Step 9 - Fill the jars
Pack
the pears into sanitized jars (leaving 1/2 inch space at the top) and
cover with boiling sugar syrup leaving 1/2 inch head space. (If you don't
cook or heat the pears first, this is called "cold packing").
 Run a rubber
spatula or table knife gently between pears and jar to release trapped air
bubbles. To do this more effectively, tilt the jar slightly while running
the tool between the fruit and the edge of the jar and also pressing
inward against the fruit a few times.
Run a rubber
spatula or table knife gently between pears and jar to release trapped air
bubbles. To do this more effectively, tilt the jar slightly while running
the tool between the fruit and the edge of the jar and also pressing
inward against the fruit a few times.
After packing the pears in the jar, pour the sugar solution up to 1/2 inch (1 cm) from the top. the fruit should be covered completely. Wipe rim and screw threads with a clean damp cloth. Add lid, screw band and tighten firmly and evenly. Do not over tighten.
Tips!
 Canned
fruits often will float if the sugar syrup is too heavy, if jars are
packed too loosely or if air remains in the tissues of the fruit after
processing. To avoid this use a light or medium sugar syrup, make sure
fruit is firm and ripe and pack fruit tightly in jars without crushing.
Canned
fruits often will float if the sugar syrup is too heavy, if jars are
packed too loosely or if air remains in the tissues of the fruit after
processing. To avoid this use a light or medium sugar syrup, make sure
fruit is firm and ripe and pack fruit tightly in jars without crushing.
If fruit is not covered by liquid it may darken during storage (but does
not necessarily mean it is spoiled, as all fruits will darken somewhat).
To avoid this be sure fruit is covered by removing air bubbles from jars
liquid while still leaving the recommended head space. Also be sure to
remove trapped air bubbles as described earlier.
Pears and apples may also show a blue, red or pink color change after
canning. This is the result of natural chemical changes that sometimes
occur as fruits are heated. It is harmless and won't affect flavor!
Also, avoid storing canned food near heat sources such as a furnace,
water heater, hot water or sunny areas. Jars need to be kept cool and
dark for longer storage life and to protect against spoilage. Be sure to
store in a dry place. If the lid or band rusts, that can cause the seal
to break.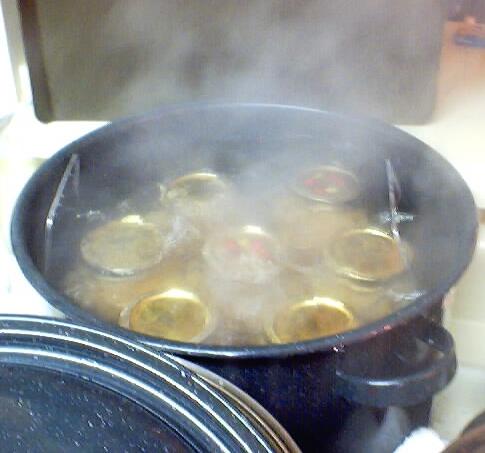
Step 10 - Process the jars in the water bath (or pressure canner)
You can "can" pears in either a water bath or pressure canner.
Water bath canner: Put the sealed jars in the canner and keep them cover with at least 1 inch of water and boiling. Boil them for at least 20 minutes (and no more than 30 min).
|
Water Bath Times. Recommended process time for Pears, halved or sliced in a boiling-water canner, using a hot pack in pints or quart jars. |
||||
| Process Time at Altitudes of | ||||
| Jar size | 0 - 1,000 ft | 1,001 - 3,000 ft | 3,001 - 6,000 ft | Above 6,000 ft |
| pints |
20 min | 25 | 30 | 35 |
| quarts | 25 min | 30 | 35 | 40 |
Pressure Canning: Processing directions for canning pears in a dial, or a weighted-gauge canner are given in Table 1, Table 2, and Table 3.
|
Table 2. Process Times for Pears, halved or sliced in a Dial-Gauge Pressure Canner. |
||||||
| Canner Pressure (PSI) at Altitudes of | ||||||
| Style of Pack | Jar Size | Process Time | 0 - 2,000 ft | 2,001 - 4,000 ft | 4,001 - 6,000 ft | 6,001 - 8,000 ft |
| Hot | Pints or Quarts | 10 minutes | 6 psi | 7 psi | 8 psi | 9 psi |
|
Table 3.
Process Times for Halved or sliced Pears in
a Weighted-Gauge Pressure Canner. |
|||
| Canner Pressure (PSI) at Altitudes of | |||
| Jar Size | Process Time (Min) | 0 - 1,000 ft | Above 1,000 ft |
| Pints or Quarts | 10 | 5 | 10 |
Step 11 - Remove and cool
Lift
the jars out of the water and let them cool without touching or bumping
them in a draft-free place (usually takes overnight), here they won't be
bumped. You can then remove the rings if you like, but if you leave them on, at least loosen them quite a bit, so they don't rust in place due to trapped moisture. Once the jars are cool,
you can check that they are sealed verifying that the lid has been sucked
down. Just press in the center, gently, with your finger. If it pops up
and down (often making a popping sound), it is not sealed.
If you put the jar in the refrigerator right away, you can still use it.
Some people replace the lid and reprocess the jar, then that's a bit iffy.
If you heat the contents back up, re-jar them (with a new lid) and the
full time in the canner, it's usually ok.
Canned pears and pear nectar will maintain quality best when stored up to 66 months at 40/F, 40 months at 70/F, or 15 months at 90/F.
If you'd rather dry or freeze pears, let me know; I'm working on those directions. Dried pears can be stored up to 24 months at 40/F, 3 months at 70/F, or 1 month at 90/F. Well packaged frozen pears will keep up to 18 months.
Other Equipment:
From left to right:
- Jar lifting tongs
helpful to pick up hot jars
- Lid lifter
- to remove lids from the pot
of hot water - Lids
- disposable - you may only
use them once - Ring
- holds the lids on the jar until after
the jars cool - then you remove them, save them and reuse them - Canning Jar funnel
- to fill the jars
Frequently asked questions!
- Is it safe to can unpeeled pears? I've spent hours
on websites and read several books on canning - to no avail. This is the
second year I've canned unpeeled pears in a 5 to 1 water to sugar
syrup (we're still alive). All my friends, their mothers and everything
I've read says to peel and I'm beginning to buckle under all the finger
wagging!!!
Answer: Buckle not! It is perfectly safe to can pears with the skins on!
- My pears, once finished with all the processing and cooled
in the jars - seem to have lost their shape. They are flat
pears, no nice curved shape that I started with. They almost seemed to
have been over cooked, and not nice firm fruit any more. Any suggestions
please
Answer: Aside from possibly overcooking, the most likely reason is the variety of pear. Some varieties hold up better to the heat and canning than others. The firmer / harder fleshed types work better, but you may sacrifice some flavor or sweetness of the softer types. Here is a guide to the varities that are considered best for home canning:
Bartlett - Popular pear for canning and fresh fruit. The fruit normally large with a smooth and attractive appearance. Flavor is considered to be tender, juicy, buttery and of high dessert quality. Ripens in most areas in late August to early September.
Orcas - Yellow fruit with light red blush. Large, flavorful pear, good for fresh eating, canning, or drying. Ripens in most areas in early September.
El Dorado - Medium to large fruit, with a lumpy surface. It is yellow-green even when ripe. el Dorado has a very long storage life, keeps until January-February. The quality is very good to excellent, considered sweet, smooth, melting. Ripens in most areas in mid-October.


Looking for canning equipment and supplies?
Water bath canner with a jar rack
Pressure canners for gas, electric and induction stoves: Presto 23Qt or T-fal 22Qt
Canning scoop (this one is PERFECT)
Ball Blue book (most recent version)
Jars: 8oz canning jars for jams
Find Other types of farms:
Farm markets and roadside stands
Road trips and camping resources
Local Honey, apiaries, beekeepers
Consumer fraud and scams information
Home canning supplies at the best prices on the internet!
Maple Syrup Farms, sugarworks, maple syrup festivals
Environmental information and resources
Farms For Your Event for birthday parties, weddings, receptions, business meetings, retreats, etc.
Festivals - local fruit and vegetable festivals
Get the
most recent version of
the Ball Blue Book
