Looking for Graham cracker pie crust in 2024? Scroll down this page and follow the links. And if you bring home some fruit or vegetables and want to can, freeze, make jam, salsa or pickles, see this page for simple, reliable, illustrated canning, freezing or preserving directions. There are plenty of other related resources, click on the resources dropdown above. If you are having a hard time finding canning lids, I've used these, and they're a great price & ship in 2 days.
If you have questions or feedback, please let me know! There are affiliate links on this page. Read our disclosure policy to learn more.
How to make the best Graham cracker pie crust - easily!
How to Make a Graham Cracker Pie Crust - Easily!
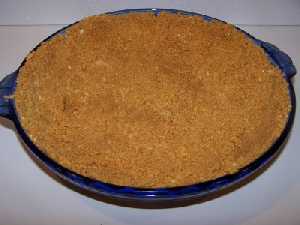 Yes, I know there are ready made Graham Cracker pie crusts in the frozen section
at the store, but they really are stale, dry and bland. A moist, tasty crust is easy
to make, just follow these simple, illustrated instructions!
Yes, I know there are ready made Graham Cracker pie crusts in the frozen section
at the store, but they really are stale, dry and bland. A moist, tasty crust is easy
to make, just follow these simple, illustrated instructions!For those unfamiliar with a Graham Cracker pie crust; you see them often on the bottom of cheesecakes. Unlike a dough pie crust, they have a sweeter flavor, a hint of honey, and a nice crumbly texture. You never find Graham cracker crust left on the plate.
For those in the British Isles, you may simply substitute "Digestives" for graham crackers. They are very similar, although I think they lack the faint flavor of honey in the Graham Crackers.
If you are looking for a lower-sugar, lower-fat and lower calorie version of a graham cracker pie crust, see this page instead.Directions for Making a Graham Cracker Pie Crust - Easily!
Ingredients and Equipment
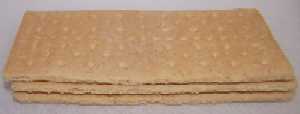
 1.5 cups of crushed Graham Crackers.
Note: in England, Australia, N.Z., you may not have Graham crackers, but
"digestives" are almost the same! It takes about 12 of the
crackers to make 1.5 cups crushed. 1.5 cups of crushed Graham Crackers.
Note: in England, Australia, N.Z., you may not have Graham crackers, but
"digestives" are almost the same! It takes about 12 of the
crackers to make 1.5 cups crushed. |
|
Recipe and Directions
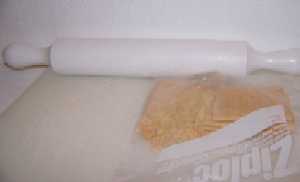
Step 1 - Crush the Graham Crackers.The easiest way, of course, is to buy them already crushed. Some years ago, Nabisco started selling them crushed, just for this purpose. If all you have is the crackers, put them in a plastic bag and roll over it with a rolling pin, or the bottom of a large heavy jar (like a full quart jar of spaghetti sauce). crush away until they are just crumbs!.
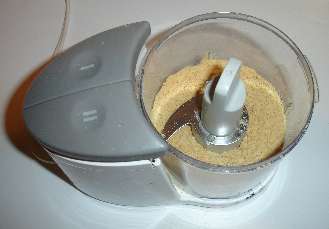
Note that is much faster and easier to just put the graham crackers in a food processor, chopper or blender and turn them into crumbs in a few seconds.
|
|
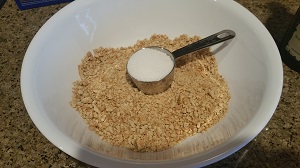 |
Step 2 - Mix the cracker crumbs and sugarMix the crumbs and sugar Stir it up!
|
Step 3 - Melt the butter6 Tablespoons (most of 1 stick) of butter or margarine usually melts without splattering in about 75 seconds in my microwave set on medium. Yours may vary! Or you can use a stove on very low heat. Either way, be sure to cover the container while you melt it.
|
|
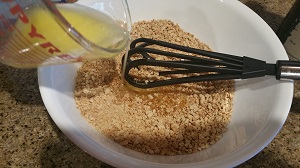 |
Step 4 - Mix the melted butter in with the crumbs and sugar mixtureStir them together to get the butter evenly spread among the crumbs. Try to work without delay, as the crumbs will stick together better when the butter is warfm. |
|
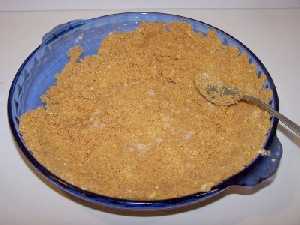
. Step 5 - Press the mixture into the pie plateTry to make it about 1/8 inch (1/3 cm) evenly all around. The bottom of a soup spoon is ideal for this. The crumbs should stick pretty well, without being wet. If they won't stick where you press them, just add another tablespoon of water to the mix. |
|
|
|
Step 6 - Finishing upEven the crumbs up and make sure there are no gaps or holes. That's all there is to it. Now, you're ready to add the pie filling! TIP: For those wanting to make a "no bake" pie, such as lemon meringue, you need to bake the crust first. A 375 degree (F) oven for 4-5 minutes or until the crust is lightly browned. Cool before filling. If you chill the crust for an hour before you use it or bake it, it will prevent crumbling when you want to serve it. (as does the baking). |
| See here for related tools, equipment, supplies on Amazon See here for related tools, equipment, supplies on Amazon |
Home Canning KitsSee the seller's website for features, pricing and user reviews! This is the same type of standard canner that my grandmother
used to make everything from pumpkinauce to jams and jellies to tomato and
spaghetti sauce. This complete kit includes everything you need: the canner, jar rack, Jar grabber tongs,
lid lifting wand, a plastic funnel,
labels, bubble freer, and the bible of canning, the Ball Blue Book. You will never need anything else except more jars and lids!
|
 |
Deluxe Food Strainer & Sauce MakerClick here for more information, other strainers and supplies or to order!With the Deluxe Food Strainer/Sauce Maker, you can make creamy apple sauce and smooth tomato sauce without having to peel and core! This multi-use strainer forces food through a stainless steel screen, automatically separating the juice and pulp from the seeds, shins, and stems. Perfect for purees, creamed soups, baby foods, pie filling, juices, jams, and more. Save time, effort, and money by preparing your own tasty sauces to be used immediately or boiled for future use. Do bushels with ease and in a fraction of the time. Includes the tomato/apple screen with easy twist on design and instruction/recipe booklet. The Deluxe model comes with the standard Tomato/Apple Screen; as well as the Berry Screen, Pumpkin Screen, and Grape Spiral. Note
|
|
Lids, Rings, Jars, mixes, pectin, etc.Need lids, rings and replacement jars? Or pectin to make jam, spaghetti sauce or salsa mix or pickle mixes? Get them all here, and usually at lower prices than your local store! |
Can't find the equipment? We ship to all 50 states!
Looking for canning equipment and supplies?
Water bath canner with a jar rack
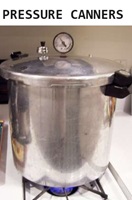
Pressure canners for gas, electric and induction stoves: Presto 23Qt or T-fal 22Qt
Canning scoop (this one is PERFECT)
Ball Blue book (most recent version)
Jars: 8oz canning jars for jams
Find Other types of farms:
Farm markets and roadside stands
Road trips and camping resources
Local Honey, apiaries, beekeepers
Consumer fraud and scams information
Home canning supplies at the best prices on the internet!
Maple Syrup Farms, sugarworks, maple syrup festivals
Environmental information and resources
Farms For Your Event for birthday parties, weddings, receptions, business meetings, retreats, etc.
Festivals - local fruit and vegetable festivals
Get the
most recent version of
the Ball Blue Book
With this Presto 23 quart pressure canner and pressure cooker, you can "can" everything, fruits, vegetables, jams, jellies, salsa, applesauce, pickles, even meats, soups, stews. Model 01781

You can make jams, jellies, can fruit, applesauce, salsa and pickles with water bath canners, like this Granite Ware 12-Piece Canner Kit, Jar Rack, Blancher, Colander and 5 piece Canning Tool Set

