
How to Make Homemade Pickled Watermelon Rinds - Easily! With Step-by-step Photos, Recipe, Directions, Ingredients and Costs
How to Make Homemade Canned Pickled Watermelon Rinds
Click here for a PDF print version
 You
think making and canning your own pickled watermelon rinds is difficult or
expensive? Not at all! You can do it with basic equipment already in
your kitchen - you just need a canning pot. And thanks to the vinegar in
pickled watermelon rinds, you can use a plain open water bath pot (or a pressure
canner, without the weight on)
You
think making and canning your own pickled watermelon rinds is difficult or
expensive? Not at all! You can do it with basic equipment already in
your kitchen - you just need a canning pot. And thanks to the vinegar in
pickled watermelon rinds, you can use a plain open water bath pot (or a pressure
canner, without the weight on)
So, here's how to can pickled watermelon rinds! The directions are complete with instructions in easy steps and completely illustrated. In the winter when you open a jar, the pickled watermelon rinds will taste MUCH better than any store-bought Canned Pickled Watermelon Rinds!
The recipe is easy, but the you will need to 2 days in total, as the rinds need to soak in brine for 3 to 4 hours, then are quickly cooked (10 minutes), then must rest in the fridge over night.
Prepared this way, the jars have a shelf life of about 12 months, and aside from storing in a cool, dark place, require no special attention.
Directions for Making Canned Pickled Watermelon Rinds
Yield: About 4 or 5 pints.
Ingredients
- 3 quarts (about 6 pounds) watermelon rind, unpared
- 3/4 cup salt
- 3 quarts water
- 2 quarts (2 trays) ice cubes
- 9 cups sugar (Yes, you may substitute Stevia or Splenda if that is your need or preference)
- 3 cups 5% vinegar, white
- 3 cups water
- 1 tablespoon (about 48) whole cloves
- 6 cinnamon sticks, 1 inch pieces
- 1 lemon, thinly sliced, with seeds removed
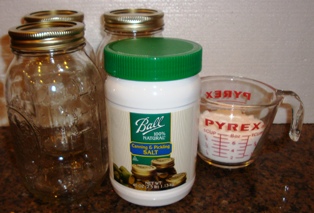
Equipment
- At least 1 large pot
- Large spoons and ladles,
- Canning jars (often called Ball jars, Mason jars or Kerr jars) (Publix, Kroger, other grocery stores and some "big box" stores carry them - about $7 per dozen pint jars including the lids and rings)
- Jar grabber (to pick up the hot jars)
- Jar funnel ($4 at mall kitchen stores and local "big box" stores, but it's usually cheaper online from our affiliates)
- 1 Water Bath Canner OR a Pressure Canner (a large pressure pot with a lifting rack to sanitize the jars after filling about $75 to $200 at mall kitchen stores and "big box" stores, but it is cheaper online; see this page for more about pressure canners).
 Watermelon
Rind Pickles Recipe and Directions
Watermelon
Rind Pickles Recipe and Directions
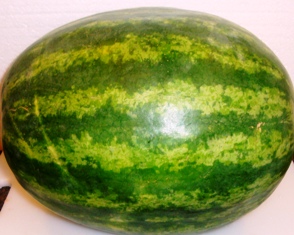
Step 1 -Wash the watermelon!
I'm sure you can figure out how to scrub the watermelon in plain cold or lukewarm water using your hands or a vegetable brush.
Step 2 - Make the brine solution
Make the brine by mixing the 3/4 cup salt with 3 quarts cold water. Stir well.
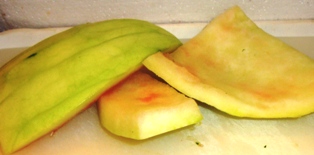
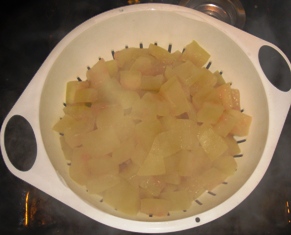
Step 3 - Prepare the watermelon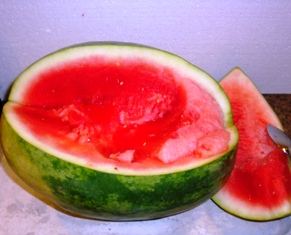
Trim the pink flesh and outer green skin from thick watermelon rind. Cut into 1 inch squares or any shapes you desire. You only want the white portion. Of course, you can give the red parts to your kids to eat while you're cooking! And the red part makes great watermelon jelly!

Step 4 - Brine the watermelon rind
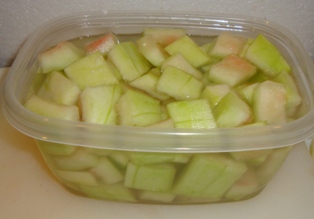 Cover
with the brine solution from step 3. Add the 2 trays (2 quarts worth) of
ice cubes.
Cover
with the brine solution from step 3. Add the 2 trays (2 quarts worth) of
ice cubes.
Let stand 3 to 4 hours* or overnight**.
(* USDA recommendation; ** Ball Blue Book recommendation;
USDA is more
recent, so that's the minimum)
Step 5 - Prepare the seasoning mix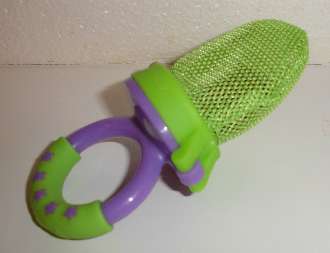
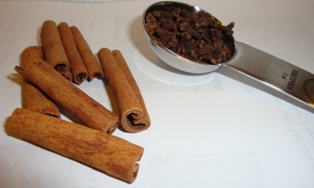 Combine
- 1 tablespoon (about 48) whole cloves
- 6 cinnamon sticks, 1 inch pieces
tied in a clean, thin, white cloth. I use a baby's ice lollipop bag (available at mall kitchen stores, Target and other local "big box" stores) as it is reusable and easy to use (see the photo).
Step 6 - Drain and rinse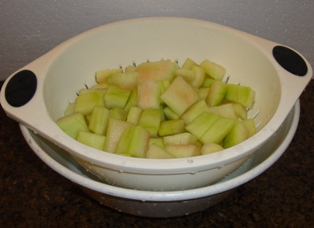
After the 3 to 4 hours minimum brining has elapsed, drain and then rinse in cold water and drain again.
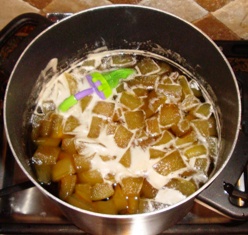
Step 7 - Cook the watermelon rind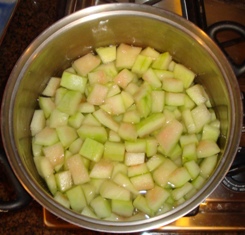
Cover the watermelon rind with cold water and cook until almost fork tender, about 10 minutes (do not overcook). Halfway through (after 5 minutes), add the sliced lemon.
Step 8 - Cook the seasoned syrup mix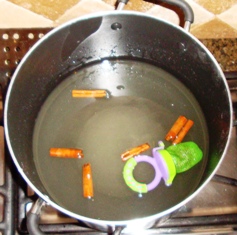
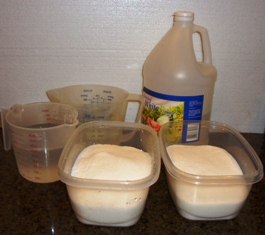 While
the watermelon rind is cooking, combine
While
the watermelon rind is cooking, combine
- 9 cups sugar
- 3 cups 5% vinegar, white
- 3 cups water
and the seasoning mix bag from step 6 in a large pot and boil for 5 minutes.
Step 9 - Drain the watermelon rind and add to the seasoned syrup.
 Drain
the watermelon rind and add to the seasoned syrup solution from the previous step (remove
the syrup from heat).
Drain
the watermelon rind and add to the seasoned syrup solution from the previous step (remove
the syrup from heat).
Step 10 - Chill overnight
Let the watermelon rind and seasoned syrup stand overnight in the refrigerator.
Step 11 - Prepare the jars and canner
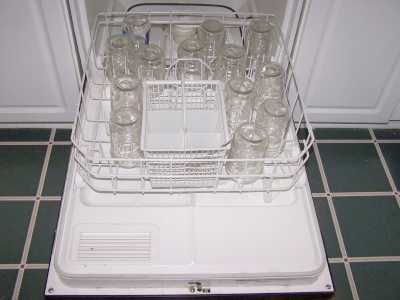 Wash
the jars and lids
Wash
the jars and lids
This is a good time to get the jars ready! The dishwasher is fine for the jars; especially if it has a "sanitize" cycle. Otherwise put the jars in boiling water for 10 minutes. I just put the lids in a small pot of almost boiling water for 5 minutes, and use the magnetic "lid lifter wand" (available from target, other big box stores, and often grocery stores; and available online - see this page) to pull them out.
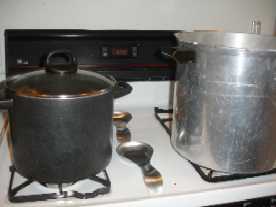
Get the canner heating up
Rinse out your canner, put the rack in the bottom, and fill it with hot tap water. (Of course, follow the instruction that came with the canner, if they are different). Put it on the stove over low heat just to get it heating up for later on.
Step 12 - Heat and prepare to can!
 Heat
the watermelon rind in syrup by bringing it to a boil. As soon as a boil
is reached, turn down the heat to cook slowly for 1 hour.
Heat
the watermelon rind in syrup by bringing it to a boil. As soon as a boil
is reached, turn down the heat to cook slowly for 1 hour.
Step 13 - Packing the watermelon rind in the canning jars
 This
is called "hot packing"! Fill the jars loosely, but be sure to leave
1/2-inch of space at the TOP of the jar. That is called "headspace"
and is needed for expansion during heating in the water bath. To each
jar add 1 piece of stick cinnamon from spice bag;
This
is called "hot packing"! Fill the jars loosely, but be sure to leave
1/2-inch of space at the TOP of the jar. That is called "headspace"
and is needed for expansion during heating in the water bath. To each
jar add 1 piece of stick cinnamon from spice bag;
Step 14 - Pour boiling cooking liquid into each packed jar
Use a ladle or pyrex measuring cup to carefully fill each packed jar with the hot syrup solution, again allowing 1/2-inch headspace. The watermelon rind should be covered and there should still be 1/2 inch of airspace left in the top of each jar. Be careful not to burn yourself, (or anyone else - children should be kept back during this step!)
Remove air bubbles and adjust headspace if needed. Wipe rims of jars with a dampened clean paper towel; adjust two-piece metal canning lids.
Step 15 - Put the lids and rings on
Put the lids on each jar and seal them by putting a ring on and screwing it down snugly (but not with all your might, just "snug").
Step 16 - Put the jars in the canner and the lid on the canner
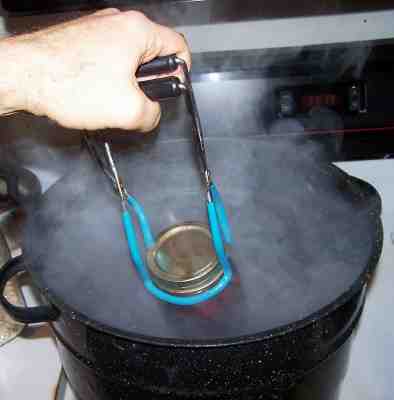 Using
the jar tongs, put the jars on the rack in the canner. Make sure
the tops of the jars are covered by at least 1 inch of water.
Using
the jar tongs, put the jars on the rack in the canner. Make sure
the tops of the jars are covered by at least 1 inch of water.
Step 17 - Process for 10 minutes*
The chart below will help you determine the right processing time and pressure, if you have a different type of canner, or are above sea level. For most people, using a plain open water bath canner, the time will be 10 minutes.
Process according to the recommendations below. Let cool, undisturbed, 12-24 hours and check for seals.
|
Recommended process time for Watermelon Rind Pickles in a boiling-water (open, non-pressurized) canner. |
||||
|
|
Process Time at Altitudes of |
|||
|
Style of Pack |
Jar Size |
0 - 1,000 ft |
1,001 - 6,000 ft |
Above 6,000 ft |
|
Hot |
Pints |
10 min |
15 |
20 |
Step 18 - Remove the jars
Lift
the jars out of the water and let them cool on a wooden cutting board or
a towel, without touching or bumping them in a draft-free place
(usually takes overnight), here they won't be bumped. You can then
remove the rings if you like, but if you leave them on, at least loosen
them quite a bit, so they don't rust in place due to trapped moisture.
Once the jars are cool, you can check that they are sealed verifying
that the lid has been sucked down. Just press in the center, gently,
with your finger. If it pops up and down (often making a popping sound),
it is not sealed. If you put the jar in the refrigerator right away, you
can still use it. Some people replace the lid and reprocess the jar,
then that's a bit iffy. If you heat the contents back up, re-jar them
(with a new lid) and the full time in the canner, it's usually ok.
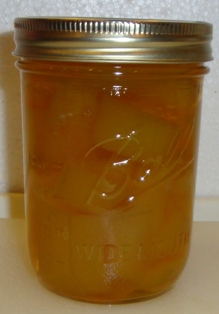
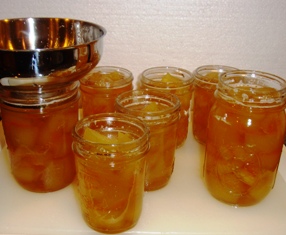
You're done!
Other Equipment:
|
From left to right:
|
Canning Supplies Starter Kit - Canning Jar Lifter, Canning funnel, Scissor Tongs, more |
 |
Frequently Asked Questions
Q. Is it safe to can watermelon rind in a traditional water bath? If so how long do you do process them?
A. Yes, PICKLED watermelon rind, the recipe above, has been tested and is very safe in a water bath canner.


Looking for canning equipment and supplies?
Water bath canner with a jar rack
Pressure canners for gas, electric and induction stoves: Presto 23Qt or T-fal 22Qt
Canning scoop (this one is PERFECT)
Ball Blue book (most recent version)
Jars: 8oz canning jars for jams
Find Other types of farms:
Farm markets and roadside stands
Road trips and camping resources
Local Honey, apiaries, beekeepers
Consumer fraud and scams information
Home canning supplies at the best prices on the internet!
Maple Syrup Farms, sugarworks, maple syrup festivals
Environmental information and resources
Farms For Your Event for birthday parties, weddings, receptions, business meetings, retreats, etc.
Festivals - local fruit and vegetable festivals
Get the
most recent version of
the Ball Blue Book
