
Looking for How to Can Tomato Bruschetta in 2025? Scroll down this page and follow the links. And if you bring home some fruit or vegetables and want to can, freeze, make jam, salsa or pickles, see this page for simple, reliable, illustrated canning, freezing or preserving directions. There are plenty of other related resources, click on the resources dropdown above. If you are having a hard time finding canning lids, I've used these, and they're a great price & ship in 2 days.
If you have questions or feedback, please let me know! There are affiliate links on this page. Read our disclosure policy to learn more.
How to Can Tomato Bruschetta
Tomato Bruschetta
Yield: 7 (8 oz) half- pint jars
Home-canned Tomato Bruschetta tastes great on a cold winter day to remind you of summer! It is a clean, elegant recipe combining your own ripe tomatoes mixed with garlic, oregano, basil and balsamic vinegar.
Ingredients
- Tomatoes: 4 lb (about 12 medium sized Roma / Paste / Plum tomatoes to produce 9 cups of chopped cored tomatoes
- 5 cloves worth (5 teaspoons of minced garlic (I used the already prepared minced garlic)
- 1 cup white wine vinegar 5% acidity
- 1/2 cup water
- 2 Tablespoons sugar (or Stevia / Truvia)
- 2 Tablespoons dried basil
- 2 Tablespoons dried oregano
- 2 Tablespoons balsamic vinegar
Equipment
- 1 water bath canner (a huge pot to sanitize the jars after filling (about $30 to $35 - $30 at mall kitchen stores and local "big box" stores. Note: we sell canners, supplies and kits through our affiliates: click here or see the bottom of this page) Tomatoes are on the border between the high-acid fruits that can be preserved in a boiling-water bath and the low-acid fruits, vegetables and meats that need pressure canning.
- Pint (or smaller) canning jars (Ball or Kerr jars can be found at Publix, Kroger, Safeway and local "big box" stores - about $13 per dozen 8-ounce jars, more for quilted design or larger jars, including the lids and rings).
- Lids - thin, flat, round metal lids with a gum binder that seals them against the top of the jar. They may only be used once.
- Rings - metal bands that secure the lids to the jars. They may be reused many times.
- Jar grabber (to pick up the hot jars)
- Lid lifter (has a magnet to pick the lids out of the almost-boiling water where you sanitize them. ($4 at mall kitchen stores and local "big box" stores, but it's usually cheaper online from our affiliates)
- 1 large pot.
- Large spoons and ladles,
- Jar funnel ($3-Grocery stores, like Publix, Kroger and Safeway and local "big box" stores; sometimes even hardware stores)
Directions
Step 1 - Get things prepared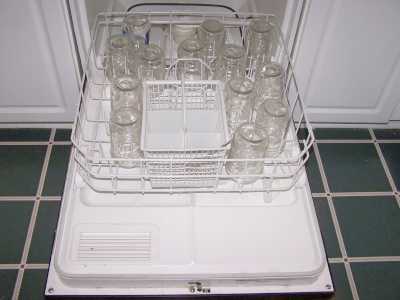
The dishwasher is fine for the jars; especially if it has a "sanitize" cycle. I get that going while I'm preparing everything else, so it's done by the time I'm ready to fill the jars.
Be sure to let it go through the rinse cycle to get rid of any soap!
Lids: Put the very hot (but not quite boiling; around 180 F,
steaming water is fine) water for at least
several minutes. 
Note: everything gets sanitized in the water bath (step 7) anyway, so this just helps to ensure there is no spoilage later!)
Fill the water canner to 2/3 full with water and getting heating on the stove.
Step 2 - Selecting the tomatoes
 It's fun to go pick your own and you can obviously get better quality
tomatoes!
It's fun to go pick your own and you can obviously get better quality
tomatoes!
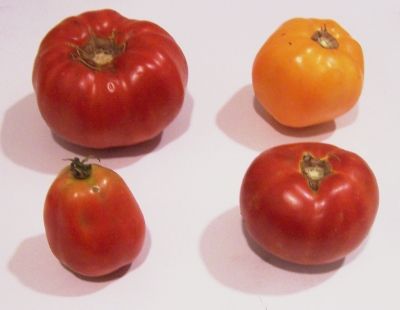
At right is a picture of tomatoes from my garden - they are so much better than anything from the grocery store. And if you don't have enough, a pick-your-own farm is the pace to go! At right are 4 common varieties that will work:
| Top left: Beefsteak | Top right: Lemon Boy, yellow |
| Bottom left: Roma, paste-type | Bottom right: Better Boy |
 The picture
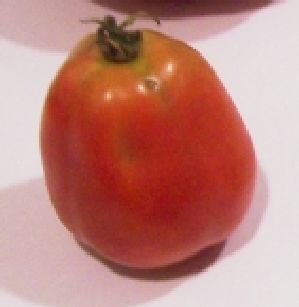
at left shows the best variety of tomato to use: Roma; also called paste
tomatoes. they have fewer sides, thicker, meatier walls, and less
water.
The picture
at left shows the best variety of tomato to use: Roma; also called paste
tomatoes. they have fewer sides, thicker, meatier walls, and less
water.
Also, you don't want mushy, bruised or rotten tomatoes!
Step 3 - Mix and heat the seasoning ingredients
Put the garlic, wine, wine vinegar, water, sugar, basil, oregano and balsamic vinegar in a pot and
bring it to a full rolling boil over high heat, stirring
occasionally.
Then reduce the heat, cover and simmer 5 minutes or until garlic is heated through.
And then remove from the heat.
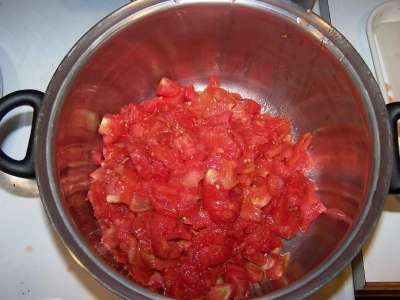
Step 4 - Chop the tomatoes
Chop the tomatoes into 1/2 (1 cm) sized cubes. Best are Roma / Paste / Plum tomatoes but you can use Beefstake... I wouldn't recommend tiny cherry tomatoes, they are too watery. you will need about 9 cups of chopped cored tomatoes
Step 5 - Fill the jars with tomatoes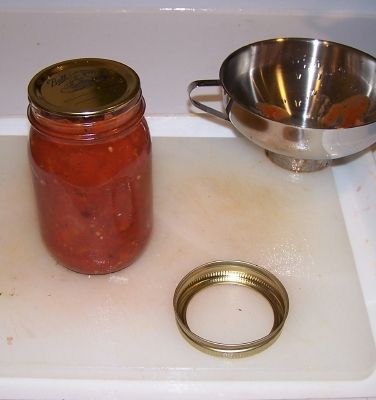
Fill the jars with the cubes tomatoes leaving 1/2 inch headspace
Step 6 - Add the Vinegar seasoning liquid
Ladle the hot vinegar mixture over tomatoes, leaving a 1/2 inch headspace. Free any trapped air bubbles and wipe the jar's rim
Step 7 - Put the lid and rings on
Put the lid and ring on, seat the lid and hand-tighten the ring around them.
Be sure the contact surfaces (top of the jar and underside of the ring) are clean to get a good seal!
Step 8 - Process (boil) the jars in the canner
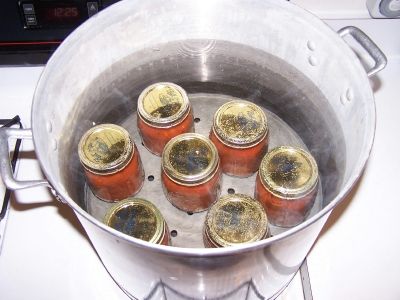 Put them in the canner and keep them covered with at least 1 to 2
inches of water. Keep the water boiling.
Put them in the canner and keep them covered with at least 1 to 2
inches of water. Keep the water boiling.
Process the jars in a boiling-water bath for:
| Recommended process time for Tomato Bruschetta in a boiling-water canner. | ||||
| Process Time at Altitudes of | ||||
| Style of Pack | Jar Size | 0 - 1,000 ft | 1,001 - 6,000 ft | Above 6,000 ft |
| Hot | Pints or 8 oz jars | 20 min | 25 | 30 |
Step 9 - Done
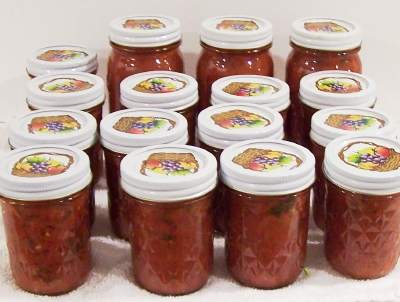 Lift the jars out of the water and let them cool without touching or
bumping them in a draft-free place (usually takes overnight) You can
then remove the rings if you like, but if you leave them on, at least loosen them quite a bit, so they don't rust in place due to trapped moisture. Once the jars are cool, you can check
that they are sealed verifying that the lid has been sucked down. Just
press in the center, gently, with your finger. If it pops up and down
(often making a popping sound), it is not sealed. If you put the jar in
the refrigerator right away, you can still use it. Some people replace the
lid and reprocess the jar, then that's a bit iffy. If you heat the
contents back up, re-jar them (with a new lid) and the full time in the
canner, it's usually ok.
Lift the jars out of the water and let them cool without touching or
bumping them in a draft-free place (usually takes overnight) You can
then remove the rings if you like, but if you leave them on, at least loosen them quite a bit, so they don't rust in place due to trapped moisture. Once the jars are cool, you can check
that they are sealed verifying that the lid has been sucked down. Just
press in the center, gently, with your finger. If it pops up and down
(often making a popping sound), it is not sealed. If you put the jar in
the refrigerator right away, you can still use it. Some people replace the
lid and reprocess the jar, then that's a bit iffy. If you heat the
contents back up, re-jar them (with a new lid) and the full time in the
canner, it's usually ok.


Looking for canning equipment and supplies?
Water bath canner with a jar rack
Pressure canners for gas, electric and induction stoves: Presto 23Qt or T-fal 22Qt
Canning scoop (this one is PERFECT)
Ball Blue book (most recent version)
Jars: 8oz canning jars for jams
Find Other types of farms:
Farm markets and roadside stands
Road trips and camping resources
Local Honey, apiaries, beekeepers
Consumer fraud and scams information
Home canning supplies at the best prices on the internet!
Maple Syrup Farms, sugarworks, maple syrup festivals
Environmental information and resources
Farms For Your Event for birthday parties, weddings, receptions, business meetings, retreats, etc.
Festivals - local fruit and vegetable festivals
Get the
most recent version of
the Ball Blue Book
