
Looking for How to can your own corn from corn-on-the-cob using the raw pack method (directions, recipe, with photos and free) in 2024? Scroll down this page and follow the links. And if you bring home some fruit or vegetables and want to can, freeze, make jam, salsa or pickles, see this page for simple, reliable, illustrated canning, freezing or preserving directions. There are plenty of other related resources, click on the resources dropdown above. If you are having a hard time finding canning lids, I've used these, and they're a great price & ship in 2 days.
If you have questions or feedback, please let me know! There are affiliate links on this page. Read our disclosure policy to learn more.
How to can your own corn from corn-on-the-cob using the raw pack method (directions, recipe, with photos and free)
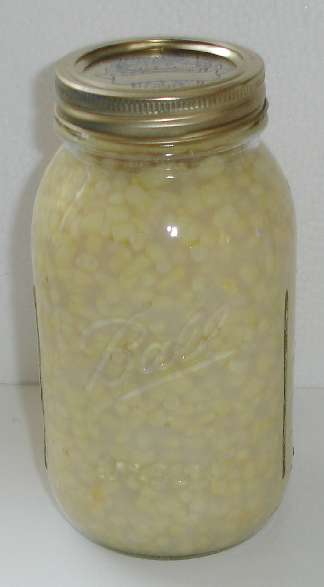
How to Can Corn - From Corn on the Cob!
using the "Raw Pack" method
Click here for a PDF print version
 If
you don't have room in your freezer, but you want to be able to enjoy the corn
from your garden this winter, then home-canning your corn is the easy way to do
it. Here's how to do it, complete instructions in easy steps and completely
illustrated. The corn will taste MUCH better than any canned corn you've ever
had from a store. Frozen corn, of course, retains flavor better. If
you want directions for freezing corn,
click here. One other important note: you will need a Pressure Canner.
Corn is a low acid food, so you cannot use a water bath canner . It
must be a Pressure Canner. Pressure canners cost more than water bath canners,
but they are more versatile and last a lifetime, and your children and
grandchildren may be using it. See this page for more information about pressure canners.
If
you don't have room in your freezer, but you want to be able to enjoy the corn
from your garden this winter, then home-canning your corn is the easy way to do
it. Here's how to do it, complete instructions in easy steps and completely
illustrated. The corn will taste MUCH better than any canned corn you've ever
had from a store. Frozen corn, of course, retains flavor better. If
you want directions for freezing corn,
click here. One other important note: you will need a Pressure Canner.
Corn is a low acid food, so you cannot use a water bath canner . It
must be a Pressure Canner. Pressure canners cost more than water bath canners,
but they are more versatile and last a lifetime, and your children and
grandchildren may be using it. See this page for more information about pressure canners.
See this FAQ for more details: Can I use a water-bath canner instead of a Pressure Canner for low acid foods like corn?
Hot Pack v. Raw Pack? Raw pack means it is placed into the jars without heating, and then the jars are processed in the canner. Which is better? Not much difference. Food safety experts prefer the hot pack method, because you can stir the corn the ensure it gets evenly and thoroughly heated. I usually use the "hot pack" method. Hot pack instructions are here, should you prefer them.
Directions for Canning Corn at Home
Ingredients and Equipment
- fresh corn on the cob - any quantity. I figure 1.5 ears per
serving.
- 1 medium sized pot of boiling water (to pour over the corn in the
jars)

- Canning jars, lids and rings
- 2 large bowls, one filled with cold water and ice.
- 1 sharp knife
- 1 Large spoon or ladle
Ideal ear - ripe but not bloated. the kernels are still tender (easily punctured with your fingernail) and the juice is milky). White, yellow or bicolor types are all fine!
Instructions
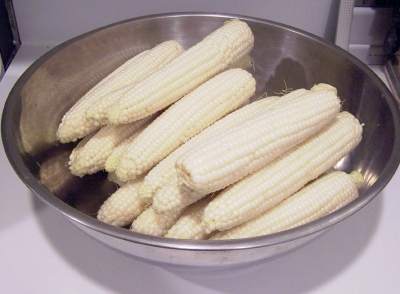
Step 1 - Get yer corn!
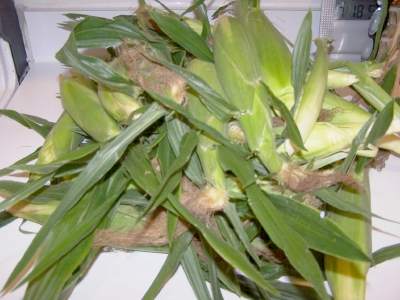 Start
with fresh corn on the cob - as fresh as you can get. If there is a
delay between harvesting and canning, put it in the refrigerator or put
ice on it. The sugars break down quickly at room temperature.
According to the USDA, about 32 pounds (in husk) of sweet corn is needed
per canner load of 7 quarts; an average of 20 pounds is needed per canner
load of 9 pints. Note that a bushel weighs 35 pounds and yields 6 to 11
quarts of canned corn, which is an average of 41/2 pounds of corn in the
husks per quart of finished canned corn.
Start
with fresh corn on the cob - as fresh as you can get. If there is a
delay between harvesting and canning, put it in the refrigerator or put
ice on it. The sugars break down quickly at room temperature.
According to the USDA, about 32 pounds (in husk) of sweet corn is needed
per canner load of 7 quarts; an average of 20 pounds is needed per canner
load of 9 pints. Note that a bushel weighs 35 pounds and yields 6 to 11
quarts of canned corn, which is an average of 41/2 pounds of corn in the
husks per quart of finished canned corn.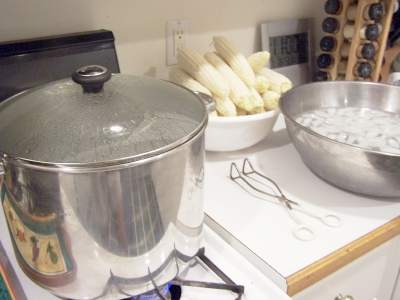
Step 2 - Get the pots ready
Get the medium sized pot filled with water.
This is also a good
time to get the c
Step 3 - Husk the corn
 Husk
the corn and pick off as much of the silk as you can.
Husk
the corn and pick off as much of the silk as you can.
A soft vegetable brush is the fastest and easiest way to get the remaining silk off - just don't be too rough with it.
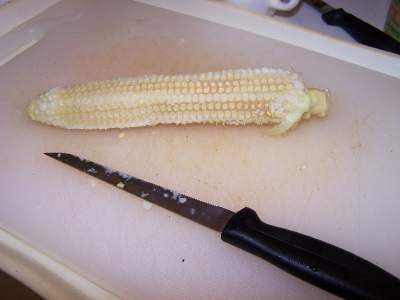
Step 4 - Cut the kernels from the cob
 Obviously,
if you are canning the corn on the cob, skip this step.
Obviously,
if you are canning the corn on the cob, skip this step.
Whole Kernel Corn - Cut kernels from cob about 2/3 to 3/4 the depth of the kernels. I hold the ear by the small end, and slide the knife down the ear. See the next photo.
Cream Style Corn - Cut kernel tips about 1/2 deep and scrape the cobs with the back of a knife to remove the juice and the heart of the kernel.
 Another
way to prepare cream style corn for canning is to cut and scrape the corn
from the cob without blanching. Place the cut corn in a double boiler, and
heat with constant stirring for about 10 minutes or until it thickens; allow
to cool by placing the pan in ice water.
Another
way to prepare cream style corn for canning is to cut and scrape the corn
from the cob without blanching. Place the cut corn in a double boiler, and
heat with constant stirring for about 10 minutes or until it thickens; allow
to cool by placing the pan in ice water.
You don't need a special tool, just a very sharp knife! Some folks use an electric carving knife and report this is the easiest method, and a few use a meat slicer.
However, a number of people wrote in to point out that they prefer one of the tools below, as do I, often because it is easier for them due to arthritis, or simply faster.
See here for related tools, equipment, supplies on Amazon See here for related tools, equipment, supplies on Amazon See here for related tools, equipment, supplies on Amazon
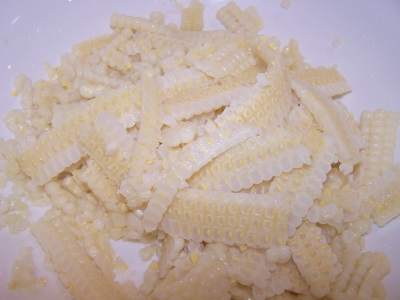
As the corn piles up in your bowl, it will look like this!
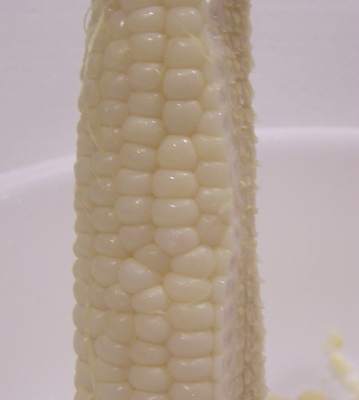
 Close
up, the corn comes off in strips. As you put these in the bag,
they will easily separate into separate kernels.
Close
up, the corn comes off in strips. As you put these in the bag,
they will easily separate into separate kernels.
Step 5 - Get a pot of water boiling
You will need this to fill the jars after you pack them with corn.
Step 6 - Pack the jars
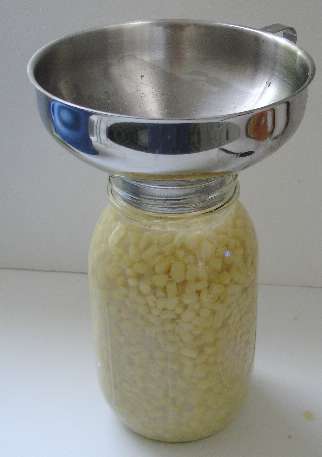 Fill
jars with corn leaving 3/4 to 1 inch headspace (corn tends to expand
more than other vegetables).
Fill
jars with corn leaving 3/4 to 1 inch headspace (corn tends to expand
more than other vegetables).
Step 7 - Fill with hot liquid
Be sure to include enough hot water from step 7 to cover the corn and jostle out any air bubbles that may be trapped. You may add additional plain boiling water, if you are short on liquids from the heated corn. Still leave 3/4 to 1 inch headspace.
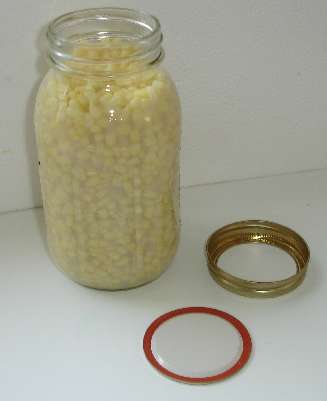
Step 8 - Put the lids and rings on the jars
Wipe the rims of the jars, put the lids on and then the rings on snugly, not not TOO hard.
|
Processing time for corn in a dial-gauge pressure canner |
|||||
| Raw Pack | Canner Pressure (PSI) at Altitudes of | ||||
| Jar Size | Process Time | 0 - 2,000 ft | 2,001 - 4,000 ft | 4,001 - 6,000 ft | 6,001 - 8,000 ft |
| Pints | 55 min | 11 lb | 12 lb | 13 lb | 14 lb |
| Quarts | 85 min | 11 | 12 | 13 | 14 |
|
Processing time for corn in a weighted-gauge pressure canner |
|||
| Raw Pack | Canner Pressure (PSI) at Altitudes of | ||
| Jar Size | Process Time | 0 - 1,000 ft | Above 1,000 ft |
| Pints | 55 min | 10 lb | 15 lb |
| Quarts | 85 | 10 | 15 |
Step 9 - Done!
When
the processing time is up, turn off the heat, and allow the pressure
canner to cool and the pressure to drop to zero before opening the
canner. Let the jars cool without being jostled.
Later, when you are ready to serve the corn, it just takes about 3 or 4 minutes in the microwave (from frozen) or in the top of a double boiler. The corn doesn't need to be "cooked", just heated up!
Tips:
- Harvest early in the morning, especially if the weather is hot, to get peak flavor.
- Harvest the corn at its peak maturity (milky fluid in the kernels, kernels tender, and not bloated). Immature corn is watery when cooked and over-ripe corn is chewy and doughy.
- Process promptly after harvesting, or keep cooled in the fridge or with ice until then.
Frequently Asked Questions
- What causes corn to turn brown during processing?
This occurs most often when too high a temperature is used causing caramelization of the sugar in the corn. It may also be caused by some minerals in the water used in canning.
- Aspirin / Salicylic Acid? My mother canned corn using salicylic acid.
The only recipe I have is: 7 cups corn 1/2 cup salt 1 cup sugar 1t.salicylic
acid 1 cup water Let boil several minutes. What do I need to know to can
corn using this method?
You may have heard of someone's grandmother canning corn by boiling the corn, adding aspirin or salicylic acid from the drugstore, then sealing the corn in jars with no further processing. According to the University of Illinois, a recipe circulated several years ago, using aspirin to acidify tomatoes and beans for canning. Aspirin is not recommended for canning. While it contains salicylic acid, it does not sufficiently acidify low acid foods like tomatoes or beans for safe hot water bath canning. Low acid foods (without added acids) should only be processed safely in a Pressure Canner. Lemon juice or vinegar is recommended to acidify tomato products for safe water bath processing. You can also see an article in JAMA (the Journal of the American Medical Association, Vol. 289 No. 13, April 2, 2003, titled "Is salicylic acid as a food preservative harmful?"; from which the abstract states: "salicylic acid, in the ways in which it is used in the preparation of food products, is not only not harmful, but is a preservative to health, inasmuch as the process of decomposition which it prevents would be far more dangerous."
Pressure canners!

|
Presto 01781 23-Quart Pressure Cooker/CannerThis is one of the least expensive but reliable pressure canners available. I've been using mine for 30 years! There is also a 16 quart version for even less. . Click on the links at left or above for more info and current pricing. Click on the box at left for more information. See the seller's website for features, pricing and user reviews!
|
|
|
See the seller's website for features, pricing and user reviews! |
| See here for related tools, equipment, supplies on Amazon See here for related tools, equipment, supplies on Amazon |
All American Pressure Canner and Cookers - In 3 SizesSee the seller's website for features, pricing and user reviews! |
| See here for related tools, equipment, supplies on Amazon |
5-Piece Canning Accessories Kit
|


Looking for canning equipment and supplies?
Water bath canner with a jar rack
Pressure canners for gas, electric and induction stoves: Presto 23Qt or T-fal 22Qt
Canning scoop (this one is PERFECT)
Ball Blue book (most recent version)
Find Other types of farms:
- Easter egg hunts
- Children's consignment sales
- Farm markets and roadside stands
- Road trips and camping resources
- Local Honey, apiaries, beekeepers
- Local Meat, Milk and Eggs
- Consumer fraud and scams information
- Home canning supplies at the best prices on the internet!
- Maple Syrup Farms, sugarworks, maple syrup festivals
- Environmental information and resources
- Farms For Your Event for birthday parties, weddings, receptions, business meetings, retreats, etc.
- Festivals - local fruit and vegetable festivals
- Pumpkin patches and corn mazes
- Christmas Tree Farms and lots
Get the
most recent version of
the Ball Blue Book
Get the
most recent version of
the Ball Blue Book of Home Canning
Find other types of farms:
- Easter egg hunts
- Children's consignment sales
- Farm markets and roadside stands
- Local Honey
- Local Meat, Milk and Eggs
- Road trip and camping
- Pumpkin patches and corn mazes
- Christmas Tree Farms and lots
- Maple Syrup farms and sugarworks
Highly rated canning supplies:
- Regular Mouth Canning Lids with food-grade with BPA Free Silicone seals for Ball, Kerr Jars for Canning
- Canning accessories kit: funnel, jar tongs, lid lifter, etc
- Food Dehydrator, 400W Electric with 8 Trays, 48 hour Timer and Temperature Control 95-176℉, BPA-Free
- Water Bath Canner, 21 Qts with lid, Jar Rack, Speckled Black, cans 7 quart jars, 9 pint jars or 13 half-pint jars
- Air Fryer: Instant Pot Instant Vortex Plus XL 8QT Clear Windows, Custom Programming, 8-in-1 Functions that Crisps, Broils, Roasts, Dehydrates, Bakes, Reheats
- Pressure canner: All American 921, 21.5qt Pressure Cooker/Canner, never needs gaskets, Great for Gas, Electric or Flat Top Stoves - Made in the USA
- The Backyard Homestead:a guide to homesteading , on 1/4 acre, how to raise grains and vegetables; raise animals for meat, eggs, and dairy; and keep honey bees
- Smart silent HEPA Air Purifiers for Home, Large Rooms for Allergies, Smoke, Pets. Eliminates 99.97% of Dust, Pet Hair, Odors