
Looking for How to Make Homemade Chili Sauce - Easily! in 2024? Scroll down this page and follow the links. And if you bring home some fruit or vegetables and want to can, freeze, make jam, salsa or pickles, see this page for simple, reliable, illustrated canning, freezing or preserving directions. There are plenty of other related resources, click on the resources dropdown above. If you are having a hard time finding canning lids, I've used these, and they're a great price & ship in 2 days.
If you have questions or feedback, please let me know! There are affiliate links on this page. Read our disclosure policy to learn more.
How to Make Homemade Chili Sauce - Easily!
How to Make Homemade Chili Sauce - Easily! With Step-by-step Directions and Photos
Yield: 6 pint jars
Click here for a PDF print version
 Making and canning your own
Chili sauce from your own tomatoes and peppers is easy! Now, you can enjoy the homegrown
tomato flavor and your own level of spice and heat by canning your own chili
sauce!
Making and canning your own
Chili sauce from your own tomatoes and peppers is easy! Now, you can enjoy the homegrown
tomato flavor and your own level of spice and heat by canning your own chili
sauce!
Ingredients
- 4 quarts (4 liters) of chopped, peeled, cored tomatoes. Generally that requires about 8 quarts of fresh whole tomatoes, which is probably about 14 pounds.
- 2 cups (500 ml) of chopped onions (I like Vidalia's)
- 2 cups (500 ml) of chopped sweet red peppers - that's about 3 or 4 large
peppers
- 1 hot red pepper, finely chopped. You can use chili peppers or your favorite type of hot pepper, like jalapeno, habaneras, Serrano, etc.. You can add two peppers, if you like it really hot. Be sure to finely dice (I use a blender).
- 1 cup (250 ml, by volume) of sugar. Or you can use 1 cup of honey instead.
Diabetics may want to use 1 cup Splenda (or about 1/3 that if you use Stevia, which is my preference) instead.

- 3 Tablespoons (44 ml) salt (for flavoring; if you are on a low salt diet, you may reduce or eliminate the salt)
- 3 Tablespoons (44 ml) of mixed pickling spices. Most grocery stores sell this, either by the herbs and spices, or by the seasonal canning supplies.
- 1 Tablespoon (15 ml) of celery seed.
- 1 Tablespoon (15 ml) of mustard seed.
- : 2 1/2 cups (600 ml) of clear (white) vinegar, 5% concentration.
Equipment
- 1 water bath canner (a huge pot to sanitize the jars after filling (about $30 to $35 - $30 at mall kitchen stores and local "big box" stores. Note: we sell many sizes and types of canners for all types of stoves and needs - see canning supplies). Tomatoes are on the border between the high-acid fruits that can be preserved in a boiling-water bath and the low-acid fruits, vegetables and meats that need pressure canning
- 1 large pot (to scald the tomatoes, step 3) and 1 small pot to sanitize the lids.
- Spice bag - Cheesecloth or a commercial spice bag. A piece of a clean T-shirt will work in a pinch.
- 8 ounce canning jars (Ball or Kerr jars can be found at Publix, Kroger, Safeway and local "big box" stores - about $13 per dozen 8-ounce jars, more for quilted design or larger jars, including the lids and rings).
- Lids - thin, flat, round metal lids with a gum binder that seals them against the top of the jar. They may only be used once.
- Rings - metal bands that secure the lids to the jars. They may be reused many times.
- Jar grabber (to pick up the hot jars)
- Lid lifter (has a magnet to pick the lids out of the almost-boiling water where you sanitize them. ($4 at mall kitchen stores and local "big box" stores, but it's usually cheaper online from our affiliates)
- Jar funnel ($3-Grocery stores, like Publix, Kroger and Safeway and local "big box" stores; sometimes even hardware stores)
- Large spoons and ladles,
Directions - Step by Step, How to Make Home Canned Chili Sauce from Fresh Tomatoes
 Step 1 - Selecting the
tomatoes
Step 1 - Selecting the
tomatoes
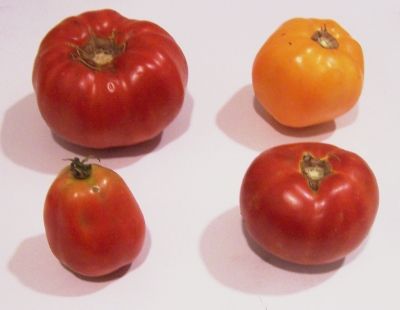
It's fun to go pick your own and you can obviously get better quality tomatoes!
At right is a picture of tomatoes from my garden - they are so much better than anything from the grocery store. And if you don't have enough, a pick-your-own farm is the pace to go! At right are 4 common varieties that will work:
| Top left: Beefsteak | Top right: Lemon Boy, yellow |
| Bottom left: Roma, paste-type | Bottom right: Better Boy |
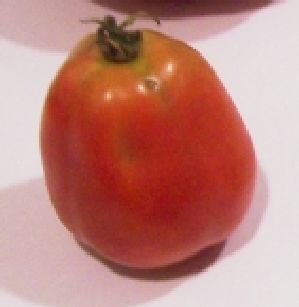 The
picture at right shows the best variety of tomato to use: Roma; also called
paste tomatoes. They have fewer sides, thicker, meatier walls, and
MUCH less water.
And that means thicker sauce in less cooking time!
The
picture at right shows the best variety of tomato to use: Roma; also called
paste tomatoes. They have fewer sides, thicker, meatier walls, and
MUCH less water.
And that means thicker sauce in less cooking time!
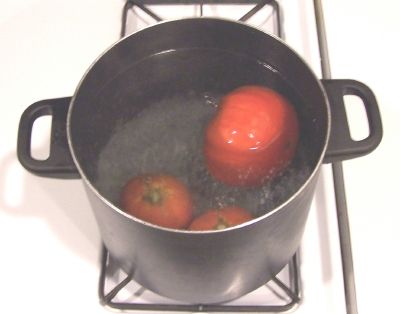
Also, you don't want mushy, bruised or rotten tomatoes! Here is some general tomato information that applies to almost all tomato canning recipes:
For thin sauce - An average of 35 pounds is needed per canner load of 7 quarts; an average of 21 pounds is needed per canner load of 9 pints. A bushel weighs 53 pounds and yields 10 to 12 quarts of sauce-an average of 5 pounds per quart.
For thick sauce - An average of 46 pounds is needed per canner load of 7 quarts; an average of 28 pounds is needed per canner load of 9 pints. A bushel weighs 53 pounds and yields 7 to 9 quarts of sauce-an average of 61/2 pounds per quart.
Step 2 - Get the jars and lids sanitizing
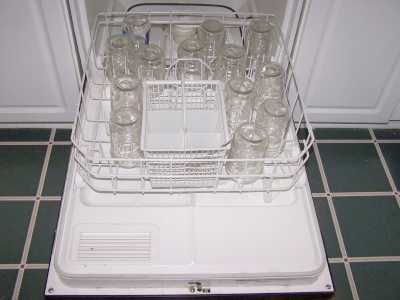 The dishwasher is fine for the jars; especially if it has a "sanitize" cycle.
I get that going while I'm preparing everything else, so it's done by the
time I'm ready to fill the jars. If you don't have a
dishwasher, submerge the jars in a large pot (the canner itself) of
water and bring it to a boil.
The dishwasher is fine for the jars; especially if it has a "sanitize" cycle.
I get that going while I'm preparing everything else, so it's done by the
time I'm ready to fill the jars. If you don't have a
dishwasher, submerge the jars in a large pot (the canner itself) of
water and bring it to a boil.
Be sure to let it go through the rinse cycle to get rid of any soap!
Get the canner heating up
 Fill
the canner about 1/2
full of water and start it heating (with the lid on).
Fill
the canner about 1/2
full of water and start it heating (with the lid on).
Start the water for the lids
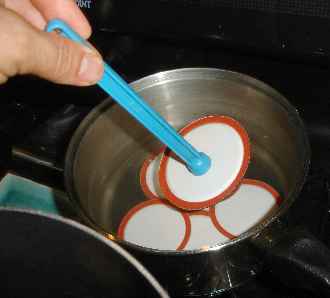 Put the lids into a pan of hot, but not quite boiling water for at least
several minutes. Note: everything gets
sanitized in the water
bath (step 7)
anyway, so this just helps to ensure
there is no spoilage later!)
Put the lids into a pan of hot, but not quite boiling water for at least
several minutes. Note: everything gets
sanitized in the water
bath (step 7)
anyway, so this just helps to ensure
there is no spoilage later!)
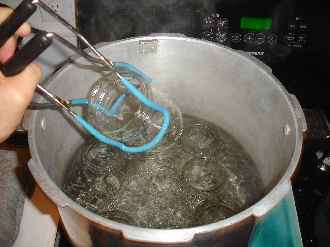
Step 3 - Removing the tomato skins
Here's a trick you may not know: put the tomatoes, a few at a time in a large pot of boiling water for no more than 1 minute (30 - 45 seconds is usually enough)
then....
Plunge them into a waiting bowl of ice water.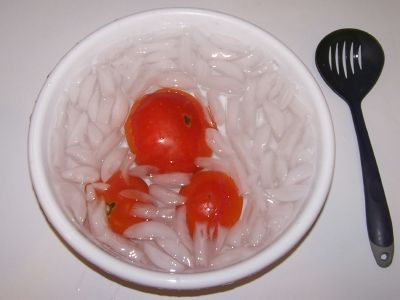
This makes the skins slide right off of the tomatoes! If you leave the skins in, they become tough and chewy in the sauce, not very pleasant.
Step
4 - Removing the skins, bruises and tough parts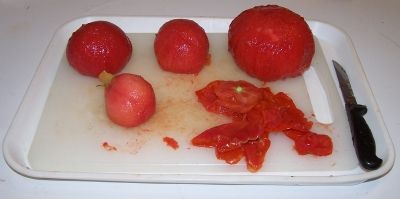
The skins should practically slide off the tomatoes. Then you can cut the tomatoes in quarters and remove the tough part around the stem and any bruised or soft parts.
Why remove the skins? They become tough when you cook them! Some people use a juicer and then cook the resultant juice down. It takes more time, but there's nothing wrong with that approach.
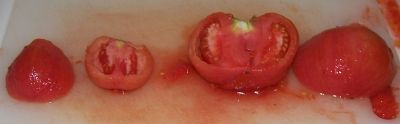
Step 5 - Removing seeds and water
After you have peeled the skins off the tomatoes, cut the tomatoes in half. Now we need to remove the seeds and excess water.
 Step
6 - Squeeze of the seeds and water
Step
6 - Squeeze of the seeds and water
Just like it sounds: wash your hands then
squeeze each tomato and use your finger or a
![]() spoon
to scoop and shake out most of the seeds. You don't need to get
fanatical about it; removing just most will do. Another way to do it is to cut each tomato in half, across it, instead of lengthwise. Then just shake the seeds and juice out. Another way to do it is to
cut each tomato in half, across it, instead of lengthwise. Then just shake
the seeds and juice out.
spoon
to scoop and shake out most of the seeds. You don't need to get
fanatical about it; removing just most will do. Another way to do it is to cut each tomato in half, across it, instead of lengthwise. Then just shake the seeds and juice out. Another way to do it is to
cut each tomato in half, across it, instead of lengthwise. Then just shake
the seeds and juice out.
Step
7 - Drain the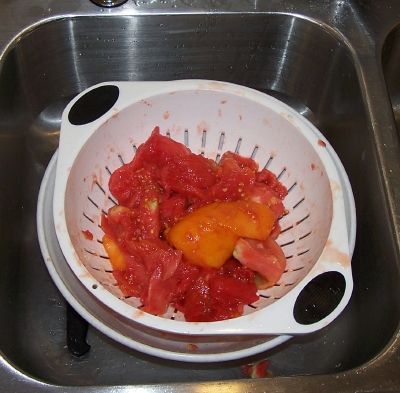 tomatoes
Toss the squeezed (Squozen? :) tomatoes into a colander or drainer, while you work on others. This helps more of the water to drain off. You may want to save the liquid: if you then pass it through a sieve, screen or cheesecloth, you have fresh tomato juice; great to drink cold or use in cooking! By draining the water off now, you will end up with a thicker chili sauce in less cooking time! And that preserves vitamins (and your sanity).
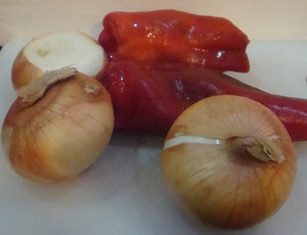
Step 8 - Chop the peppers and onions
You can manually chop the onions or peppers, or use an
electric chopper. Except for the hot peppers, I chop to
about 1/8 sized pieces or even smaller.
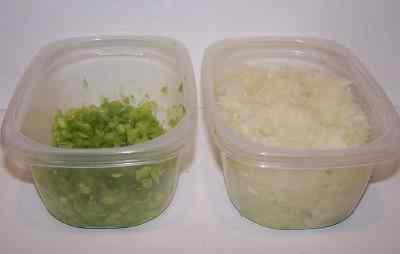
- 2 cups of chopped onions (I like Vidalia's)
- 2 cups of chopped sweet red peppers - that's about 3 or 4 large peppers
- 1 hot red pepper, finely chopped. You can use chili peppers or your favorite type of hot pepper, like jalapeno, habaneras, Serrano, etc.. You can add two peppers, if you like it really hot. Be sure to finely dice the hot peppers(I use a blender).
Step 9 - Combine the tomatoes and other ingredients in a large pot and bring the sauce to a gentle simmer for 45 minutes
 Combine
the
Combine
the
- tomatoes, and
- 2 cups chopped onions,
- 2 cups chopped sweet peppers,
- 1 hot finely chopped pepper
- 1 cup of sweetener (sugar, Stevia (in a prepared form like Truvia, it measures same as sugar; if you use another form, you will need do your own conversion) - or Splenda, if you prefer, , honey) and
- salt (optional)
in a big pot. Simmer for 45 minutes in large-diameter pot. Take care to mind the heat and stir to avoid any burning.
Step 10 - Tie the spices in a spice bag and add.
Tie the
- 3 tablespoons of pickling spices,
- 1 Tablespoon of celery seed, and
- 1 Tablespoon of mustard seed
In the spice bag or a piece of cheesecloth and toss it into the simmering tomato mixture.
Step 11 - Simmer until the volume is reduce in half.
Boil until the volume is reduced by about one-third for thin sauce, or by one-half for thick sauce.
You don't need to overcook it; just bring it to boiling to sanitize it and cook down the tomatoes.
As they cook, the tomatoes will fall apart into sauce with out much need of mushing!
Step 12 - Add the vinegar and simmer again
Again simmer of low to medium heat until it reaches the thickness that you prefer! A crock pot (with the lid off or askew) works well for reducing volumes without burning.
 Step
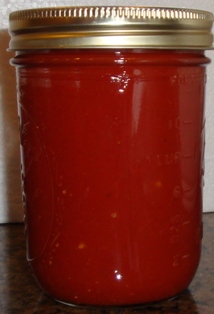
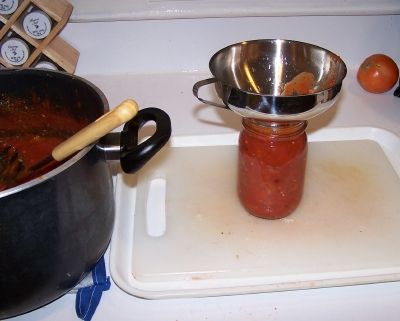
13 - Fill the jars with sauce
Step
13 - Fill the jars with sauce
Remove the spice bag. Fill the jars to within 1/4-inch of the top, seat the lid and hand-tighten the ring around them.
NOTE: if you want to freeze the sauce instead, just fill your freezer containers (I like Ziploc freezer bags in the quart size), fill them completely, eliminate air pockets, seal them and pop them in the freezer. You're done!
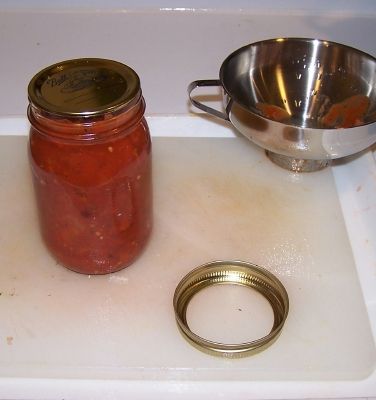
Step 14 - Put the lids and rings on
 Just
screw them on snugly, not too tight. If the is any tomato on the surface
of the lip of the jar, wipe it off first with a clean dry cloth or paper towel.
Just
screw them on snugly, not too tight. If the is any tomato on the surface
of the lip of the jar, wipe it off first with a clean dry cloth or paper towel.
Be sure the contact surfaces (top of the jar and underside of the ring) are clean to get a good seal!
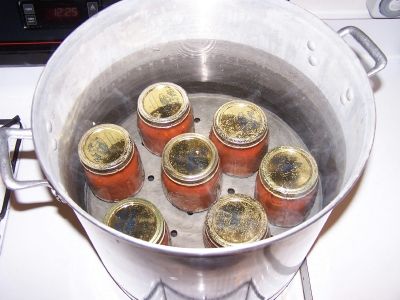 Step
15 - Boil the jars in the water bath canner
Step
15 - Boil the jars in the water bath canner
Put them in the canner and keep them covered with at least 1 inch of water. Keep the water boiling. Process the jars in a boiling-water bath for 15 minutes for pints and 8-ounce jars. Times have not been determined for larger sized jars. Remember to adjust the time if you are at a different altitude other than sea level! Pressure canners work better for tomato sauce and other low acid foods - you will get less spoilage with a Pressure Canner.
I prefer a Pressure Canner as the higher temperatures and shorter cooking time result in better flavor and less spoilage. For more information or to order one, click on Pressure Canners. The recipe and directions for pressure canning tomatoes are coming.
| Recommended process time for Chili Sauce in a boiling water canner. | ||||
| Process Time at Altitudes of | ||||
| Style of Pack | Jar Size | 0 - 1,000 ft | 1,001 - 6,000 ft | Above 6,000 ft |
| Hot | Half-pints or smaller | 15 min | 20 min | 25 min |
Step 16 - Done
 Lift the jars out of the water and let them cool without touching or
bumping them in a draft-free place (usually takes overnight) You can then remove the rings if you like, but if you leave them on, at least loosen them quite a bit, so they don't rust in place due to trapped moisture. Once the jars are cool, you can check that they are sealed verifying that the lid has been sucked down. Just press in the center, gently, with your finger. If it pops up and down (often making a popping sound), it is not sealed. If you put the jar in the refrigerator right away, you can still use it. Some people replace the lid and reprocess the jar, then that's a bit iffy. If you heat the contents back up, re-jar them (with a new lid) and the full time in the canner, it's usually ok.
Lift the jars out of the water and let them cool without touching or
bumping them in a draft-free place (usually takes overnight) You can then remove the rings if you like, but if you leave them on, at least loosen them quite a bit, so they don't rust in place due to trapped moisture. Once the jars are cool, you can check that they are sealed verifying that the lid has been sucked down. Just press in the center, gently, with your finger. If it pops up and down (often making a popping sound), it is not sealed. If you put the jar in the refrigerator right away, you can still use it. Some people replace the lid and reprocess the jar, then that's a bit iffy. If you heat the contents back up, re-jar them (with a new lid) and the full time in the canner, it's usually ok.
Frequently Asked Questions about Canning Chili Sauce
Q. Color? "I made the hot sauce from your website.
Mixing the
green chilies (jalapenos) with tomatoes changed the color of the sauce to
any ugly reddish-greenish color. The sauce did not have the bright red color
like the store bought hot sauce. How do I get the nice red color in my hot
sauce? Thanks"
A. Well, that's a basic color problem. Remember in kindergarten mixing finger paints and learning how red and yellow mixed together make green? The same thing is happening here. The commercial sauce producers add food coloring to make it bright reed. You could do the same with food color from the grocery store, but most of us would rather have it be entirely natural, and let the taste speak for it! You could also puree the peppers in a blender, then filter them through cheesecloth, adding only the liquid to your sauce. That might eliminate the green.
Tips and Comments from Visitors
-
Comments from a visitor on August 20, 2009: "I have a suggestion for your canning friends making
tomato sauce. I put my tomatoes through a victorio strainer, which separates my
skins and seeds from the pulp. No need to blanch and skin all done in 1 easy
step. Then I put my sauce through a jelly bag to eliminate the water from the
sauce and I don't have to boil as long to get to a thicker state. Then I
process them in my canner. Hope this gets passed around."
Other Equipment:
|
From left to right:
|
See here for related tools, equipment, supplies on Amazon |
 |
Illustrated Canning, Freezing, Jam Instructions and Recipes
[ Easy Home Canning Directions] [FAQs - Answers to common questions and problems] [Recommended books about home canning, jam making, drying and preserving!] [Free canning publications to download and print]


Looking for canning equipment and supplies?
Water bath canner with a jar rack
Pressure canners for gas, electric and induction stoves: Presto 23Qt or T-fal 22Qt
Canning scoop (this one is PERFECT)
Ball Blue book (most recent version)
Find Other types of farms:
- Easter egg hunts
- Children's consignment sales
- Farm markets and roadside stands
- Road trips and camping resources
- Local Honey, apiaries, beekeepers
- Local Meat, Milk and Eggs
- Consumer fraud and scams information
- Home canning supplies at the best prices on the internet!
- Maple Syrup Farms, sugarworks, maple syrup festivals
- Environmental information and resources
- Farms For Your Event for birthday parties, weddings, receptions, business meetings, retreats, etc.
- Festivals - local fruit and vegetable festivals
- Pumpkin patches and corn mazes
- Christmas Tree Farms and lots
Get the
most recent version of
the Ball Blue Book
Get the
most recent version of
the Ball Blue Book of Home Canning
Find other types of farms:
- Easter egg hunts
- Children's consignment sales
- Farm markets and roadside stands
- Local Honey
- Local Meat, Milk and Eggs
- Road trip and camping
- Pumpkin patches and corn mazes
- Christmas Tree Farms and lots
- Maple Syrup farms and sugarworks
Highly rated canning supplies:
- Regular Mouth Canning Lids with food-grade with BPA Free Silicone seals for Ball, Kerr Jars for Canning
- Canning accessories kit: funnel, jar tongs, lid lifter, etc
- Food Dehydrator, 400W Electric with 8 Trays, 48 hour Timer and Temperature Control 95-176℉, BPA-Free
- Water Bath Canner, 21 Qts with lid, Jar Rack, Speckled Black, cans 7 quart jars, 9 pint jars or 13 half-pint jars
- Air Fryer: Instant Pot Instant Vortex Plus XL 8QT Clear Windows, Custom Programming, 8-in-1 Functions that Crisps, Broils, Roasts, Dehydrates, Bakes, Reheats
- Pressure canner: All American 921, 21.5qt Pressure Cooker/Canner, never needs gaskets, Great for Gas, Electric or Flat Top Stoves - Made in the USA
- The Backyard Homestead:a guide to homesteading , on 1/4 acre, how to raise grains and vegetables; raise animals for meat, eggs, and dairy; and keep honey bees
- Smart silent HEPA Air Purifiers for Home, Large Rooms for Allergies, Smoke, Pets. Eliminates 99.97% of Dust, Pet Hair, Odors
